Lexicon
4-3
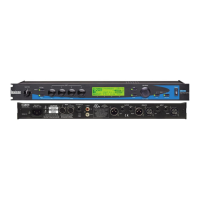
1. Connect a Digital signal (CD player, DAT, or effects box) to the S/PDIF input jack on the back of the
MPX 500.
2. Connect the S/PDIF output of the MPX 500 to a D/A device (M300) for conversion back to an analog
signal.
3. Connect the analog output of the D/A device (M300) to your amplifier with speaker output. Be sure to
turn the volume down on the amplifier.
4. Turn the volume up on your amplifier to a comfortable listening level and verify audio at the output and
that it is free and clear of any audio defects (pops, clicks, static, etc.).
MIDI Functionality:
This test will verify that the MIDI Input and MIDI Output/Thru circuits are working.
The test will transmit data out of the MIDI OUT jack and will attempt to read the data through the MIDI IN
jack.
Midi functionality is tested through the extended diagnostics of the MPX 500.
To enter the Extended Diagnostics, power on the unit while pressing down & holding the BYPASS button
on the front panel of the MPX 500. When the EDIT LED is lit, the BYPASS button can be released. After it
is released, the EDIT LED will go out and the LCD Display will indicate the first test, # 1 ROM. Turn the
Program Knob CW until test # 10 Midi test is displayed.
Connect a 5 Pin Male DIN to 5 Pin Male DIN Cable (also known as a MIDI cable) between the MIDI IN jack
and the MIDI OUT jack.
Press the Program Knob once to execute the test.
When the test is executed, the LCD Display will indicate the test is “Running…”, followed by the Pass/Fail
status of the test.
To exit the test, press the Program Knob.
Footswitch Functionality:
Footswitch functionality is performed through the extended diagnostics of the MPX 500.
To enter the Extended Diagnostics, power on the unit while pressing down & holding the BYPASS button
on the front panel of the MPX 500. When the EDIT LED is lit the BYPASS button can be released. After it is
released, the EDIT LED will go out and the LCD Display will indicate the first test, # 1 ROM. Turn the
Program Knob CW until test # 8 Switch test is displayed.
To perform this test, a Dual stereo style footswitch must be plugged into the Footswitch jack on the back of
the MPX 500 using a ¼ tip/ring/sleeve cable.
Press the Program Knob once to execute the test.
Press the LEFT FOOTSWITCH (Ring). The BYPASS LED will light and the LCD Display will indicate
“BYPASS”. The remaining LEDs will be off. When the LEFT FOOTSWITCH is released, the BYPASS LED
will go off.
Press the RIGHT FOOTSWITCH (TIP). The TAP LED will light and the LCD Display will indicate “TAP”. The
remaining LEDs will be off. When the RIGHT FOOTSWITCH is released, the TAP LED will go off.
To exit the test, press the Program Knob.
 Loading...