Jam message numbers and how to access each jam
Jam number To access the jam
200-201 Try one or more of the following:
• Remove Tray 1.
• Open the front door, and then remove the photoconductor kit.
202 Open the front door, and then open the rear door.
231 Open the front door, and then open the rear door.
233 Remove Tray 1, and then depress the lever.
Note: For alternative access to the jam, open the front door, and then open the rear door.
234 Try one or more of the following:
• Open the front door, and then open the rear door.
• Remove Tray 1, and then depress the lever.
235 Remove the jam from the standard exit bin.
242 Remove Tray 2.
251 Open the multipurpose feeder door.
290-294 Try one or more of the following:
• Open the ADF cover, and then remove the separator roll.
• Open the scanner cover.
• Remove the ADF paper tray.
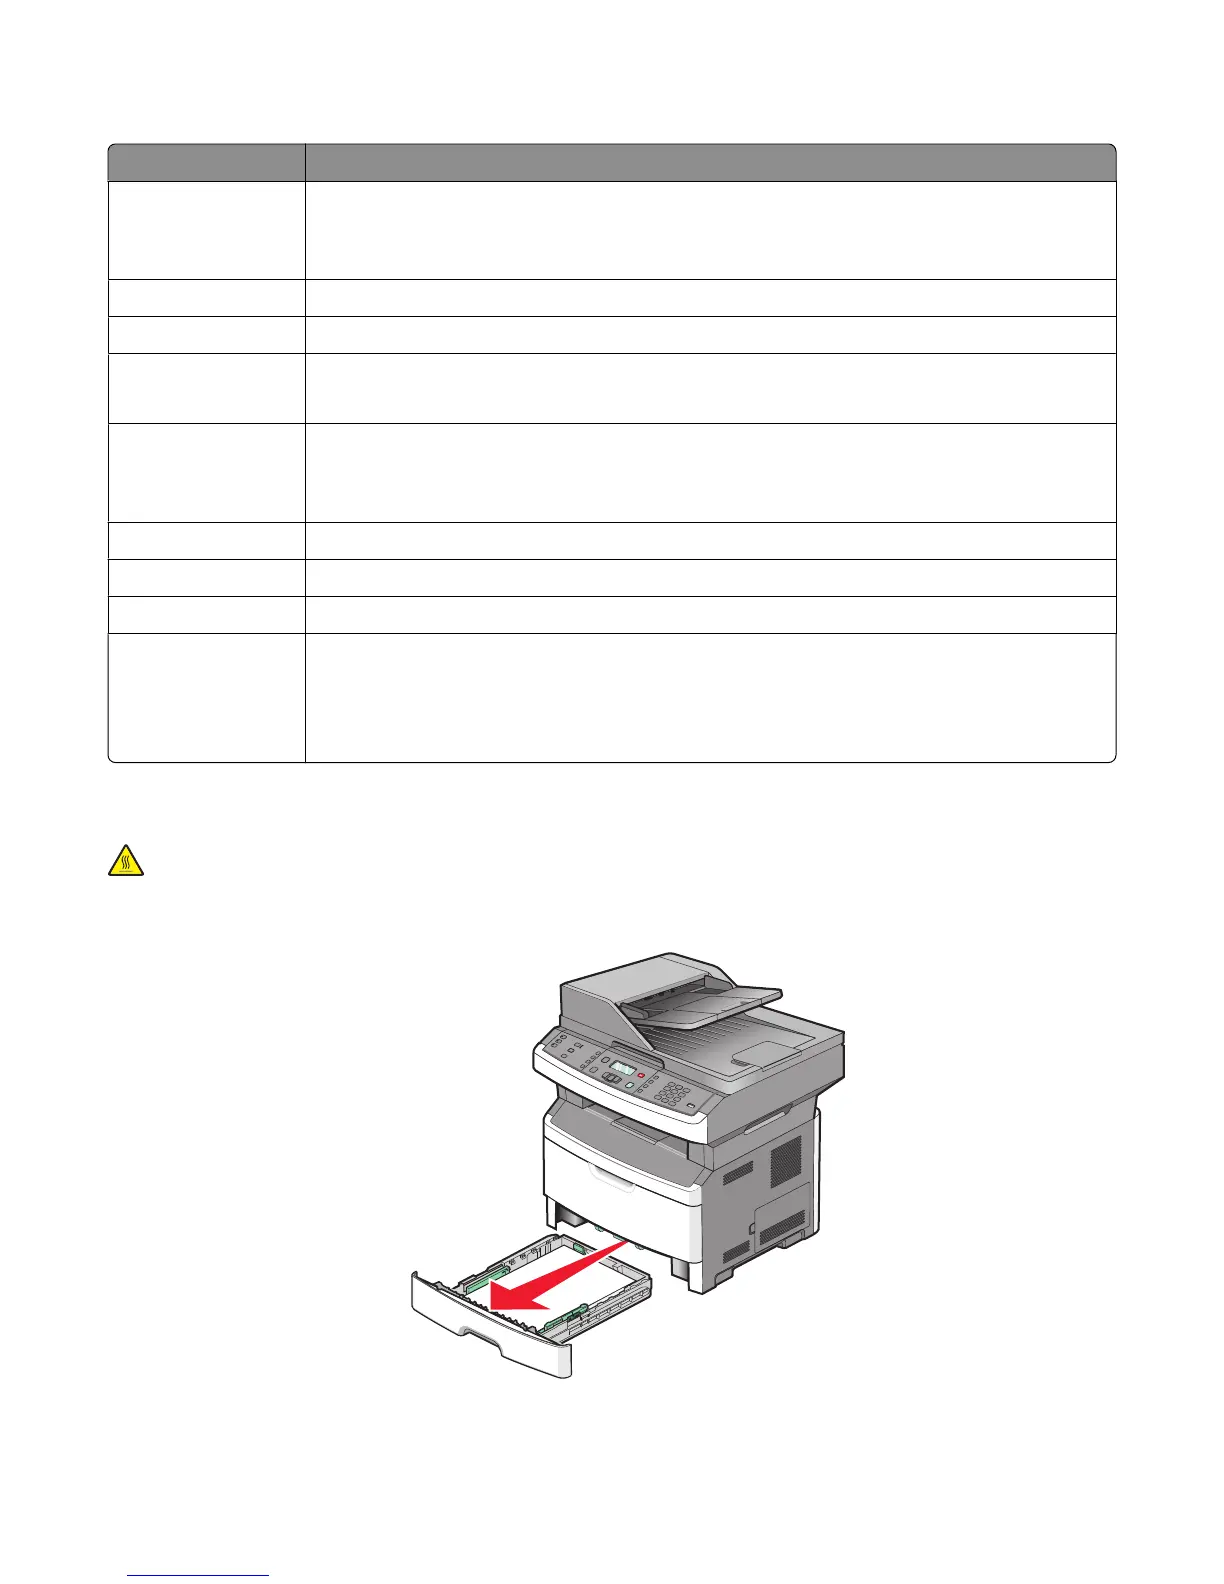
200-201 paper jams
CAUTION—HOT SURFACE: The fuser and the inside of the printer near the fuser may be hot. To reduce the risk
of injury from a hot component, allow the surface to cool before removing paper from this area.
1 Pull the tray completely out.
Clearing jams
162