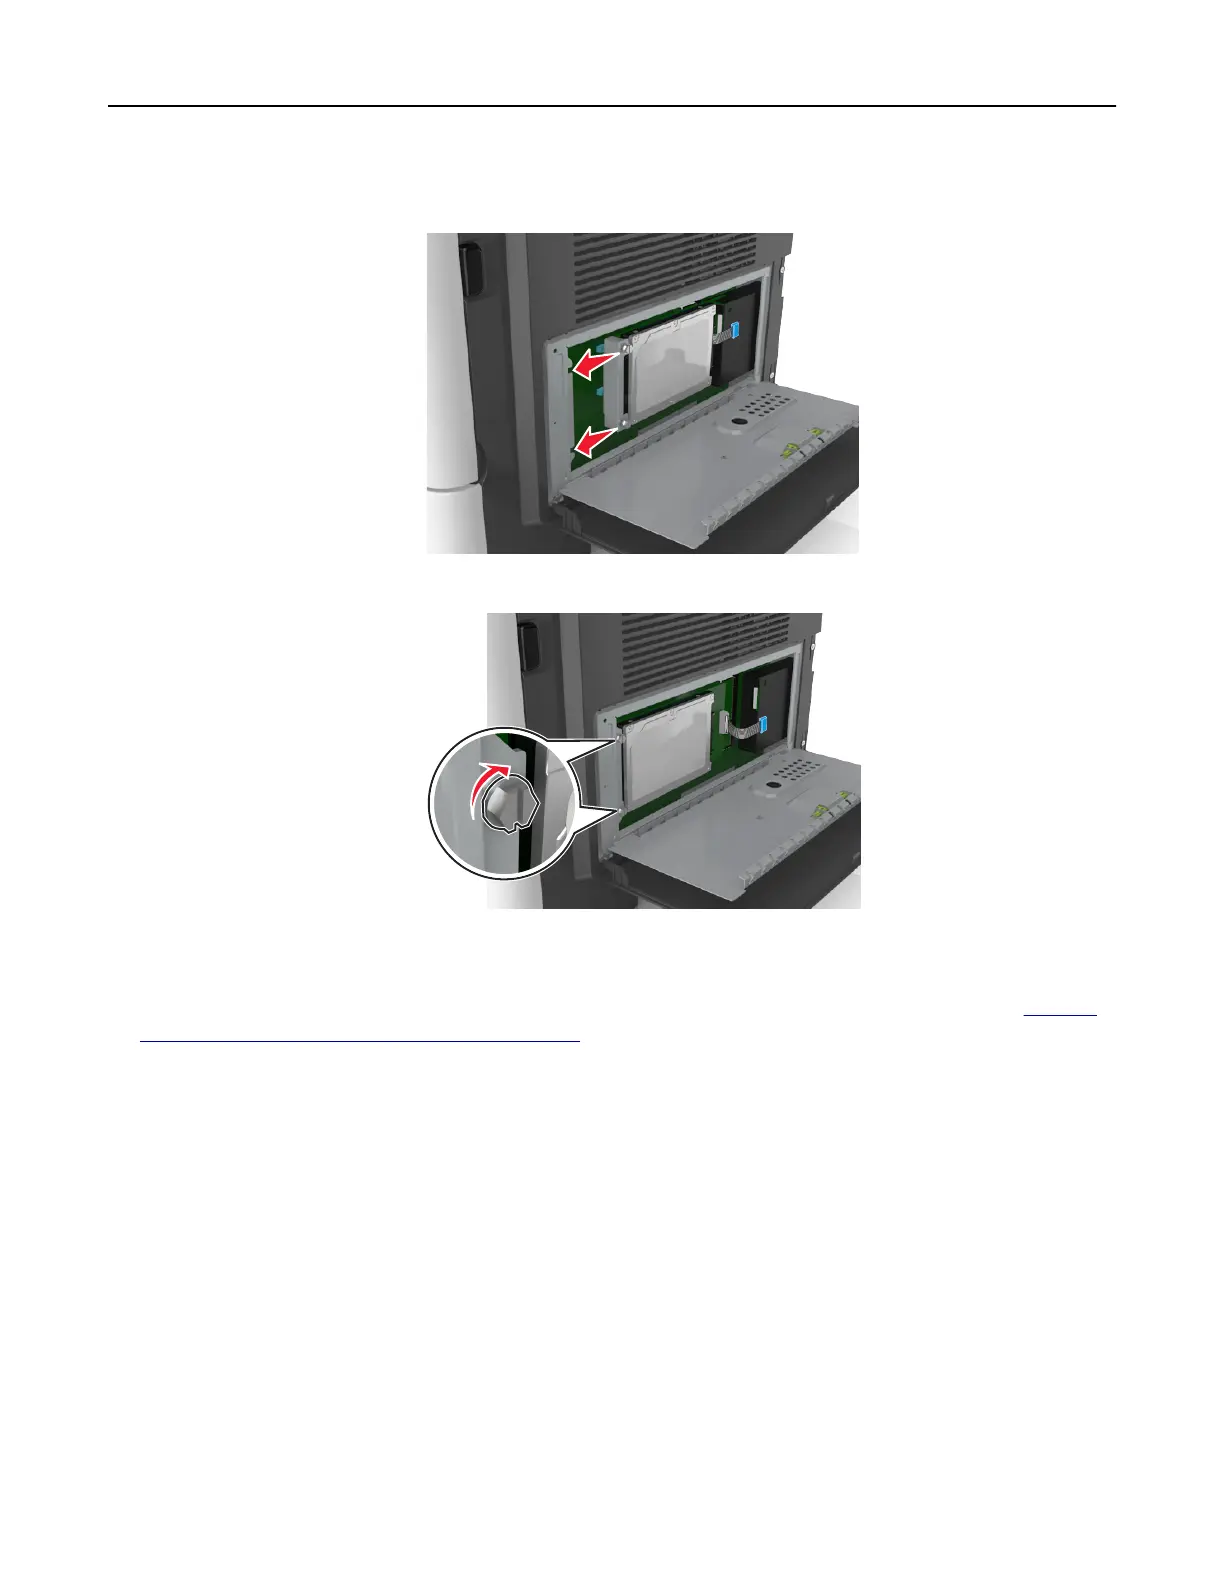
c Align the screws on the printer hard disk to the slots on the controller board bracket, and then slide the
printer hard disk onto the brackets.
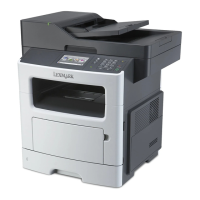
d Tighten the two screws.
4 Close the controller board shield, and then close the controller board access door.
Note: When the printer software and any hardware options are installed, you may need to manually add
the options in the printer driver to make them available for print jobs. For more information, see
“Adding
available options in the print driver” on page 46.
Additional printer setup 40