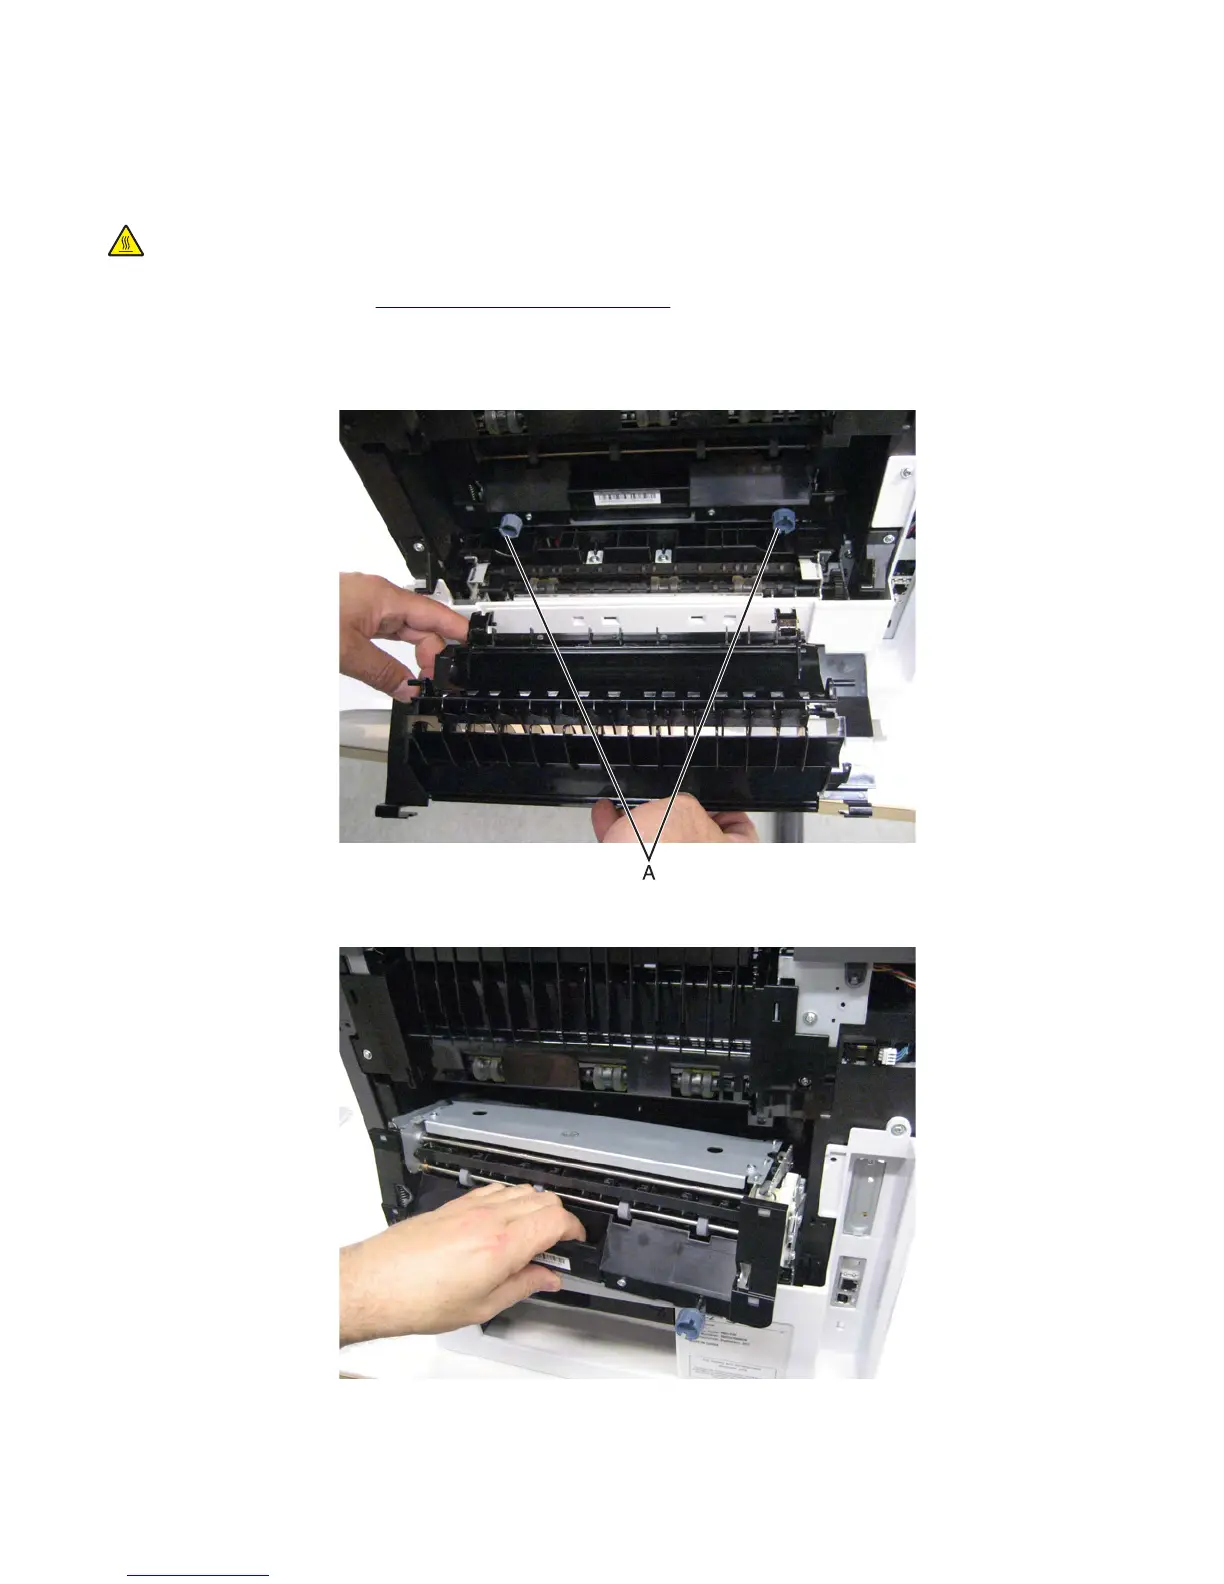
Fuser removal
Warning—Potential Damage: Turn off the printer before removing the fuser to avoid overwriting the new fuser data
with the old fuser data.
CAUTION—HOT SURFACE: The inside of the printer might be hot. To reduce the risk of injury from a hot
component, allow the surface to cool before touching.
1 Remove the rear door. See “Rear door removal” on page 549.
2 Open and lower the fuser access door.
3 Loosen the two fuser thumbscrews (A).
4 Gently pull the fuser, and remove it from the machine.
7463
Repair information
556
 Loading...