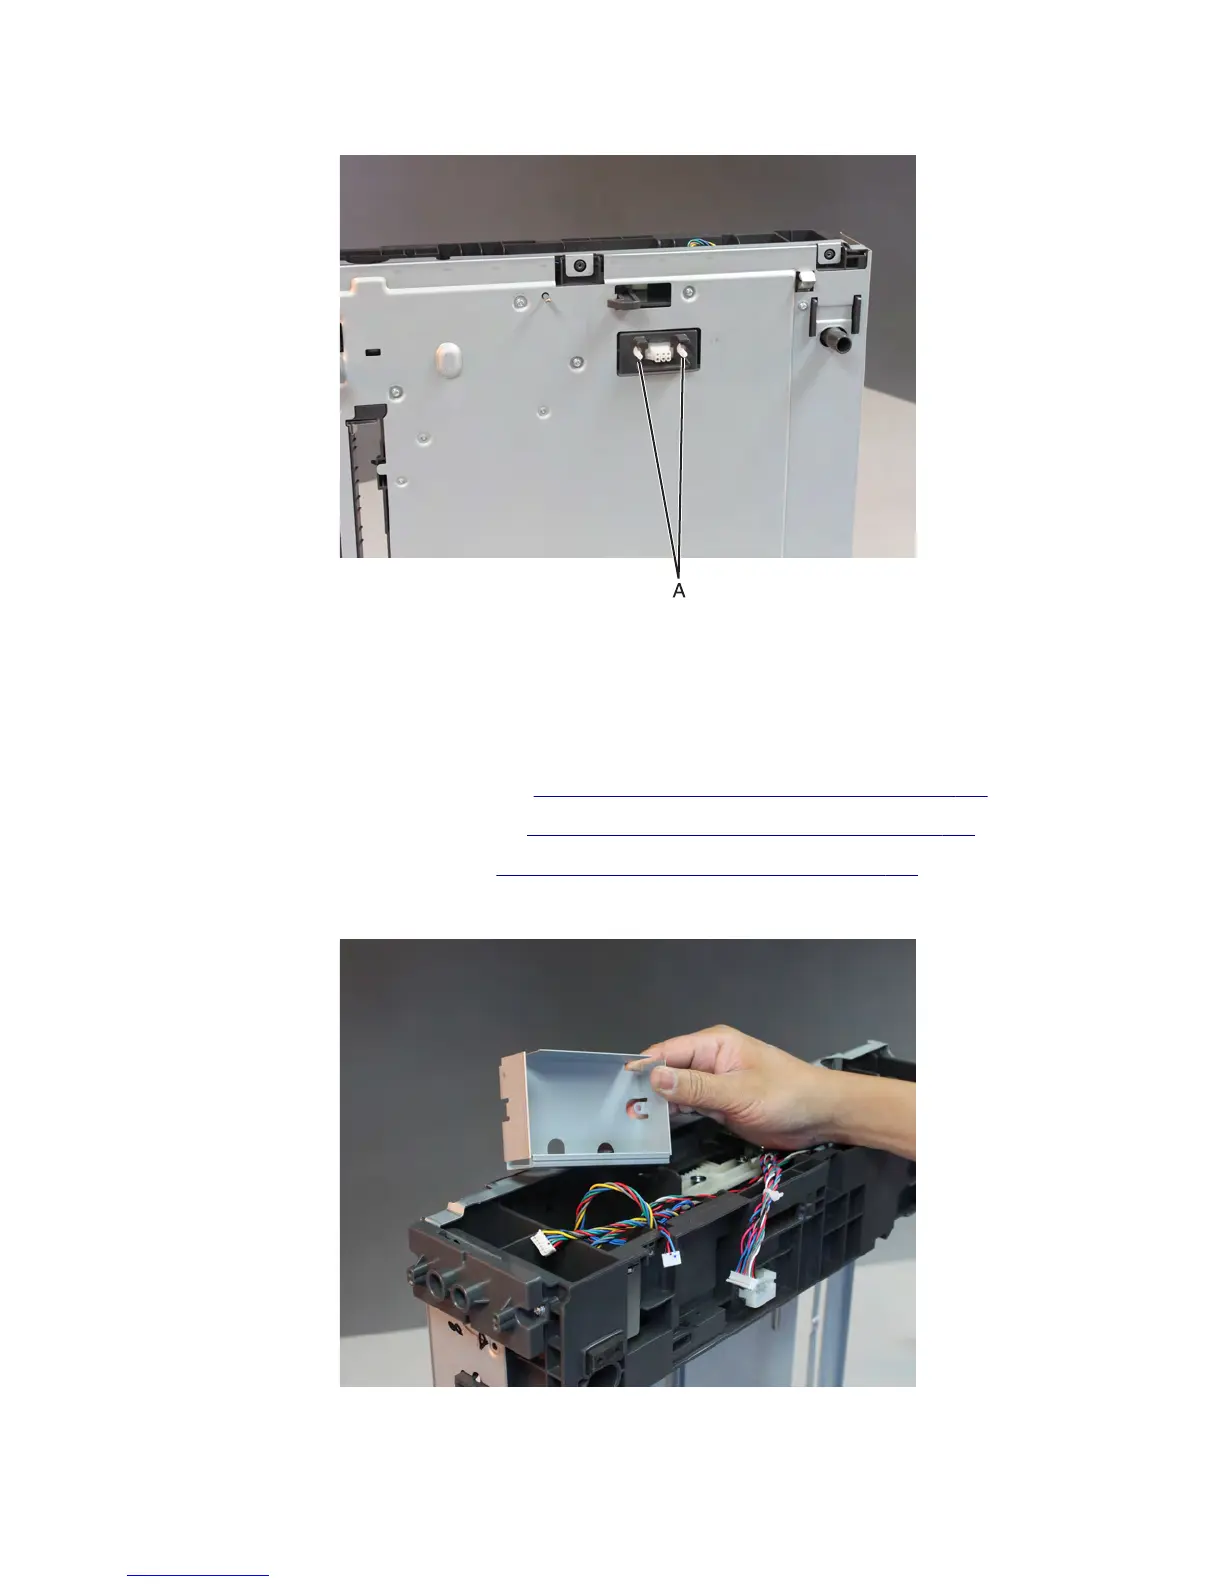
5 Crimp both connector studs (A) using a pliers to make them fit to the holes. Push the connector off its slot.
6 Route the upper interface cable off the drawer, and remove.
Note: Pay attention to the original routing of the cable.
Drawer lower interface cable removal
1 Remove the drawer assembly rear cover. See “Drawer assembly rear cover removal” on page 651.
2 Remove the drawer assembly left cover. See “Drawer assembly left cover removal” on page 652.
3 Remove the drawer controller PCBA. See “Drawer controller board removal” on page 653.
4 Remove the controller PCBA shield.
7463
Repair information
655


 To Next Page