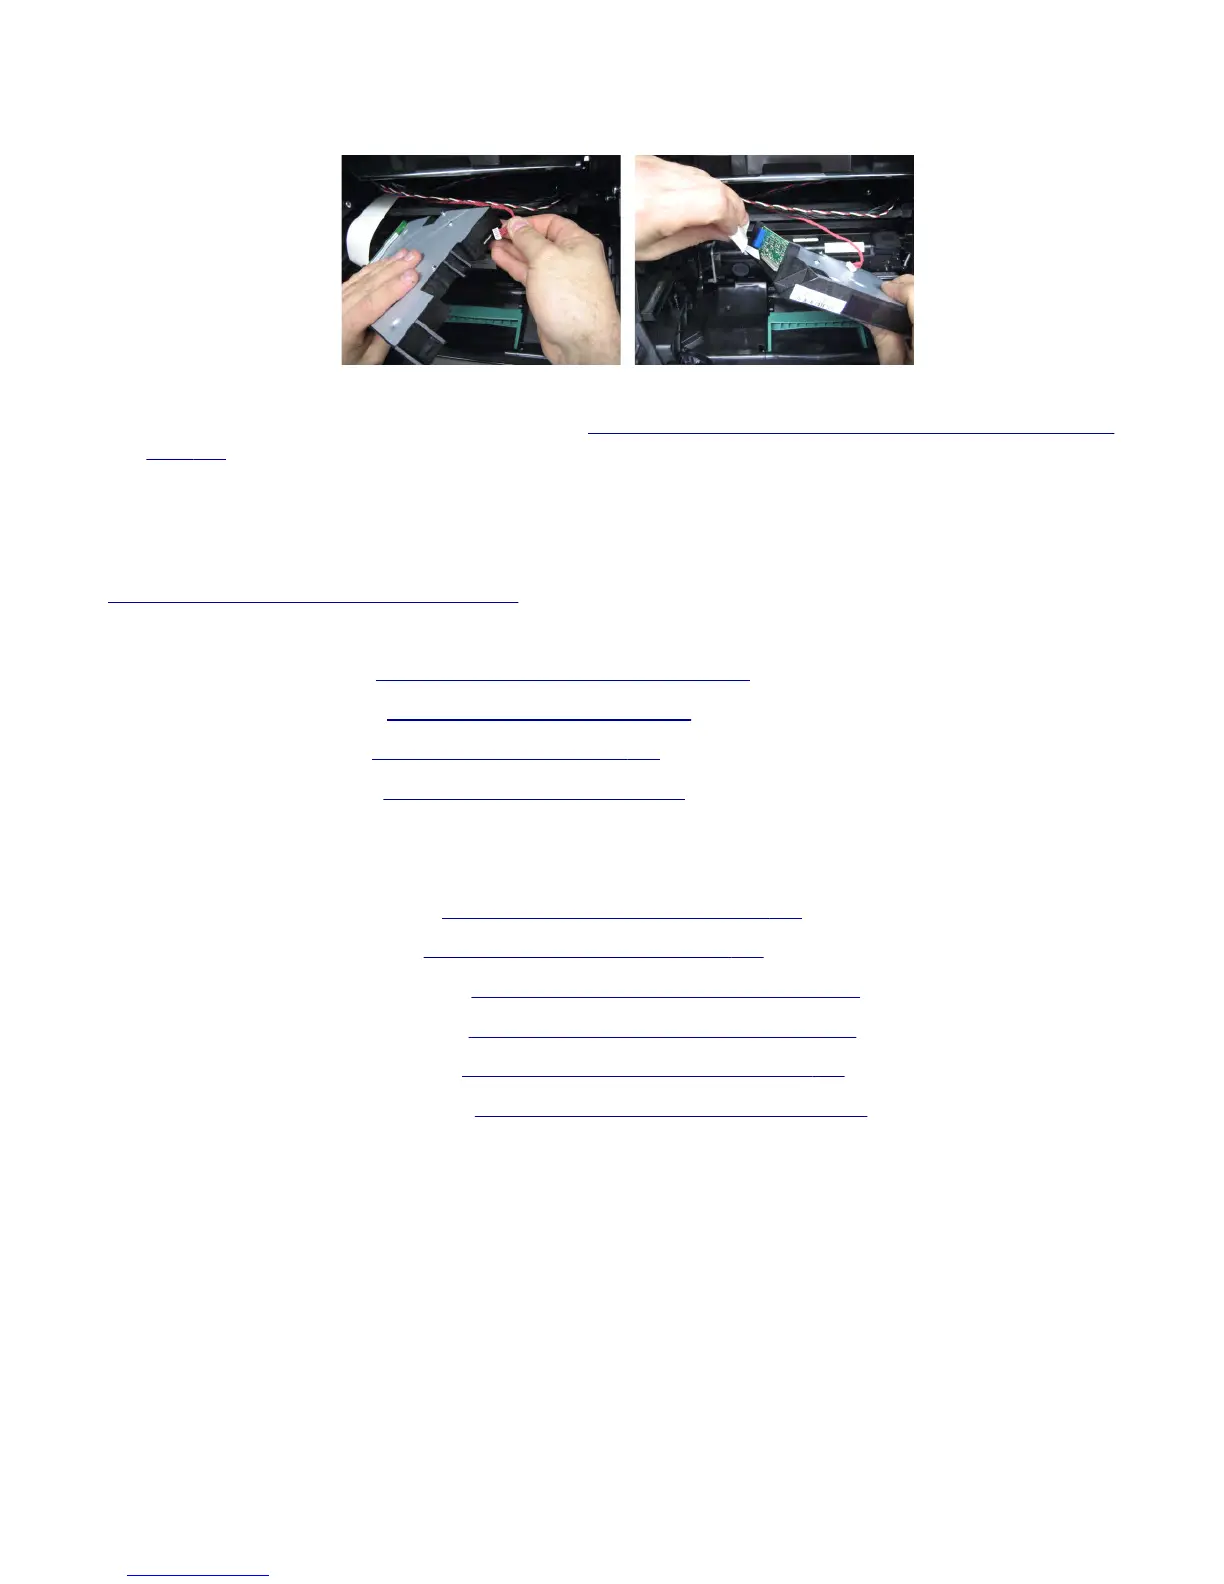
9 Disconnect the two cables from the laser printhead.
Installation note: When the new laser printhead has been installed, complete the polygon printhead mechanical
registration adjustment procedure, as needed. See
“Polygon printhead mechanical registration adjustment” on
page 394.
Media aligner roller removal
Installation warning: When you reinstall the media aligner roller, you will have to adjust the media alignment. See
“Media aligner roller adjustment” on page 393.
Warning—Potential Damage: When removing the media aligner, ensure that you retain the attached spring.
1 Remove the left cover. See “Left cover removal (MX71x)” on page 416.
2 Remove the media tray. See “Media tray removal” on page 538.
3 Remove the MPF tray. See “MPF tray removal” on page 472.
4 Remove the front door. See “Front door removal” on page 453.
5 Remove the toner cartridge.
6 Remove the imaging unit.
7 Remove the media turn guide. See “Media turn guide removal” on page 462.
8 Remove the MPF pick roller. See “MPF pick roller removal” on page 468.
9 Remove the MPF feeder lift plate. See “MPF feeder lift plate removal” on page 465.
10 Remove the media vertical guide. See “Media vertical guide removal” on page 463.
11 Remove the duplex exit diverter. See “Duplex exit diverter removal” on page 451.
12 Remove the inner guide deflector. See “Inner guide deflector removal” on page 455.
13 Remove the three screws (A) securing the media aligner roller to the machine.
7463
Repair information
460
 Loading...