EasyManua.ls Logo

LF Harbor Breeze BOLTZ III 43349 - User Manual

LF Harbor Breeze BOLTZ III 43349
18 pages
Print Icon
To Next Page IconTo Next Page
Loading...
1
SS24037
ITEM #5497045, 5497046, 5497047,5497048
MODEL #43349, 43350, 43367, 43368
BOLTZ III CEILING FAN
Español p. 19
HARBOR BREEZE and logo design are trademarks or
registered trademarks of LF, LLC. All rights reserved.
ATTACH YOUR RECEIPT HERE
Purchase Date _________________________
Thank you for purchasing this HARBOR BREEZE product.
Questions, problems, or missing parts?
Before returning, contact us at:
888-251-1003, 8 a.m. - 8 p.m., EST, Monday - Sunday or at ascs@lowes.com.

Questions and Answers

  • W
    Willie FranklinAug 7, 2025
    Why is my LF Harbor Breeze BOLTZ III 43349 not moving?
    • R
      Richard GainesAug 7, 2025
      Your LF Fan might not be moving due to several reasons: 1. The reverse switch might not be fully engaged. Try firmly pushing the reverse switch completely to the left or right. 2. The wall switch could be turned off. Ensure the wall switch is turned on. 3. The power might be off, or a fuse (breaker) could be blown. Turn the power on or check the fuse (breaker). 4. There could be a faulty wire connection. Turn the power off and inspect all connections at the ceiling outlet box.
  • M
    Michael HuntAug 13, 2025
    What to do if my LF Harbor Breeze BOLTZ III 43349 Fan is making noise?
    • K
      Kenneth FigueroaAug 14, 2025
      If your LF Fan is noisy, consider these possible causes and solutions: * The blades may be loose. Check and tighten all screws that hold the fan blades to the blade arms and the motor. * There may be a cracked blade. If so, replace the cracked blade. * The wall control may not be compatible. Avoid using a full range dimmer switch to control the fan speed. * The outlet box might not be secure. Ensure the outlet box is securely attached to the building structure. * The mounting bracket could be loose. Make sure the mounting bracket is secured to the outlet box and that the screws are tight.
  • M
    Melvin WashingtonAug 19, 2025
    How to fix excessive wobbling in my LF Fan?
    • F
      fdavisSep 12, 2025
      Excessive wobbling in your LF Fan can be due to: * Loose blades or blade arms: Check and tighten all screws that secure the fan blades to the blade arms and the blade arms to the motor. * Unbalanced blades: Try switching one blade with a blade from the opposite side. Alternatively, balance the fan using a blade balancing kit (sold separately). * Insecure fan mounting: Turn off the power, loosen the canopy, and verify that the mounting bracket is securely attached to the electrical outlet box. Ensure the bracket is flush against the outlet box without movement. * Fan too close to a vaulted ceiling: Use a longer downrod (sold separately) or relocate the fan. * Loose set screw on the motor housing yoke: Lift the yoke cover and tighten the set screw to the yoke until secure.
  • C
    Christopher JacksonAug 25, 2025
    What to do if the remote control for LF Harbor Breeze BOLTZ III 43349 doesn't work?
    • D
      davisrickyAug 26, 2025
      If the remote control for your LF Fan isn't working, here are a few things to try: 1. A power surge might have cleared the memory. Turn off the power at the breaker box for at least 10 seconds, then turn it back on. Within 30 seconds, press and hold the “LEARN” button on the back of the remote for 3 seconds. The fan will turn on at high speed, and the light will blink twice and stay on, indicating successful synchronization. 2. The battery in the remote control may need replacing. Insert new AAA batteries into the battery compartment of the remote control. 3. There may be interference from another remote. If there are several fans nearby, turn off the power to the other fans and re-sync the remote as described in step 1.
  • H
    Heather JohnsonAug 31, 2025
    What to do if lights are not working on my LF Harbor Breeze BOLTZ III 43349 Fan?
    • K
      Kevin StewartAug 31, 2025
      If your LF Fan is operating correctly but the lights are not working, check the following: 1. Ensure the 6-pin connectors in the light kit are connected properly. 2. Turn the power off and check all wire connections at the ceiling outlet box.

Summary

Package Contents

Hardware Contents

Safety Information

General Safety Warnings and Precautions

Essential safety guidelines and warnings before installation and operation.

Preparation

Initial Installation

Installation Preparation and Safety Checks

Disconnect power, select mount, verify blade clearance and downrod height.

Mounting Bracket and Downrod Assembly

Attach mounting bracket, prepare downrod, and attach to motor assembly.

Secure Downrod and Install Ball End

Insert downrod, secure to motor, and mount ball end into bracket.

Wiring

Connect Lead Wires Using Push-in Connectors

Wire the fan motor to house supply wires using provided push-in connectors.

Connect 3-Pin and Ground Wires

Connect the 3-pin connector and ground wires from the downrod to the mounting bracket.

Final Installation

Canopy, Blade, and Light Kit Attachment

Secure canopy, attach blades/medallions, and connect light kit.

Remote and Power Setup

Install remote bracket, batteries, and restore power to complete installation.

Operating Instructions

Remote Control Functions Overview

Understand LED indicator, fan power, speed, timers, light delay, Home Shield, and variable breeze.

Remote Control Synchronization (LEARN)

Pair the remote control with the fan receiver using the LEARN button for proper operation.

Seasonal Airflow Direction (Reverse Switch)

Adjust the reverse switch to control airflow direction for summer or winter comfort.

Care and Maintenance

Routine Cleaning and Screw Tightening

Periodically clean the fan housing and blades and tighten all screws for safety.

Battery Replacement Guidelines

Use specified AAA batteries, ensure correct polarity, and follow safety warnings.

Troubleshooting

Limited Lifetime Warranty

Replacement Parts List

Overview

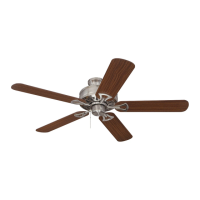
This document describes the Harbor Breeze Boltz III Ceiling Fan, a residential ceiling fan designed for indoor use. It provides instructions for assembly, installation, operation, and maintenance, along with safety information and warranty details.

Function Description

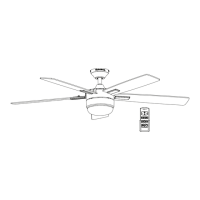
The Boltz III Ceiling Fan is designed to circulate air within a room, providing a cooling effect in warmer weather and helping to distribute warm air in cooler weather. It features a reversible motor for seasonal use and an integrated LED light kit for illumination. The fan and light functions are controlled via a remote control, offering various speed settings, light dimming, color temperature adjustment, and timer functions.

Important Technical Specifications

  • Model Numbers: 43349, 43350, 43367, 43368
  • Item Numbers: 5497045, 5497046, 5497047, 5497048
  • Net Weight: 17.44 lb (7.91 kg)
  • Blade Clearance: Minimum 7 ft from blades to floor, minimum 30 in from end of blades to any obstruction.
  • Outlet Box Support: Must be marked "ACCEPTABLE FOR FAN SUPPORT" and support at least 35 lbs of moving weight.
  • Wire Connectors: Designed for one 12-gauge house wire and two fan lead wires. Consult an electrician for larger gauge or multiple house wires.
  • Power Supply: Requires connection to a properly grounded outlet box.
  • Motor Control: NOT compatible with full-range dimmer switches or solid-state speed control devices.
  • Light Kit Wattage: Total fixture wattage is 23 watts (LED, not replaceable).
  • Light Color Temperature: Adjustable from 2200K (warm white) to 6500K (daylight).
  • Remote Control Batteries: 1.5V AAA alkaline batteries.
  • Ceiling Angle for Angle Mounting: Not steeper than 16°.
  • Mounting Options: Standard Mounting (for ceilings 8 ft or higher) and Angle Mounting. Flushmount and Closemount installations are not available for this model.
  • Downrod: Includes a standard downrod (A). Longer downrods (36-inch or 48-inch) are sold separately and may require the optional 36-inch lead wire (M).

Usage Features

Remote Control Operation: The fan is operated using a dedicated remote control with the following functions:

  • LED Indicator: Illuminates when any remote button is pressed, indicating fan speed.
  • Fan Power Button:
    • Turns the fan off.
    • Turns the fan on at the previously selected speed.
    • + button: Increases fan speed.
    • - button: Lowers fan speed.
  • Sleep Timers: Sets the fan to turn off after 2 hours, 4 hours, or 8 hours. Pressing the fan power button deactivates the timer.
  • Light Delay: Delays turning off the light for one minute, allowing safe exit from the room. The light blinks to confirm activation. Pressing the Light Control button deactivates it and turns off the light.
  • Home Shield™: Simulates occupancy when away from home. The fan remains off, and the light randomly turns on for 5-20 minutes, then off for 60 minutes between events. Press and hold to activate; light blinks to confirm. Press any button to cancel.
  • Variable Breeze: Simulates a natural breeze.
  • Light Control: Taps to turn the light off and on. Press and hold to dim or brighten the lights.
  • Light Color: Press and hold to cycle through color temperatures from 2200K (warm white) to 6500K (daylight).
  • LEARN Button: Used to sync the remote control to the receiver (located on the back of the remote).

Reverse Switch (Seasonal Use): The fan features a reverse switch to change the direction of blade rotation, optimizing airflow for different seasons:

  • Warmer Weather (Sun Icon): Push the reverse switch left for downward airflow, creating a wind chill effect.
  • Cooler Weather (Snowflake Icon): Push the reverse switch right for upward airflow, helping to move hot air off the ceiling area.
  • Important: The reverse switch must be set completely left or right for the fan to operate. If set in the middle position, the fan will not function.

Installation Considerations:

  • Mounting Bracket: Securely attaches to the outlet box. Proper hardware must be used.
  • Downrod Installation: The downrod (A) must be correctly aligned with the tab in the mounting bracket (D) to prevent wobbling or falling.
  • Blade Installation: Blades (Q) attach to blade arms (R) using a twist-lock connector and medallion (P).
  • Light Kit Installation: Connects to the motor assembly via a 6-pin connector and attaches to the light pan (N) by twisting clockwise until secure. Avoid cross-threading.

Maintenance Features

  • Regular Checks: At least twice a year, lower the canopy to check the downrod assembly and tighten all screws on the fan.
  • Cleaning: Clean the motor housing with a soft brush or lint-free cloth to avoid scratching the finish. Clean the blades with a lint-free cloth.
  • LED Light: The LED light kit is 23 watts and is not designed to be replaced.
  • Battery Replacement: Use AAA alkaline batteries for the remote control. Ensure correct polarity. Do not mix old and new batteries or different types. Remove exhausted batteries.
  • Power Disconnection: Always shut off the main power supply before performing any maintenance tasks.
  • Cleaning Agents: Do not use water or a damp cloth to clean the ceiling fan.

Troubleshooting: The manual includes a troubleshooting section to address common issues such as:

  • Fan not moving (reverse switch, wall switch, power, faulty wiring).
  • Fan is noisy (loose blades/blade arms, cracked blade, incompatible wall control, insecure outlet box/mounting bracket).
  • Lights not working (improperly connected light kit plugs, faulty wire connection).
  • Excessive wobbling (loose blades/blade arms, unbalanced blades, insecure fan mounting, fan too close to vaulted ceiling, loose set screw on motor housing yoke).
  • Remote control not working (power surge requiring re-sync, dead batteries, interference from another remote).

Warranty: The fan motor is covered by a limited lifetime warranty against defects in workmanship and material. All other ceiling fan parts (excluding motor and parts with glass) are warranted for one year from the date of purchase. The warranty is voided if the original purchaser ceases to own the fan or if service is performed by a non-licensed electrician. The manufacturer's responsibility is limited to repair or replacement of defective parts or the entire fan.

LF Harbor Breeze BOLTZ III 43349 Specifications

General IconGeneral
BrandLF
ModelHarbor Breeze BOLTZ III 43349
CategoryFan
LanguageEnglish

Related product manuals