W CAUTION:
• LP GAS: All cleaning and maintenance should be done when grill is cool and with the fuel supply
disconnected.
CHARCOAL: All cleaning and maintenance should be done when grill is cool and when the ashes are
properly disposed.
• Do NOT clean any grill part in a self-cleaning oven. The extreme heat will
damage the finish.
• LP GAS: Do NOT enlarge valve orifices or burner ports when cleaning the
valves or burners.
Notices
1. This grill should be thoroughly cleaned and inspected on a regular basis.
2. Abrasive cleaners will damage this product.
3. Never use oven cleaner to clean any part of grill.
Before Each Use
1. Keep the grill area clean and free from any combustible materials, gasoline, and
other flammable vapors and liquids.
2. Do NOT obstruct the flow of the combustion of LP gas and the ventilation of air.
3. Keep the ventilation opening(s) of the LP gas tank area free and clear from debris.
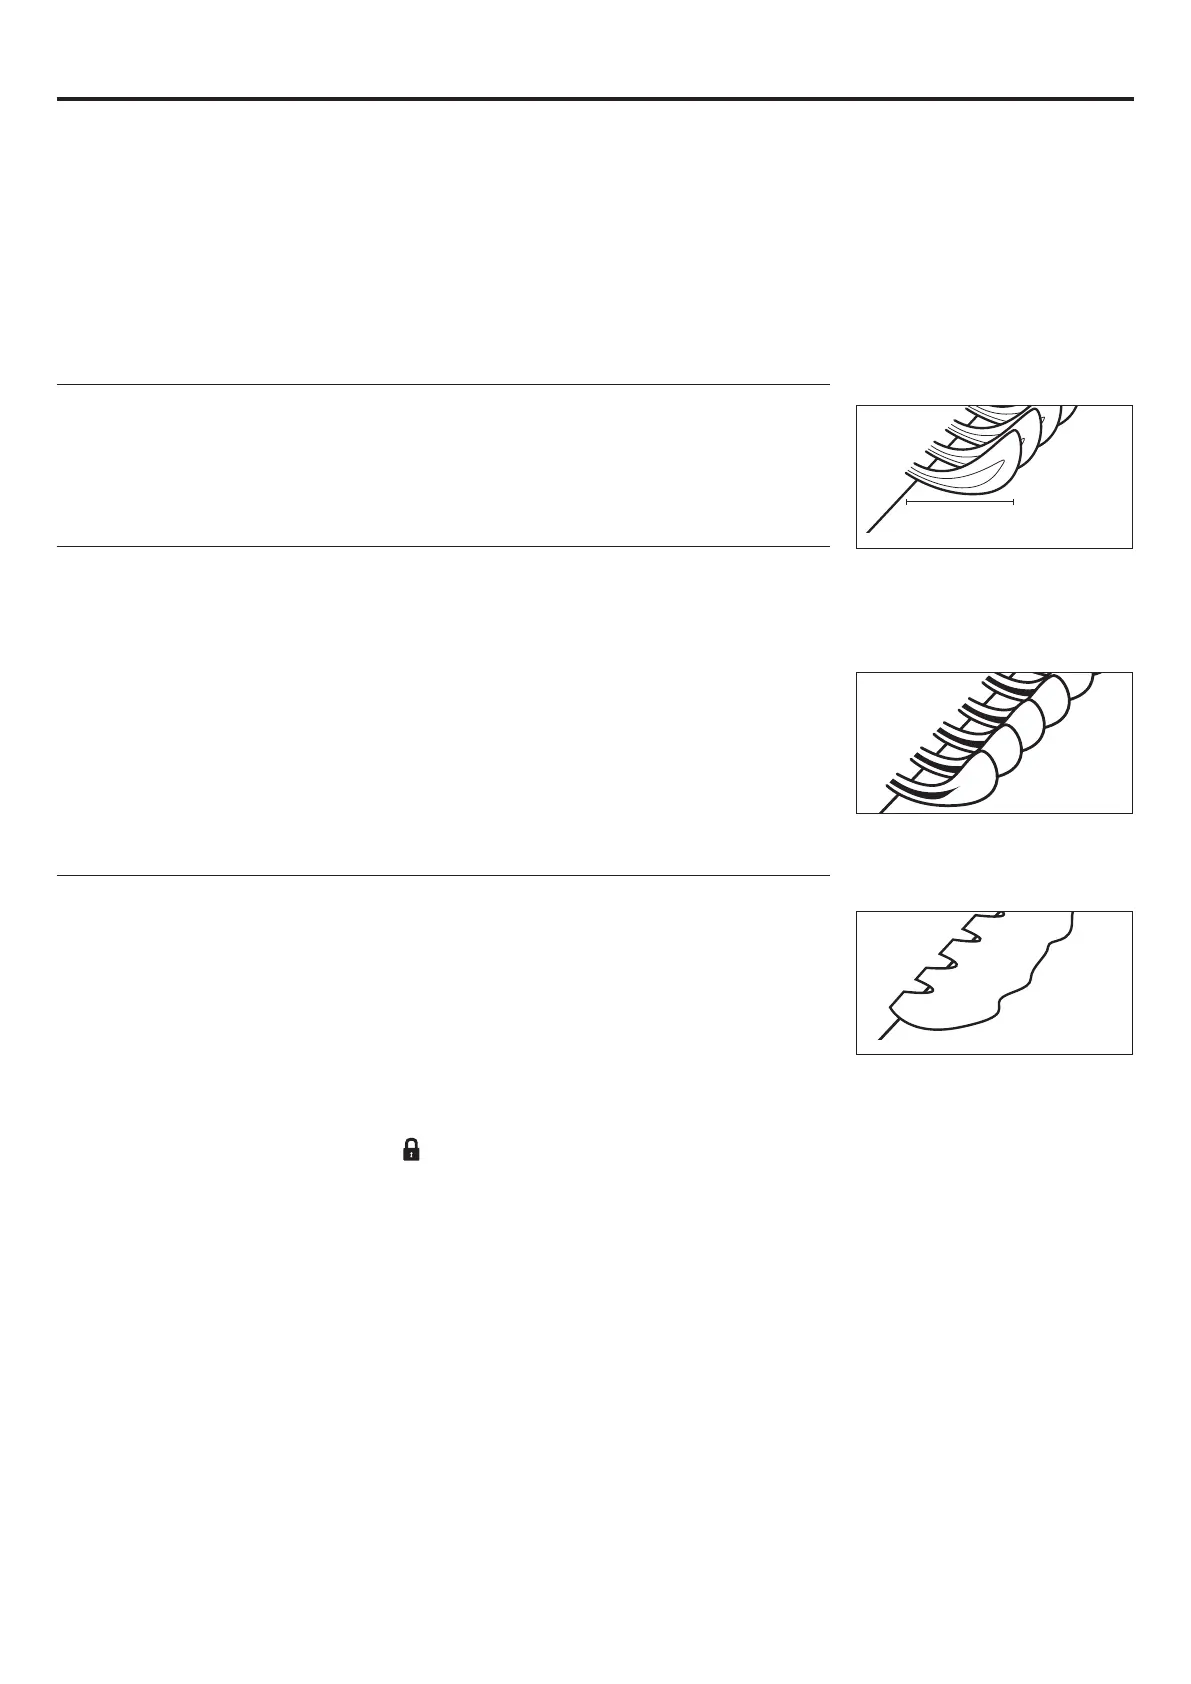
4. Visually check the burner flames to make sure your grill is working properly
(Figure 9).
5. See below for proper cleaning instructions.
6. Check for obstructions of airflow to the burners. Spiders, insects and webs can
clog the burner/venturi tube. A clogged burner/venturi tube can lead to a fire.
Cleaning Surfaces
1. Wipe surfaces clean with mild dishwashing detergent or baking soda mixed with
water.
2. For stubborn surfaces, use a citrus-based degreaser and a nylon scrubbing brush.
3. Rinse clean with water.
4. Allow to air dry.
Cleaning Main Burners
1. Turn regulator/control knob to the “
OFF” position
.
NOTE: A “poof” sound is normal as the last of the LP gas is burned.
2. Disconnect LP gas tank per “Disconnecting LP Gas Tank” section.
3. Remove regulator/control knob.
4. Remove cooking grid and heat plate.
5. Disconnect wire from igniter, if applicable.
6. Remove burner.
7. Remove all food residue and dirt from burner surface.
8. Disconnect wire from spark electrode.
9. Clean inlet of burner with small bottle brush or compressed air.
10. Clean any clogged ports with a stiff wire (such as an opened paper clip).
11. Inspect burner for any damage (cracks or holes). If damage is found, replace with a new burner from manufacturer.
12. Reinstall burner. Reconnect igniter (if applicable) and regulator/control knob.
13. Replace heat plate and cooking grid.
14. Connect LP gas tank per “Installing LP Gas Tank” section.
15. Perform leak test per “Checking for Leaks” section.
Figure 9
Burner Flame
Conditions
Use this chart to see if your
burners need to be cleaned.
1-2 in. /
25.4 - 50.8 mm
Normal: Soft blue flames with
yellow tips between 1 in. - 2 in.
height.
Needs cleaning: Noisy with
hard blue flames.
Has to be replaced: Wavy with
yellow flames.
CARE AND MAINTENANCE
20