For proper ventilation, allow a clear-
ance of 4" on each side and from the
wall.
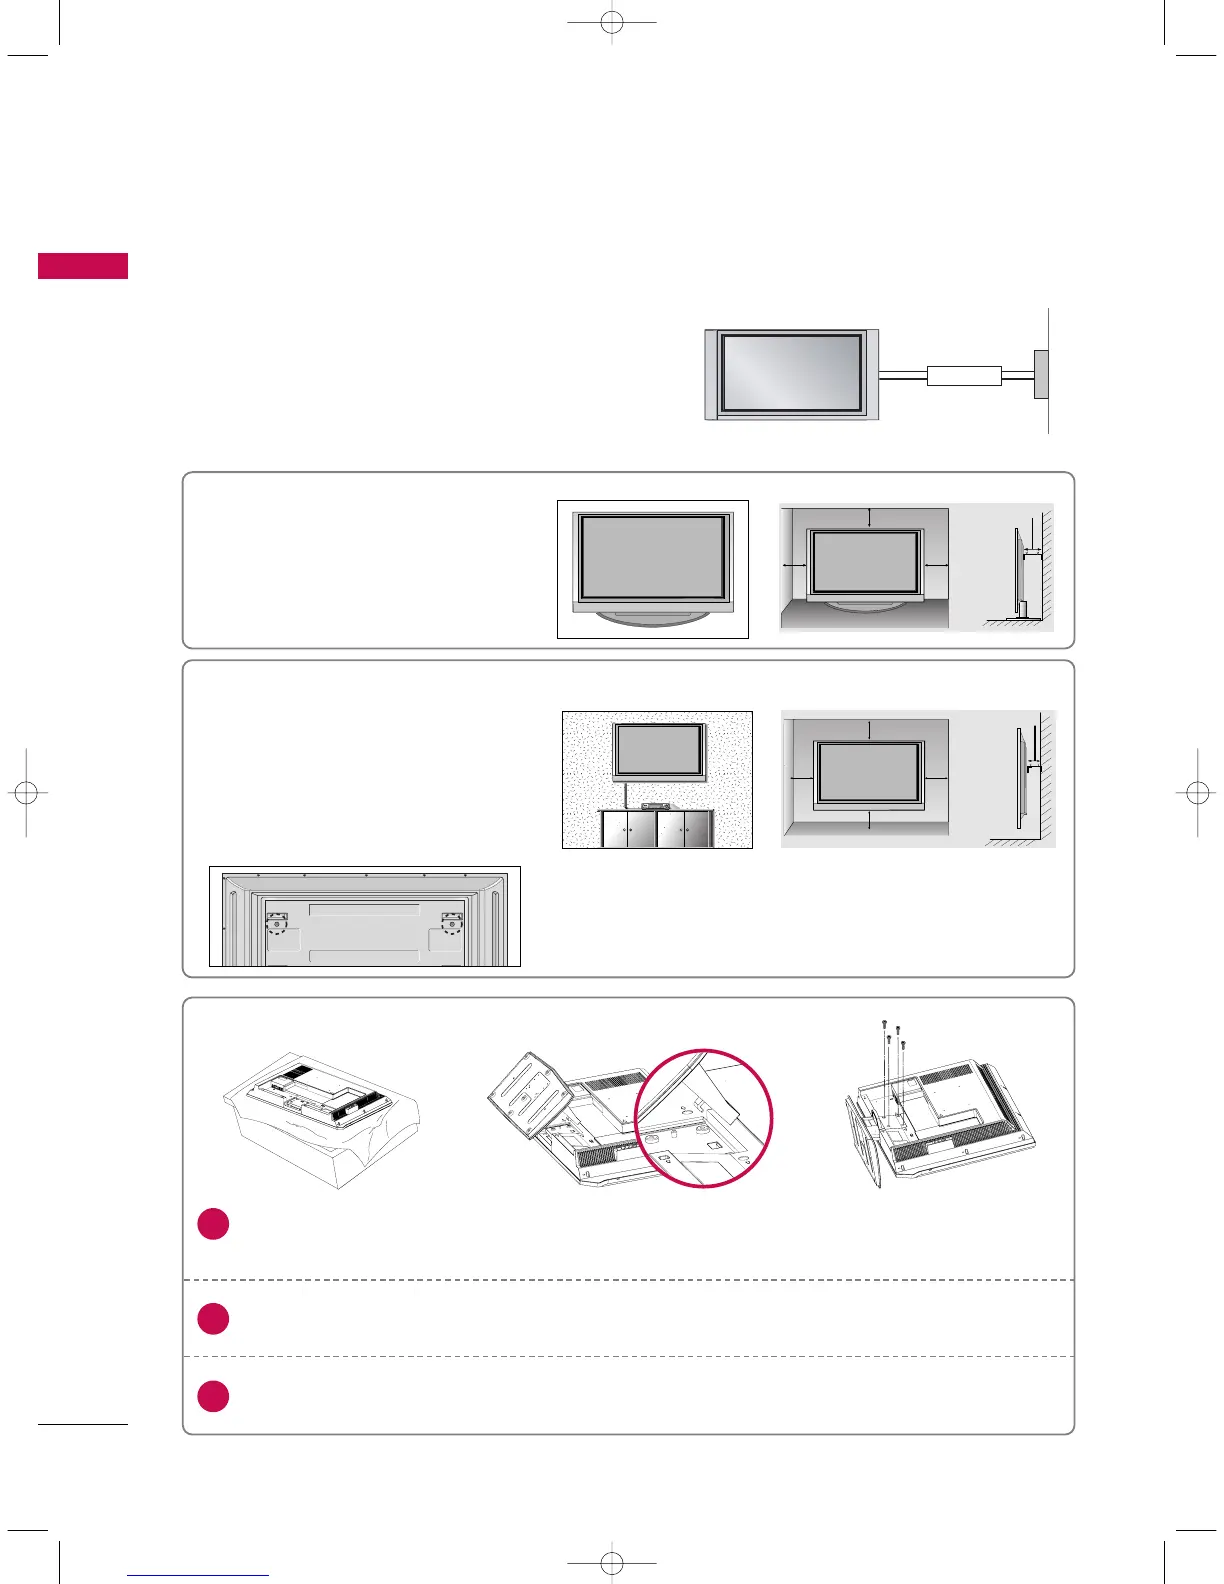
Wall Mount: Horizontal installation
For proper ventilation, allow a clearance
of 4" on each side and from the wall.
Detailed installation instruc-tions are
available from your dealer, see the
optional Tilt Wall Mounting Bracket
Installation and Setup Guide.
GROUNDING
Ensure that you connect the earth ground wire to prevent
possible electric shock. If grounding methods are not pos-
sible, have a qualified electrician install a separate circuit
breaker. Do not try to ground the unit by connecting it to
telephone wires, lightening rods, or gas pipes.
Power
Supply
Short-circuit
Breaker
■
The set can be installed in various ways such as on a wall, or on a desktop etc.
■
The set is designed to be mounted horizontally.
<<OOnnllyy 4422PPCC11DD
**
>>
Remove two screws of the backside of the set before
installing the wall mounting bracket.
INSTALLATION
Carefully place the set screen side down on a cushioned surface that will protect set and screen
from damage.
Place the hook of the stand in the back of the set as shown.
Install the 4 bolts provided securely, in the back of the set.
Stand Installation for 32LC2D
*
1
2
3
U0585Cen_CD 12/6/06 4:45 PM Page 10
 Loading...