11
ENGLISH
REFRIGERANT PIPING
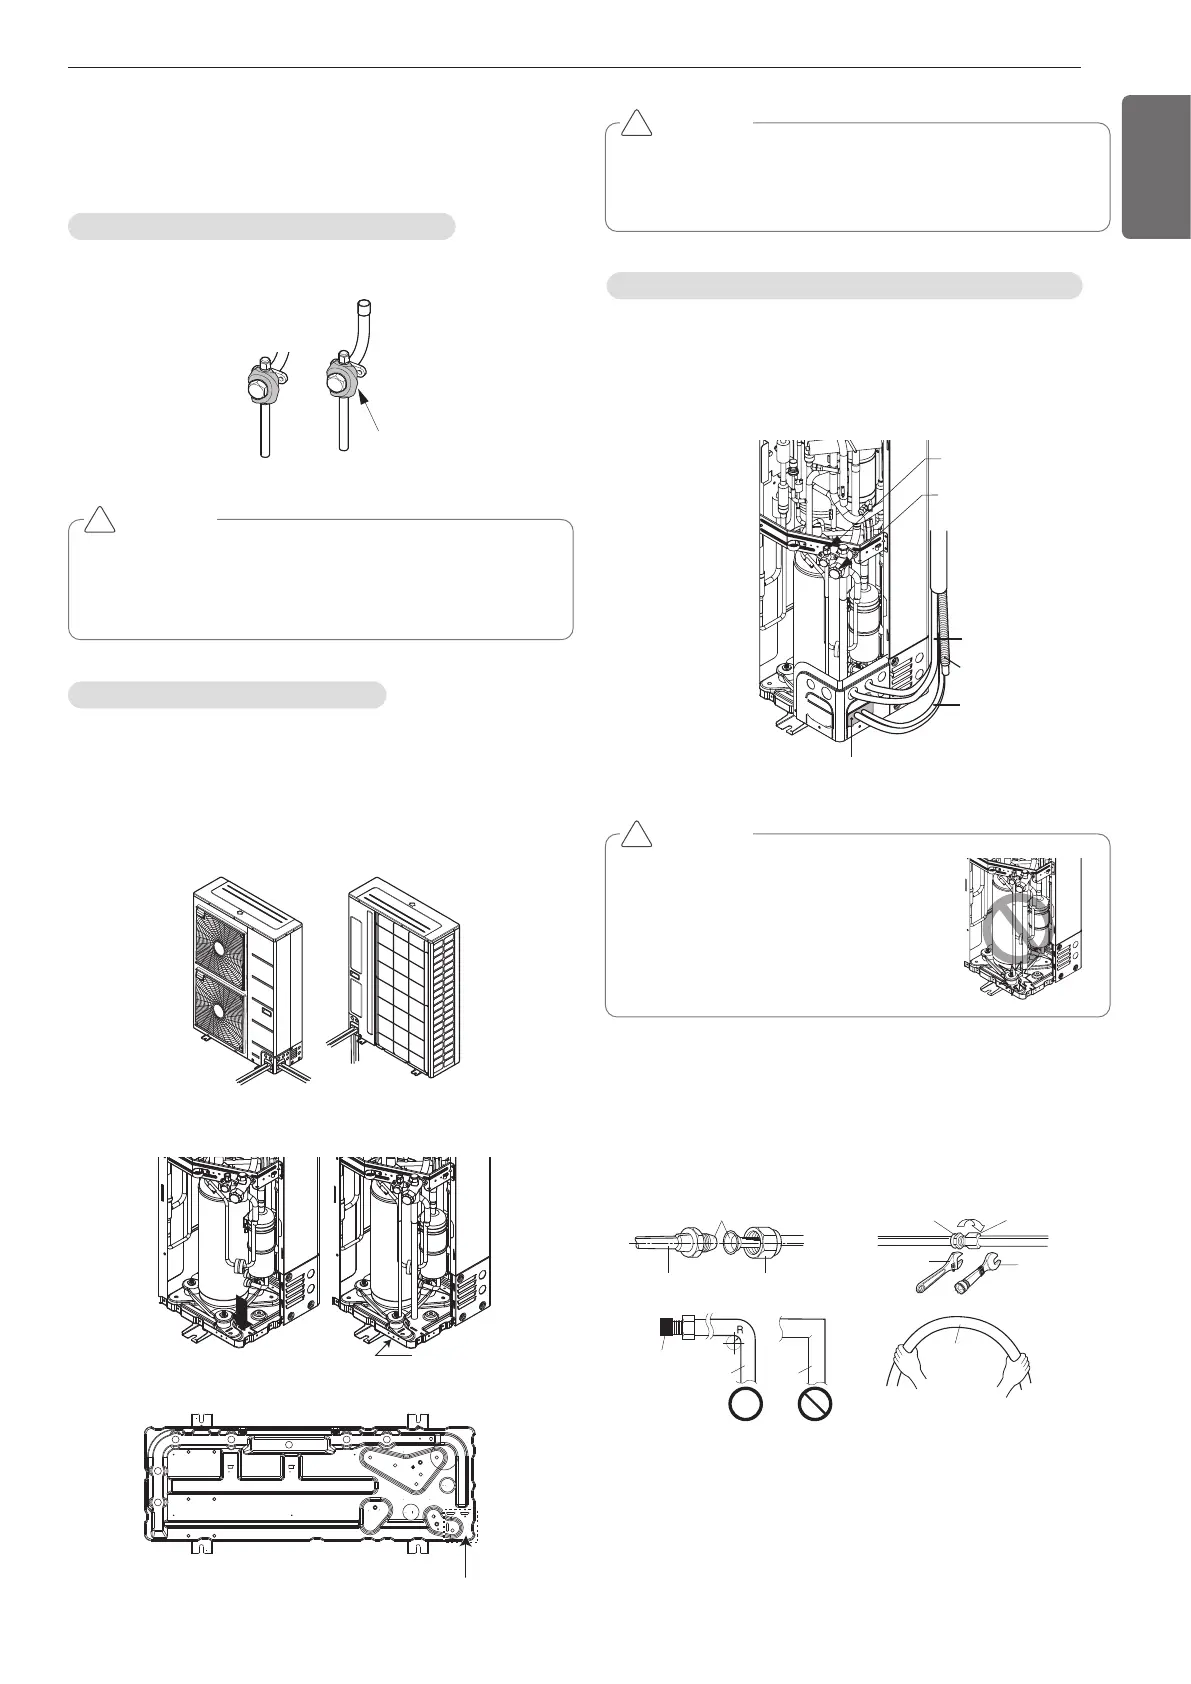
U3 Chassis (2 Fan Model)
Braze suitable field piping with service valve of gas pipe.
U4 Chassis (1Fan Model)
- After connecting the refrigerant pipe and checking the refrigerant
leakage, cover it with heat insulator and roll around it with vinyl tape.
Tighten up the flare nut fitting on regulated torque. (Until “clatter”
sounds is made at torque wrench part.)
- Do not bend the pipe more than twice and work on it making it a big
half circle.
If it is folded over, cooling/heating capacity may decrease and it could
be the reason of malfunction.
Do not remove the cap on flare side until the connection.
Dust and sand inside pipes can be the reason of malfunction.
- Bend it following the wall and connect to outdoor unit valve.
Connecting the pipes to the outdoor unit
Possible direction for field piping
CAUTION
Take care so that there is no thermal damage on the service
valves of the outdoor unit.
(Especially packing part of service port.) Wrap the service valve
with a wet towel when brazing it as shown figure above.
!
CAUTION
• You should not dame pipe/base during the work of pipe knock
out.
• Operate piping work removing burr after pipe knock out.
!
CAUTION
• Make sure that pipe doesn't contact with
the compressor terminal cover
and comp bolt.
• Always insulate the liquid and gas-side field
piping and branch.
!
- The installation piping is connectable in four directions.(refer to figure
1)
- When connecting in a downward direction, knock out the knockout
hole of the base pan.
(refer to figure2, figure3)
Preventing foreign objects from entering (Figure 4)
- Plug the pipe through-holes with putty or insulation material(procured
locally)to stop up all gaps,as shown in the figure 3.
- Insects or small animals entering the outdoor unit may cause a short
circuit in the electrical box.
ground piping.
 Loading...