11
CAUTION
•
To avoid product damage or personal injury, take
care not to drop the product parts while unpacking
them.
•
Do not use the double-sided tape on wallpaper.
The weight of the charging station and the product
could damage the paper.
•
We recommend anchoring the station with the
anchoring screw.
•
If attaching to concrete or a wall stud, use the
setscrew without a wall anchor.
•
If attaching to drywall, drill a hole and insert the
wall anchor rst.
Note:
•
Once assembled, the charging station support and
base cannot be disassembled.
•
The charging station can be removed as needed.
After unscrewing it from the wall, pull the station
upward while the bottom of the station remains
upright on the oor.
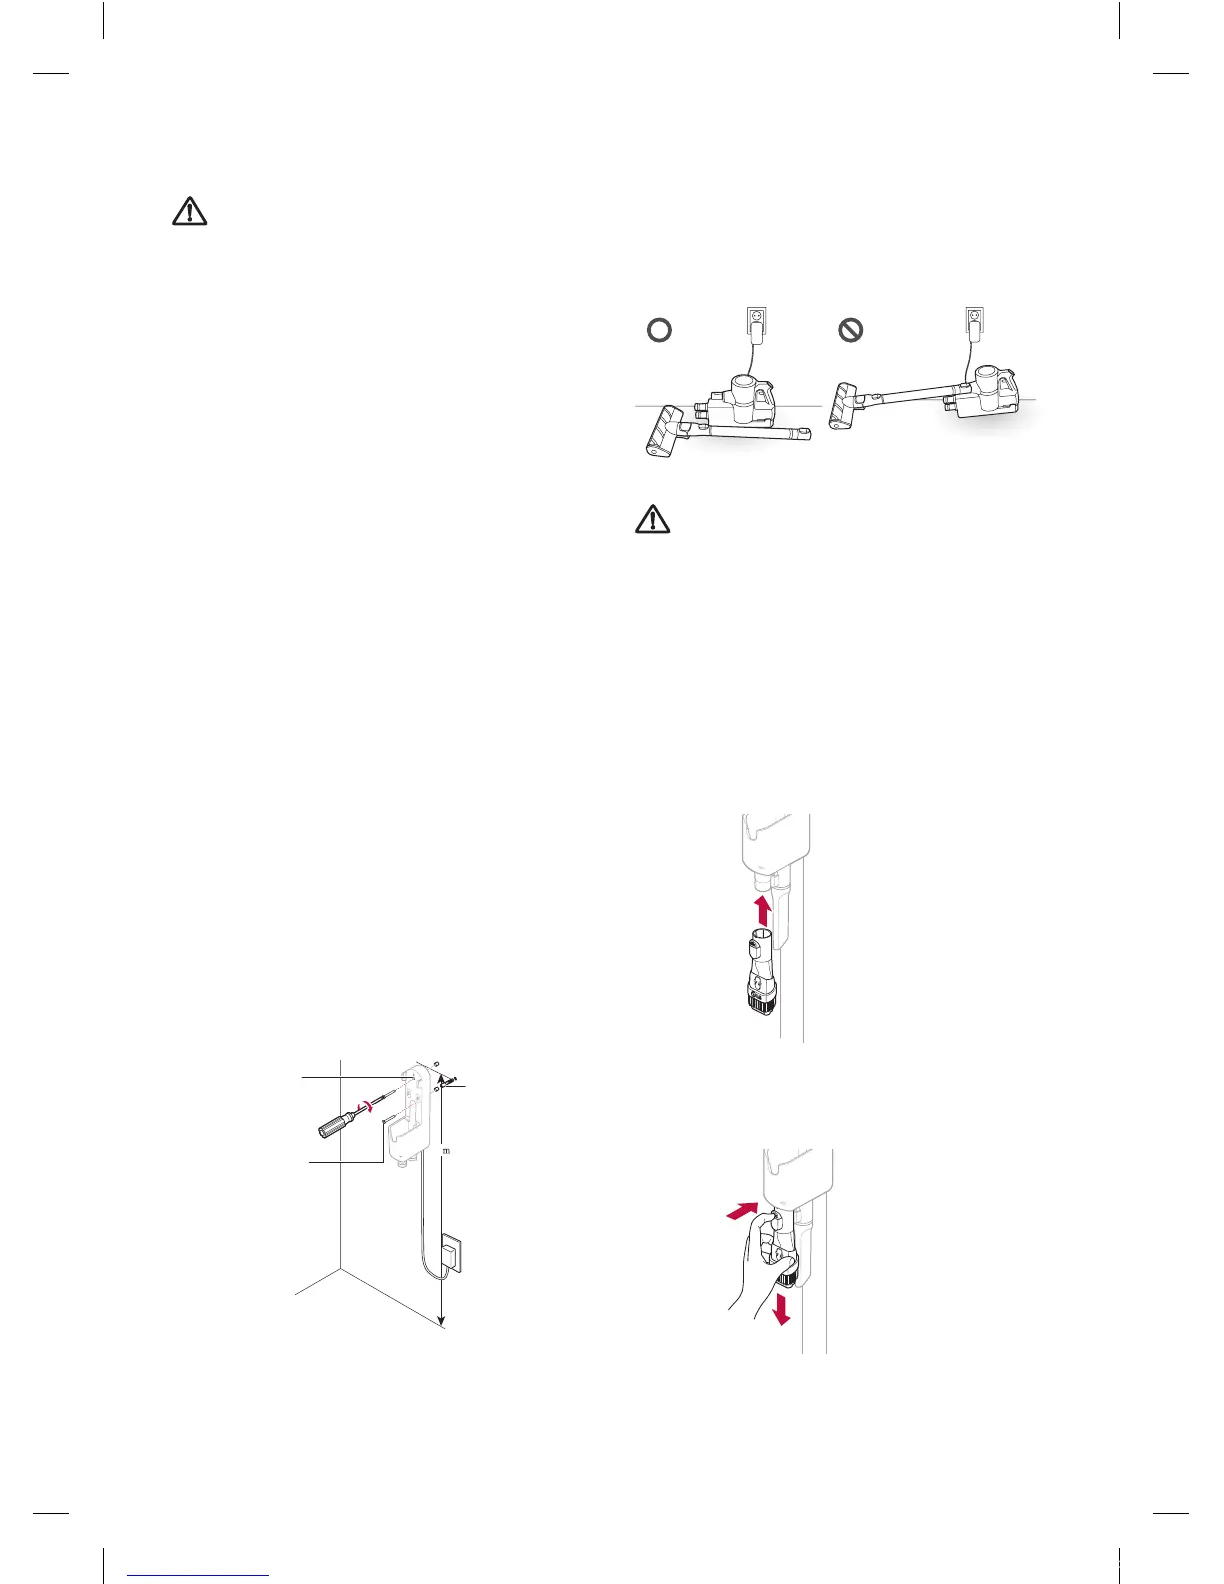
Wall Installation
1
Insert the power cable into the jack at the back
of the charging station and plug the power cord
into the power outlet.
2
Hold the station 3.25 ft (1 m) from the oor and
near enough to easily reach the power outlet.
Mark the positions of the screw holes on the
wall. Insert the wall anchors at the marks, if
needed.
•
Recommended diameter of hole:
Φ
6.5;
Recommended depth: 60 mm.
3
Use the 2 shorter wall anchoring screws
provided to attach the charging station to the
wall.
1
Wall
anchoring
hole
Wall
anchoring
screw
Wall
anchor
Note:
•
The cost of a service call to properly install the
charging station is not covered under the warranty.
Uninstalling the Station
If the station is not installed, separate the extension
pipe and nozzle from the body before storing or
charging the product.
CAUTION
•
Resting the product on a at surface for a long
time with the extension pipe and nozzle attached
may damage the product.
Attachment Storage
When not in use, the crevice and brush attachments
can be snapped onto the ports at the bottom of the
charging station.
1
Attach the combination tool and crevice tool to
the dedicated holders.
2
Press and hold the inlet removal button and pull
downward to remove the combination tool or
crevice tool.
MFL69883611_en_180523.indd 11 2018-05-23 오후 12:26:33
 Loading...