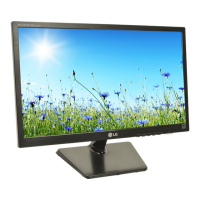
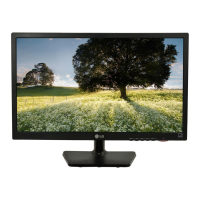
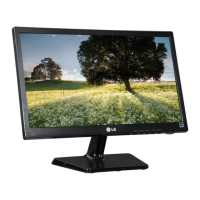
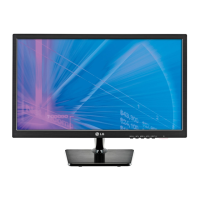
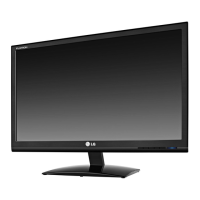
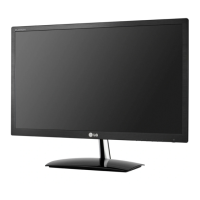
This document is an owner's manual for an LG LED LCD monitor, providing comprehensive instructions for assembly, setup, usage, and troubleshooting. It covers various models including E1642C, E1942C, E2042C, and E2242C.
The monitor functions as a display unit for a personal computer, offering a visual interface for various computing tasks. It supports analog video input via a D-SUB connection, ensuring compatibility with a wide range of PCs. The Plug & Play feature simplifies setup, allowing the PC to automatically recognize and configure the monitor without extensive user intervention.
Assembly and Setup:
The manual details the unpacking process, listing included accessories such as the owner's manual CD, D-SUB cable, power cord, AC-DC adapter (which may vary by country), stand body, and stand base. Users are cautioned against using unapproved accessories to ensure safety and product longevity.
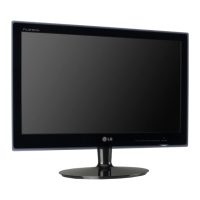
Setting up the monitor involves attaching the stand. The monitor should be placed screen-side down on a flat, cushioned surface to prevent damage. The stand body is attached first, followed by the stand base, secured with a screw. Detaching the stand follows a reverse process.
Mounting the monitor on a table requires lifting and tilting it into an upright position, ensuring a minimum 10 cm space from the wall for proper ventilation. The AC-DC adapter and power cord are then connected to a wall outlet. The power button on the bottom switch panel is used to turn the monitor on. A cable holder is provided to manage cables neatly.
For wall mounting, the manual specifies VESA standards for screw and wall mount interface. It advises using an authorized LG wall mount and contacting qualified personnel for installation. Proper screw length is crucial to prevent internal damage or the monitor falling.
Usage Features:
The monitor features a power indicator that lights up when turned on and turns off when powered off. The power button also serves as a general control.
The monitor's controls are located on the bottom panel and include buttons for MENU, SUPER ENERGY SAVING, MODE, AUTO, INPUT/EXIT, and Power.
- MENU button: Accesses the main menus for customizing settings. It also features an OSD LOCKED/UNLOCKED function, allowing users to lock current control settings to prevent accidental changes. Pressing and holding the MENU button for several seconds toggles this lock.
- SUPER ENERGY SAVING button: Enters the SUPER ENERGY SAVING menu, enabling an energy-efficient function that helps save power. It displays information on total power reduction, CO2 reduction, and saving data in W/h.
- MODE button: Enters various picture modes such as CUSTOM, TEXT, PHOTO, CINEMA, and GAME, optimizing display settings for different content types.
- AUTO button: Automatically adjusts display settings for optimal clarity and stability, particularly useful for resolving issues like blurry screens, blurred letters, screen flicker, or tilted screens in Analog Mode.
- INPUT/EXIT button: Allows selection of input signals (D-SUB/DVI/HDMI) when multiple sources are connected. It also serves to exit the On Screen Display (OSD).
- Power button: Turns the monitor on or off. The power indicator shows red when the display is running (On Mode) and blinks red in Sleep Mode.
Customizing Settings:
The manual provides detailed instructions for navigating the OSD (On Screen Display) menus to customize various settings:
- Main Menu: Includes options for BRIGHTNESS, CONTRAST, WIDE/ORIGINAL, and RESET.
- BRIGHTNESS: Adjusts the screen's brightness.
- CONTRAST: Adjusts the screen's contrast.
- WIDE/ORIGINAL: Switches between full screen mode (WIDE) or original input image ratio (ORIGINAL). The ORIGINAL function works if the input resolution is lower than the monitor's native ratio (16:9).
- RESET: Restores all factory default settings.
- NEXT MENU (Picture):
- SHARPNESS: Adjusts the clearness of the screen.
- NEXT MENU (Color):
- GAMMA: Sets gamma values (GAMMA 0, GAMMA 1, GAMMA 2) to control the lightness and darkness of images. Higher values display whitish images, lower values display blackish images.
- COLOR TEMP: Selects screen color temperature (WARM, MEDIUM, COOL) or allows custom adjustment of RED, GREEN, and BLUE color levels.
- NEXT MENU (Display):
- HORIZONTAL: Moves the image left and right.
- VERTICAL: Moves the image up and down.
- CLOCK: Minimizes vertical bars or stripes on the screen background and changes horizontal screen size.
- PHASE: Adjusts display focus to remove horizontal noise and sharpen characters.
- NEXT MENU (Others):
- LANGUAGE: Chooses the language for control names.
- POWER INDICATOR: Sets the power indicator on the bottom side of the monitor to ON or OFF.
- WHITE BALANCE: Adjusts the signal level to fit the standard output level of the video card, providing optimal image quality, especially when white and black colors are present.
Troubleshooting:
The manual includes a troubleshooting section to address common issues:
- No power/indicator issues: Checks power cord connection, power button status, brightness/contrast settings, and PC status if in power saving mode.
- "OUT OF RANGE" message: Indicates the PC signal is outside the monitor's horizontal or vertical frequency range, advising users to reconfigure display settings.
- "CHECK SIGNAL CABLE" message: Suggests checking the signal cable connection between the PC and monitor.
- "OSD LOCKED" message: Explains how to unlock OSD controls by pressing and holding the MENU button.
- Incorrect display image: Recommends using the AUTO button to adjust the display image to ideal settings for position, vertical bars/stripes, and horizontal noise. It also suggests checking Control Panel > Display > Settings for resolution and color depth.
- "Unrecognized monitor, Plug&Play (VESA DDC) monitor found" message: Advises installing the display driver from the provided CD or LG's website and ensuring the video card supports Plug&Play.
Maintenance Features:
The manual emphasizes proper posture for using the monitor to ensure comfort and prevent strain. It advises adjusting the monitor's location to avoid reflections and positioning hands gently on the keyboard with arms bent at the elbows.
The SUPER ENERGY SAVING feature can be considered a maintenance feature as it helps prolong the monitor's life by reducing power consumption and contributes to environmental sustainability.
The document also notes that product specifications and contents may change due to function upgrades, and accessories may vary by model.