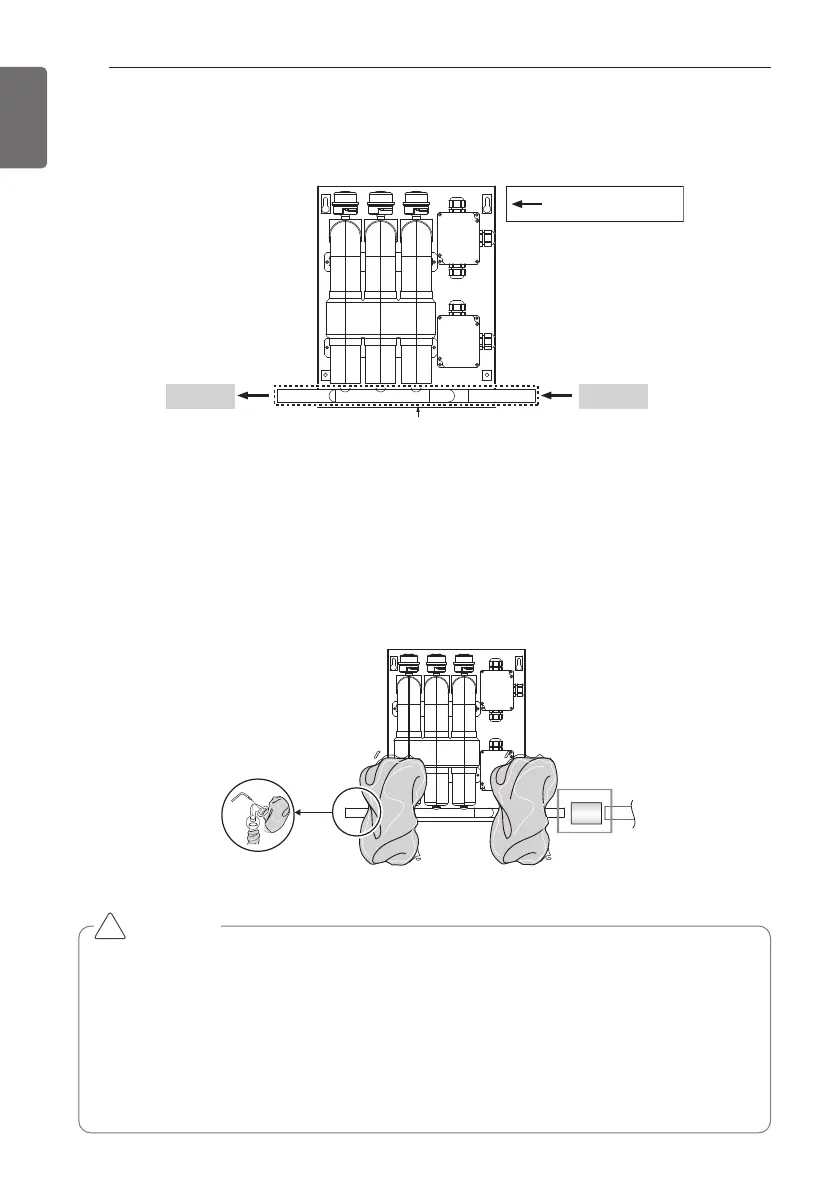
2 Weld the connector pipe (not provided) at the outdoor unit.
3 When connecting the outdoor unit's connector pipe and the EEV KIT pipe, be sure to use a
socket (not provided) that meets the necessary specifications.
4 As the size of the EEV KIT pipe and the outdoor unit's connector pipe could vary, check the
sizes beforehand and use a socket that meets the necessary specifications.
5 When welding, make sure to follow the safety precautions at all times.
6 Be sure to insulate 'A' part after welding with insulation (15T or more).
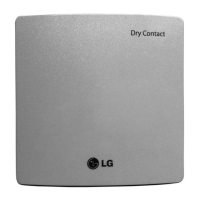
CAUTION
• Be sure to pass nitrogen through when welding parts together. Failure to do so could lead
to the compressor not working properly or becoming damaged.
• It is essential that the part be wrapped with a wet towel before and after welding. Failure
to do so could result in the part becoming damaged.
• Use a protective panel or be especially cautious not to let welding sparks come in contact
with the AHU panel.
• After welding, be sure to test for any leakage.
• Failure to properly insulate after welding may result in leakage.
!