- 7 -
4-3. Focus test method and subject
- Test pattern : Resolution Pattern , White Cross-Hatch
Pattern
- Tools : Focus width measurement ruler
(1) Focus adjustment method
1) Set the projection distance of Engine as 1200 mm (40
Inch screen).
2) Pop up the Resolution Pattern among the Test Patterns
of Set, and fix the Focus on the part where the
Resolution Pattern is classified on each part of screen.
(all parts Balancing)
3) Popup the White Cross-Hatch Pattern and measure the
width of each Point.
4) Focus judging standard : 3.5 mm or less
4-4. Focus Stopper Location Verification
(Verification corresponding to screen
inch)
(1) Test pattern : White cross-hatch
(2) Visually verify focus after locating a white board 586 mm
from the projection lens so that screen is set to 20 inches.
(3) Inspect the location of the stopper after locating a white
board 1200 mm from the projection lens so that screen is
set to 40 inches
(4) Evaluation criteria for stopper location
Non-defective : Bushing shall be located within A
marking.(Fig. 4-4)
5. Caution for DMD
(Digital Micro-mirror Device)
5-1. Caution for DMD ESD
(1) Connector the grounding to prevent a damage of ESD
(Electrostatic Discharge) when handing the DMD.
(2) Wear a wrist strap to connect the ESD grounding in flesh
necessarily.
(3) Connect the ESD ground to workstation and an electric
conductor.
(4) Save the DMD after getting rid of a static electricity. Keep
it at an exclusive case when moving it When grounding,
open the case.
(5) Put on gloves for preventing static electricity.
(6) All work is done at static free location. Attach the tape or
remove a dust on the DMD front or DMD back pin
5-2. Caution for DMD Clean
(1) Follow the procedure and caution to prevent the screen
from being scratched.
(2) When DMD glass stains with dust, polish the front and
back DMD glass with soft cloth. Then, do it again after
rotating 180 degree the DMD. If necessary, keep under
observation.
(3) Don’t clean the DMD with the high pressure. The static
electricity and pressure will damage the DMD.
* Attachment )TI Reference :
DMD Handling Specification, DMD Cleaning
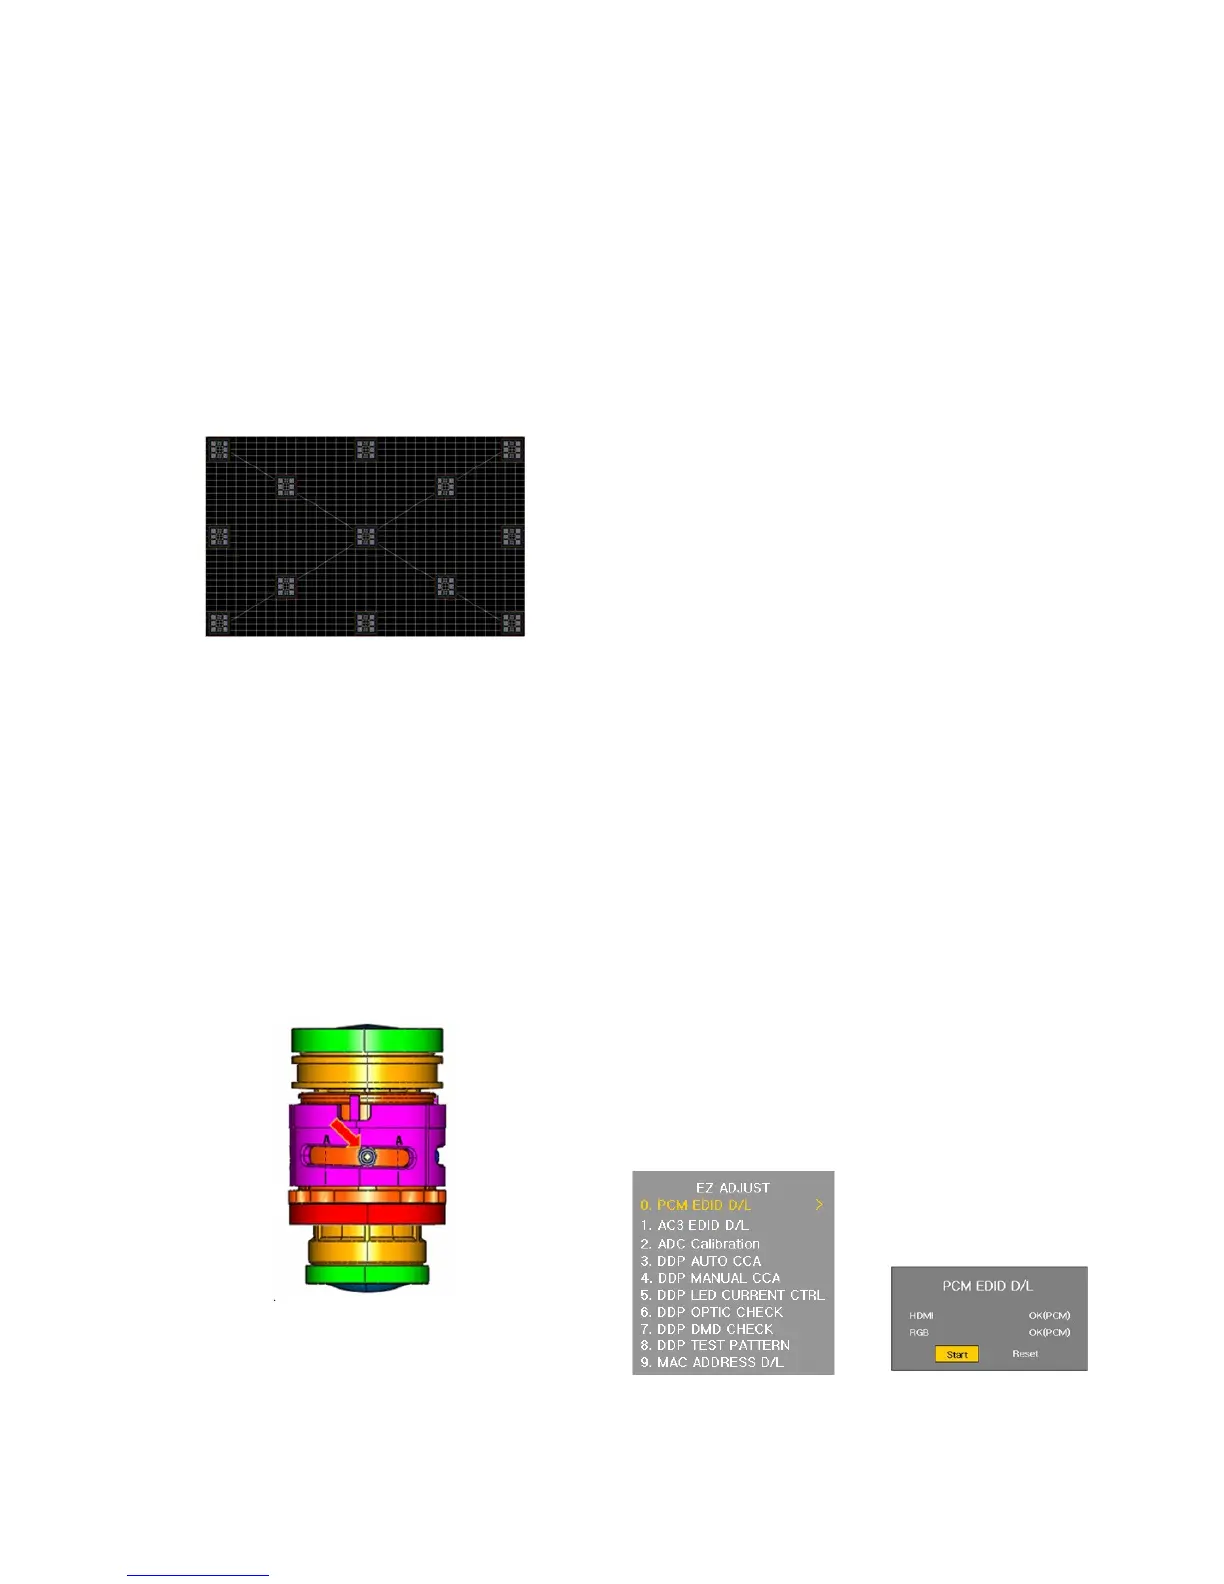
6. EDID Data Download
6-1. Used Device
Adjustment remote control
6-2. Adjustment Method
(1) Enter to adjustment mode with selecting “ADJ” on remote
control.
(2) Enter to “0. PCM EDID D/L”. with pressing right direction
key to get in EDID Download adjustment menu (Fig. 6-2-1)
(3) Select “START”
(4) When adjustment is completed, check RGB “OK(PCM)”,
HDMI1 “0K(PCM)”. (Fig. 6-2-2)
When it fails, Reset and check by trying the (3) process
again.
(5) To exit, press “ADJ” or “EXIT” of the adjustment remote
controller again to exit.
(6) To verify the adjustment result, enter PCM EDID D/L or IN-
START and verify.
Copyright © 2011 LG Electronics. Inc. All right reserved.
Only for training and service purposes
LGE Internal Use Only
(Fig. 4-3) Resolution Pattern
(Fig. 4-4) Bushing verification location
(Fig.6-2-1
) Adjustment Menu when ADJ is selected (Left)
(Fig.6-2-2
)
Selection Category on ADJ Adjustment Menu (Right)
 Loading...