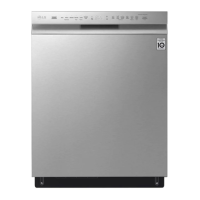
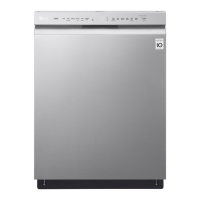
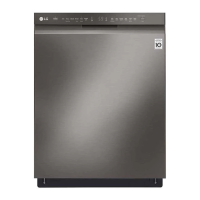
This document is an owner's manual for an LG dishwasher, specifically models LDF567#** and LDT567#**. It provides comprehensive information on the appliance's features, installation, operation, maintenance, troubleshooting, and warranty.
Function Description:
The LG dishwasher is designed to efficiently clean and dry dishes using advanced technologies. Key functions include:
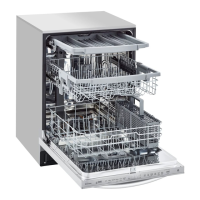
- QuadWash™ System: Features a multi-motion lower spray arm that shoots water in various directions and at optimized intensities for powerful and complete cleaning coverage throughout the tub.
- Inverter Direct Drive Motor: Utilizes LG's motor technology for extraordinary functionality, including features like Dual Zone washing, whisper-quiet operation, energy efficiency, and durability. The motor's simple design and high build quality are backed by a 10-year warranty.
- EasyRack Plus: An adjustable tine and rack height system that offers flexibility and versatility for loading dishes of various shapes and sizes.
- Hybrid Drying System: An efficient drying system that does not use a heating element, resulting in superior energy efficiency and gentle care for dishes.
- SmartThinQ™: Allows users to connect the dishwasher to a smartphone app via Wi-Fi for setting options, self-diagnosis, troubleshooting, and other useful features. This includes monitoring status, downloading new cycles, a Machine Clean Coach, and Smart Diagnosis™ for identifying issues.
- Smart Diagnosis™ Function: Provides the capability to transmit data via telephone to LG Customer Information Center or via the SmartThinQ app to a smartphone for quick and effective diagnosis of problems.
Important Technical Specifications:
- Electrical Requirement: 120 V, 60 Hz AC only, minimum 15 A circuit breaker.
- Water Pressure: 20 - 80 psi (140 - 550 kPa). If water pressure exceeds 80 psi, a pressure reducing valve must be installed.
- Inlet Water Temperature: Minimum 120 °F (49 °C), maximum 149 °F (65 °C). This range ensures optimal washing results and shortest cycle time, while preventing damage to dishes.
- Dimensions: 23 3/4" (W) x 24 5/8" (D) x 33 5/8" (H) or 603 mm (W) x 625 mm (D) x 854 mm (H).
- Net Weight: 72 - 89 lbs. (33 - 40 kg).
- Wireless LAN Module: LCW-003, Frequency Range 2412 to 2462 MHz, Output Power (Max) IEEE 802.11 b: 17.56 dBm, IEEE 802.11 g: 25.53 dBm, IEEE 802.11 n: 25.29 dBm.
Usage Features:
The dishwasher offers various cycles and options to suit different cleaning needs:
- Cycles:
- Auto: Senses soil amount and toughness for optimized cleaning.
- Heavy: For heavily soiled dishes with hardened-on soil, using the strongest spray intensity.
- Delicate: For fine china and stemware.
- Normal: For moderately soiled, everyday loads. Can be combined with Night Dry.
- Turbo: Cleans heavily soiled dishes in an hour with slightly more energy and water. Does not include drying by default.
- Download Cycle: Dedicated cycle downloadable via Wi-Fi or NFC. Default is P1. Pots & Pans.
- Machine Clean: For cleaning the dishwasher interior without dishes, eliminating residual soils, odor, and white spots. Activated by pressing and holding Heavy for three seconds.
- Rinse: A quick rinse for dishes not immediately washed, softening dried-on residue and preventing odors. No detergent used. Does not include drying. Activated by pressing and holding Normal for three seconds.
- Express: Quickly cleans lightly soiled dishes in 33 minutes. Does not include drying. Activated by pressing and holding Turbo for three seconds.
- Options:
- Dual Zone: Automatically sets soft spray intensity for the upper arm and strong for the lower arm, ideal for mixed loads.
- Half Load: Washes intensively using either the upper or lower rack to save energy and time for small loads.
- Energy Saver: Reduces wash and rinse temperatures to save energy, increasing wash time. Not recommended for heavily soiled dishes.
- High Temp: Raises main wash temperature for improved cleaning.
- Extra Dry: Adds extra drying time and raises heated rinse temperature for better drying performance. Automatically selected if rinse aid is empty.
- Night Dry: Runs the ventilation fan periodically after a cycle to vent steam and prevent condensation on dishes. Activated by pressing and holding Extra Dry for three seconds. Selected by default for all cycles except Normal.
- Delay Start: Delays the start of a selected cycle from 1 to 12 hours in one-hour increments.
- Control Lock: Prevents settings from being changed during a cycle. Locks all buttons except Power. Activated/deactivated by pressing and holding Half Load and Energy Saver simultaneously for three seconds.
- SignaLight™ (Front Display): Top-control models feature 3 indicator LEDs: Red for error, steady White for normal operation, blinking White for paused cycle, and Green for cycle finished.
Maintenance Features:
Regular maintenance is crucial for performance and longevity:
- Cleaning the Exterior: Use a soft damp cloth or sponge, then dry with a soft cloth. For stainless steel exteriors, use a stainless steel cleaner. Avoid alcohol, thinners, bleach, benzene, flammable liquids, or abrasives.
- Cleaning the Interior: Periodically clean with a soft, damp cloth or sponge to remove food and dirt. To remove white spots and odor, run an empty cycle with one cup of white vinegar in a dishwasher-safe glass on the upper rack (use sparingly as vinegar is acidic).
- Seasonal Maintenance and Storage:
- For extended absence during warmer months: Close water valve, disconnect power, and clean filters, tub, and dispenser to prevent odor.
- For extended absence during colder months (freezing temperatures): Winterize water supply lines and dishwasher by qualified service personnel.
- Clogged Drain Air Gap or In-Sink Disposal: Check and clean if the dishwasher is not draining well. Turn off the dishwasher, remove the air gap cover and plastic cap, clean debris, and replace.
- Cleaning the Filters: Remove the lower rack, turn the inner filter counter-clockwise to remove the assembled inner and stainless steel filters. Clean with a soft brush under running water. Reassemble and secure by turning clockwise until it clicks. Recommended cleaning schedule varies from once a month to twice a week depending on load frequency and pre-rinsing habits.
- Cleaning the Spray Arms: If spray arm holes are blocked, clean with a pin or sharp tool. For the upper spray arm, pull the upper rack forward, then remove the arm by turning the nut 1/8 turn counter-clockwise and pulling down. Rinse and clean, then reassemble by pressing up and turning the nut 1/8 turn clockwise. Check for free rotation after assembly.