2-5
USING YOUR RANGE
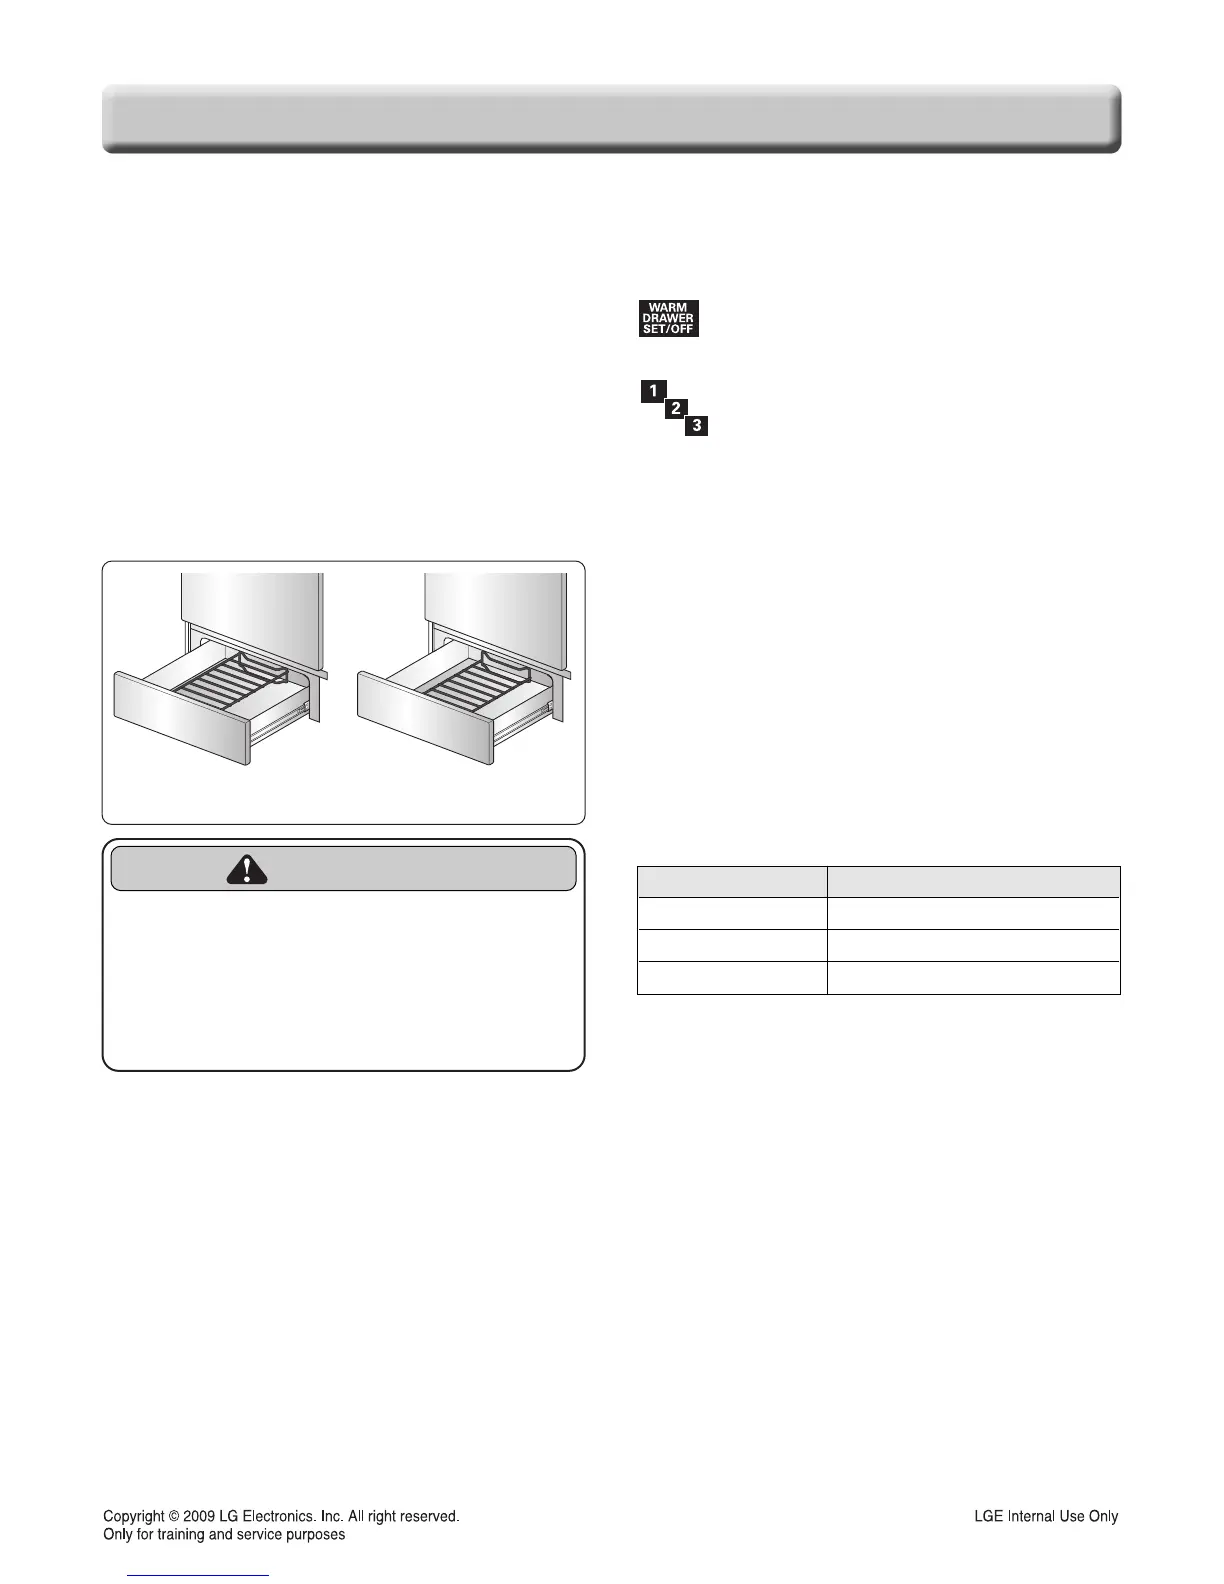
The rack can be used in 2 ways:
• In the upright position to allow low profile food
items to be placed both under and on top of the
rack (for example, rolls or biscuits on top of the
rack and a casserole dish underneath).
• In the downward position to allow you to place
light weight food items and empty cookware (for
example, rolls or pastries and dinner plates)on the
rack. Set the Warming Drawer rack in either
position as shown below (Fig.1).
To Operate the Warming Drawer
The purpose of the Warming Drawer is to keep hot
cooked foods at serving temperature. Always start
with hot food. It is not recommended to heat cold
food in the Warming Drawer.
All food placed in the Warming Drawer should be
covered with a lid or aluminum foil to maintain
quality. Do not use plastic wrap to cover food. Plastic
may melt onto the drawer and be very difficult to
clean. Use only utensils and cookware
recommended
for oven use in the Warming Drawer.
To set the warming drawer control
1. Touch the “WARM DRAWER
SET/OFF” pad. “WARMER” begins to
blink.
2. On the number pad, touch 1 for Low, 2
for Medium or 3 for High. The warm
drawer will begin to heat after a number
pad is touched.
To cancel, touch the “WARM DRAWER SET/OFF”
pad.
NOTES:
• Touching the “CLEAR OFF” pad does not turn
the warming drawer off.
• The warming drawer cannot be used if the self
clean is used.
• The warming drawer has three settings:1, 2 and 3.
These settings maintain different temperature
levels in the warming drawer.
• The Warming Drawer will shut off automatically
after 3 hours.
W
W
ARMING DRA
ARMING DRA
WER
WER
 Loading...