This document is an installation manual for an LG Air Conditioner, specifically a "Standard inverter" type. It provides comprehensive instructions for installation, wiring, piping, leakage testing, evacuation, and test running, along with safety precautions and a self-diagnosis function.
Function Description:
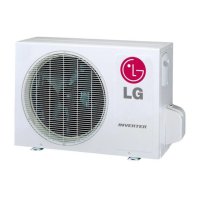
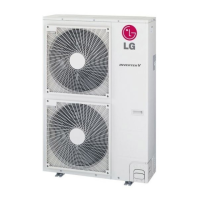
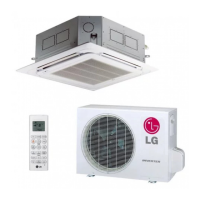
The LG Air Conditioner is designed to provide cooling and heating (where applicable) for indoor spaces. The manual covers both single and synchro operation systems, indicating its versatility for various installation configurations, from a single outdoor unit connected to one indoor unit to multiple indoor units connected to a single outdoor unit via branch pipes. The system uses refrigerant for its cooling and heating cycle. It includes features like Night Silent Operation for reduced noise and a Self-Diagnosis Function to indicate errors.
Important Technical Specifications:
- Piping Length and Elevation (Single Operation):
- UU18W (5 kW): Max length 40m, Max elevation 30m. Additional refrigerant: 20 g/m.
- UU24W, UU30W, UU36W/UU37W (7-10 kW): Max length 50m, Max elevation 30m. Additional refrigerant: 40 g/m.
- UU42W/UU43W, UU48W/UU49W, UU60W/UU61W (12.5-15 kW): Max length 75m, Max elevation 30m. Additional refrigerant: 40 g/m.
- Standard piping length for all models is 7.5m, with no additional charging needed if the tube is shorter than this.
- Pipe sizes vary by model, e.g., UU18W uses Ø12.7 (1/2") gas and Ø6.35 (1/4") liquid pipes. Larger models use Ø15.88 (5/8") gas and Ø9.52 (3/8") liquid pipes.
- Piping Length and Height (Synchro Operation):
- Total pipe length (L1+L2+L3+L4+L5): Max 80m.
- Main pipe (L1): Max 45m.
- Branch pipe (L2+L3+L4+L5): Max 40m.
- Each branch pipe: Max 15m.
- Indoor-Outdoor elevation (H1): Max 30m.
- Indoor-Indoor elevation (H2): Max 1m.
- Length between main pipe and each indoor unit: Max 70m.
- Length of branch pipe segment 'A': Max 10m.
- Refrigerant Additional Charging (Synchro Operation):
- Calculated based on (L1-b)xB + (L2+L3)xC for Duo, (L1-b)xB + (L2+L3+L4)xC for Trio, and (L1-b)xB + (L2+L3+L4+L5)xC for Quartet.
- Pipe size Ø6.35 (1/4") uses C=35 g/m.
- Pipe size Ø9.52 (3/8") uses C=40 g/m.
- B=40 g/m for UU42W/UU43W, UU48W/UU49W, UU60W/UU61W models.
- Electrical Wiring:
- Requires an ELCB (Electric Leakage Circuit Breaker) and a dedicated switching board.
- ELCB ratings vary by model: UU18W (1 phase) 20A, UU24W/UU30W (1 phase) 30A, UU36W/UU42W/UU48W/UU60W (1 phase) 40A, UU37W/UU43W/UU49W/UU61W (3 phase) 20A.
- Power cord cross-sectional area: 2.5 mm² for UU18W/24W/30W (1 phase), 6 mm² for UU36W/42W/48W/60W (1 phase), 2.5 mm² for UU37W/43W/49W/61W (3 phase).
- Connecting cable cross-sectional area: 0.75 mm².
- For connection lines over 40m, telecommunication and power lines must be connected separately.
- Flare Nut Torque:
- Ø6.35 (1/4"): 16±2 N·m.
- Ø9.52 (3/8"): 38±4 N·m.
- Ø12.7 (1/2"): 55±6 N·m.
- Ø15.88 (5/8"): 75±7 N·m.
- Evacuation Time:
- For a 30 gal/h vacuum pump: 30 minutes or more if tubing length is less than 10m (33 ft), 60 minutes or more if tubing length is longer than 10m (33 ft).
- Target vacuum pressure: 0.07 kPa or less.
- Terminal Screw Tightening Torque:
- M4: 118 N·cm (12 kgf·cm).
- M5: 196 N·cm (20 kgf·cm).
- M6: 245 N·cm (25 kgf·cm).
- M8: 588 N·cm (60 kgf·cm).
Usage Features:
- Synchro Operation: Allows multiple indoor units (Duo, Trio, Quartet) to be connected to a single outdoor unit. Requires a wired remote controller and a simple central controller (PQCSZ250S0) for simultaneous operation. Wireless remote controllers are not used in this mode.
- Auto Addressing Method: For simultaneous operation, indoor units are automatically assigned addresses during initial installation or PCB replacement. This involves setting DIP switches, turning on main power, and pressing a specific button on the outdoor unit PCB.
- Night Silent Operation: A setting available on the outdoor unit PCB (SW01N/PIP SW2) to reduce noise during nighttime.
- Forced Cooling Operation: A setting procedure (using DIP switches on the outdoor unit PCB) for adding refrigerant, especially in winter. This forces the indoor unit to operate and the compressor to run.
- Test Run: Essential after installation to verify proper operation. It involves checking various parameters like temperature, current, voltage, and noise. The test run should last more than 5 minutes and is automatically cancelled after 18 minutes. It can be initiated by pressing specific buttons on the remote controller.
Maintenance Features:
- Leakage Test and Evacuation: Crucial steps during installation to ensure system integrity. Involves pressurizing the system with dry nitrogen gas (up to 3.0 MPa) to check for leaks using liquid soap, followed by evacuation with a vacuum pump to remove incondensible gases and moisture.
- Self-Diagnosis Function: The outdoor unit features LED indicators (LED01G/RED and LED02G/GREEN) that flash in specific patterns to indicate various error codes (e.g., DC Peak, Max. CT, DC Link Low Volt, Communication Error). This helps in troubleshooting system malfunctions.
- Installation Guide at the Seaside: Provides specific recommendations for installations near the sea to prevent corrosion. This includes avoiding direct exposure to sea wind, installing a windbreak (more than 150% of the outdoor unit's height and width, with at least 70 cm space for airflow), and periodic cleaning of the heat exchanger with water to remove salt particles.
- General Maintenance: The manual emphasizes the importance of regular air filter cleaning and temperature control, which should be taught to the customer.