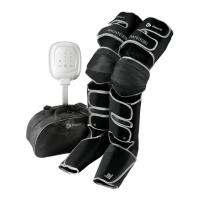
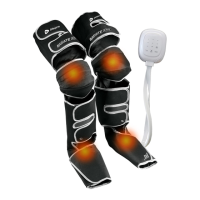
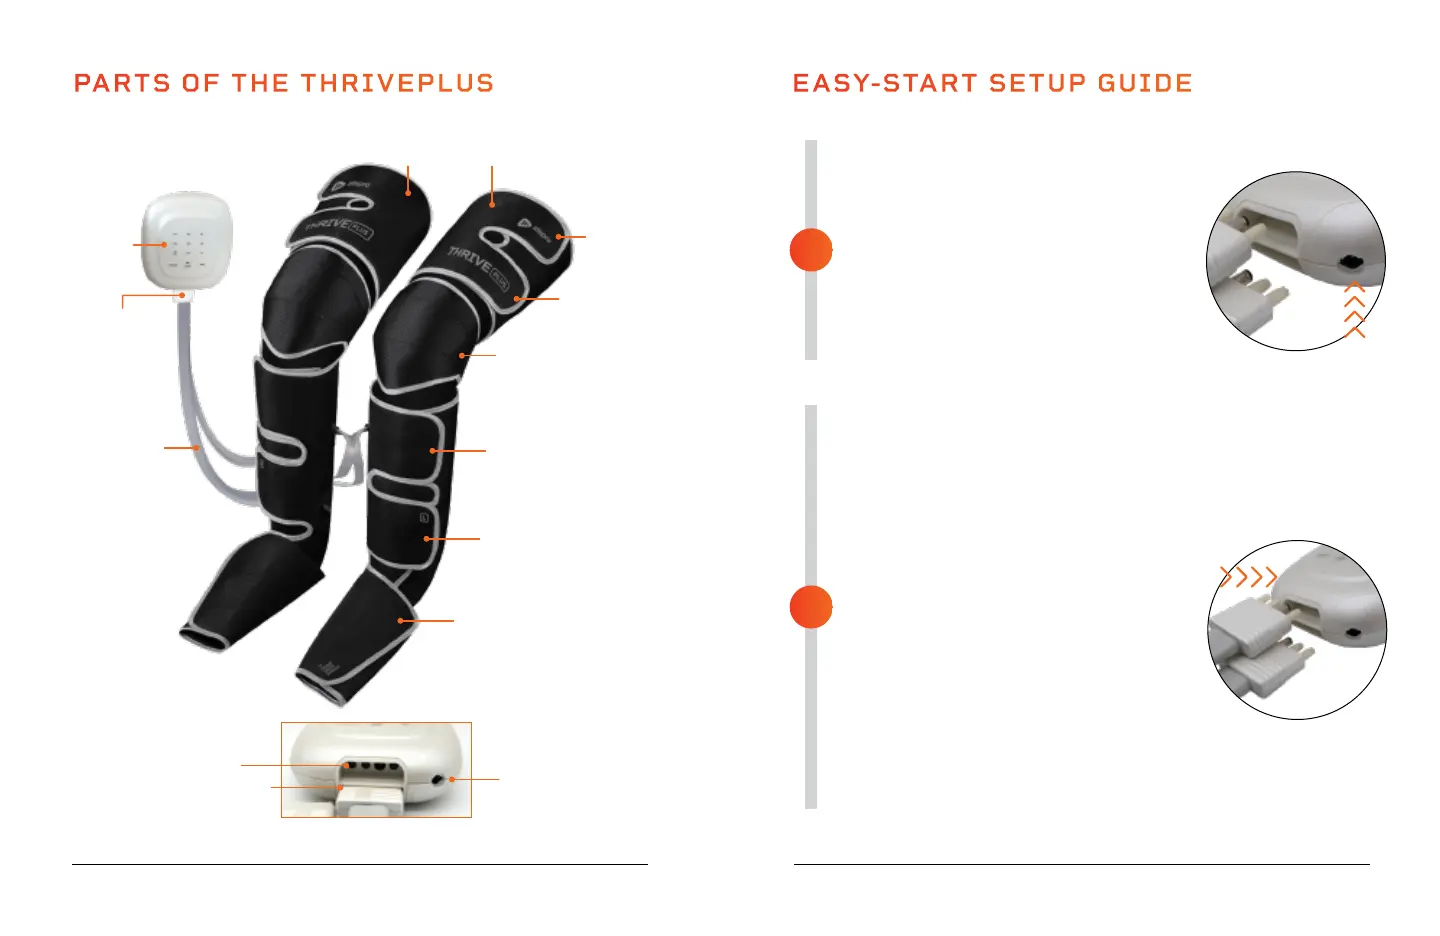
PARTS OF THE THRIVEPLUS
Remote
Control
Velcro
Strap
Velcro
Strap
Velcro
Strap
Velcro
Strap
Velcro
Strap
Air Pressure
Hose
Connectors
(Left & Right)
SoarFX Collection 9 8 ThrivePlus User Manual Lifepro
FULLY CHARGE THE BATTERY
• Ensure the ThrivePlus is powered OFF
before charging.
• Charge the battery fully (for up to 3 hours)
before using your ThrivePlus for the first
time.
• Connect the DC adapter to the charging
port on the bottom of the remote control.
• Plug the charging adapter into a wall
outlet.
SECURE THE THRIVEPLUS TO YOUR LEGS
• Make sure the Thrive is fully charged and
powered OFF.
• Pull each velcro strap to open it.
• While sitting in a chair, place one air
compression boot on each leg. Your feet
should rest flat in the bottom of the boots.
The boots are marked L (left) and R (right)
to ensure correct placement.
• Use the velcro straps to secure the boots
tightly to your feet, then to your calves,
then to your thighs, then finally to your
knees.
• Insert the air pressure connector labeled
“R” into the top port in the base of the
remote. Insert the connector labeled “L”
into the other port.
• See OPERATING INSTRUCTIONS on
the next page for usage instructions.
EASY-START SETUP GUIDE
2
1
Air Compression Boots
(Left & Right)
Air Pressure
Hoses
(Left & Right)
Heated Knee Area
Heats front of knee
(Left & Right)
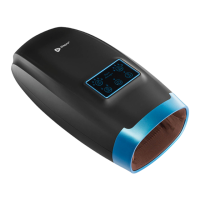
Base of Remote Control
Port for Left Air Pressure
Hose Connector
Port for DC
Charging Adapter
Port for Right Air Pressure
Hose Connector