TESTING
When you are ready to take a test,
the rst step is turning your ignition
switch to the “ON” position.
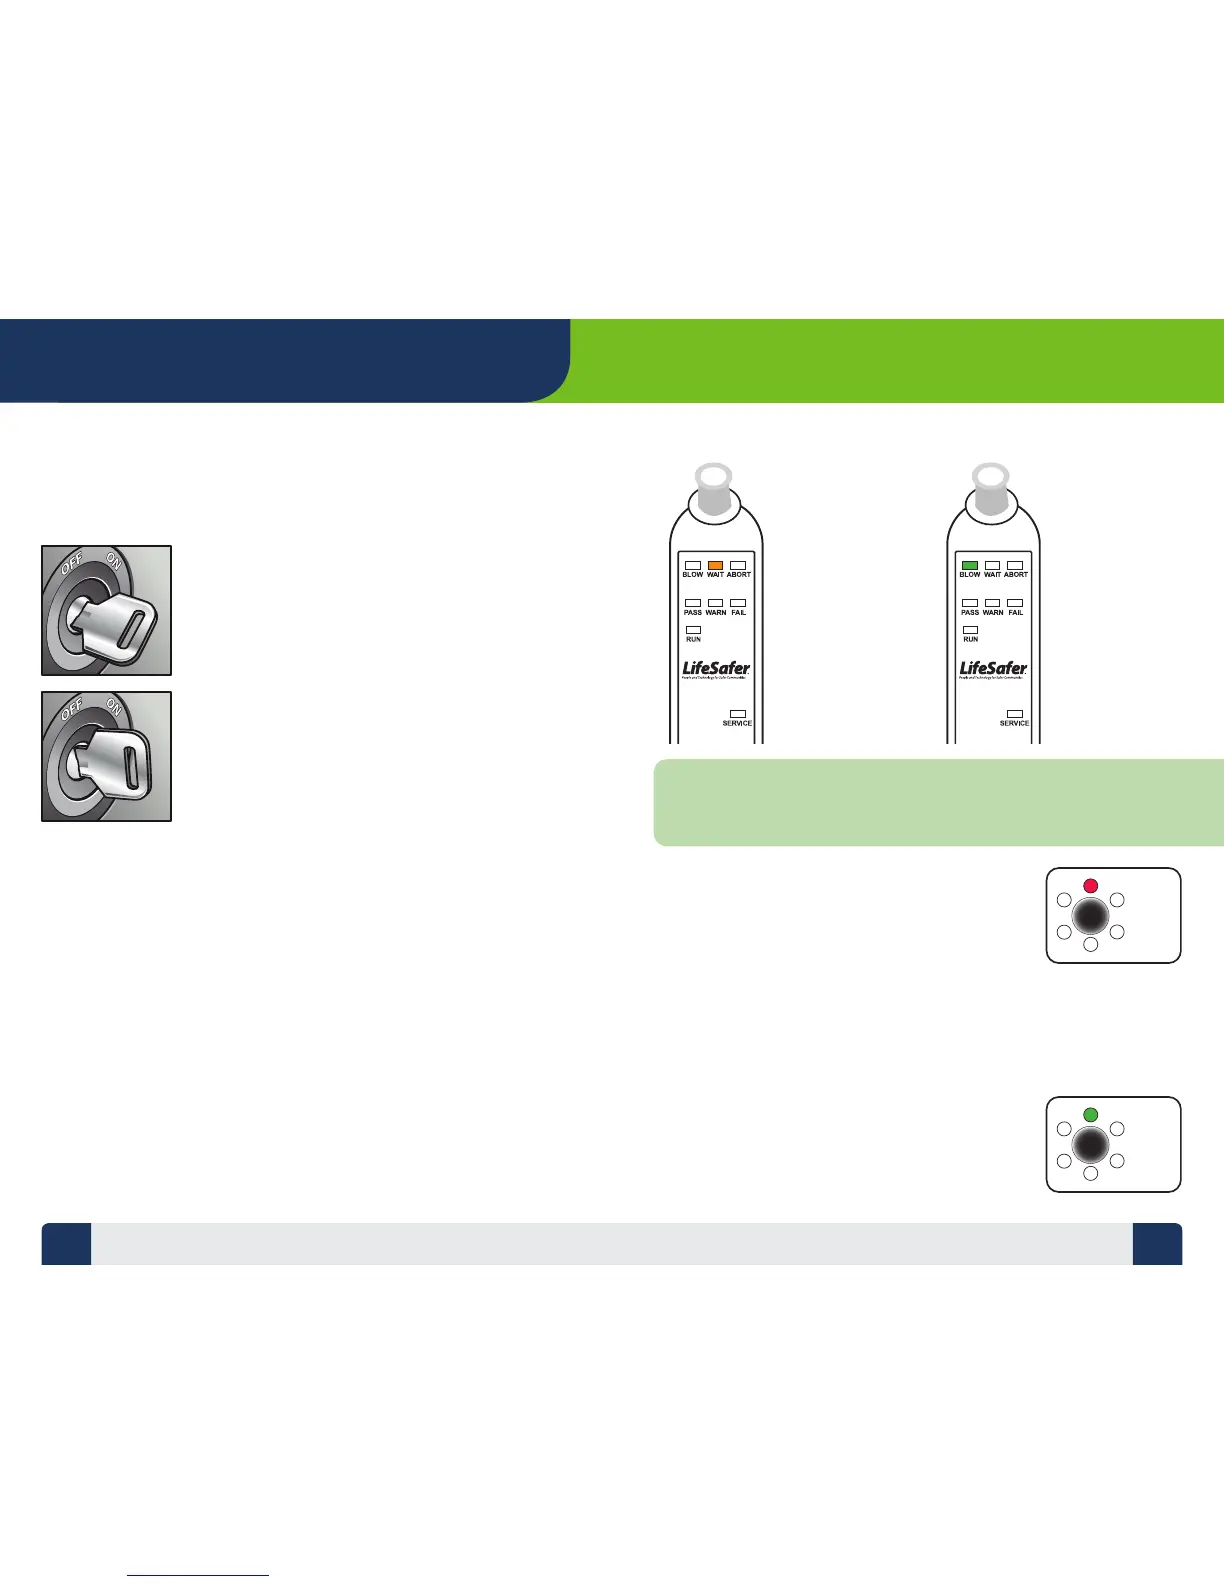
Once the Device wakes up and the
WAIT light glows orange, turn the
key back to the “OFF” position.
TIME TO TEST
You must complete a breath test that indicates your Breath Alcohol
Content (BrAC) is below the fail point required by the state before it
will allow you to start your vehicle.
Camera Light (Red)
While the WAIT light is ashing and the Handset is emitting a
“BLAP BLAP” sound, the red light on the Camera will be on,
indicating that the target on the Handset has not
been detected.
Hold the Handset within 4-8 inches of the Camera module,
gripping the Handset at the bottom with the target in clear
view of the Camera module. You may have to slowly wave
the Handset around in front of the Camera module to detect
the target.
Camera Light (Green)
When the target tracking feature is turned on and the
Camera is successfully tracking the Handset during the
test period, the green light on the Camera will illuminate.
TAKING A TEST
Wait Light
(Orange)
Once a test has
been initiated,
the WAIT light
glows indicating
the sensor is
warming up,
and the Handset
is preparing to
accept a breath
test.
Blow Light
(Green)
Once the
sensor is
ready for a
test the Green
BLOW light
comes on.
NOTE:
Under normal operating conditions, the WAIT light stays on momentarily
while the sensor warms up. If you are operating your Device in extremely cold
temperature conditions (-40°F), the Device can take up to 4 minutes to warm-up.
7 8