8
6
Place Preprogammed Motion Sensor (if included)
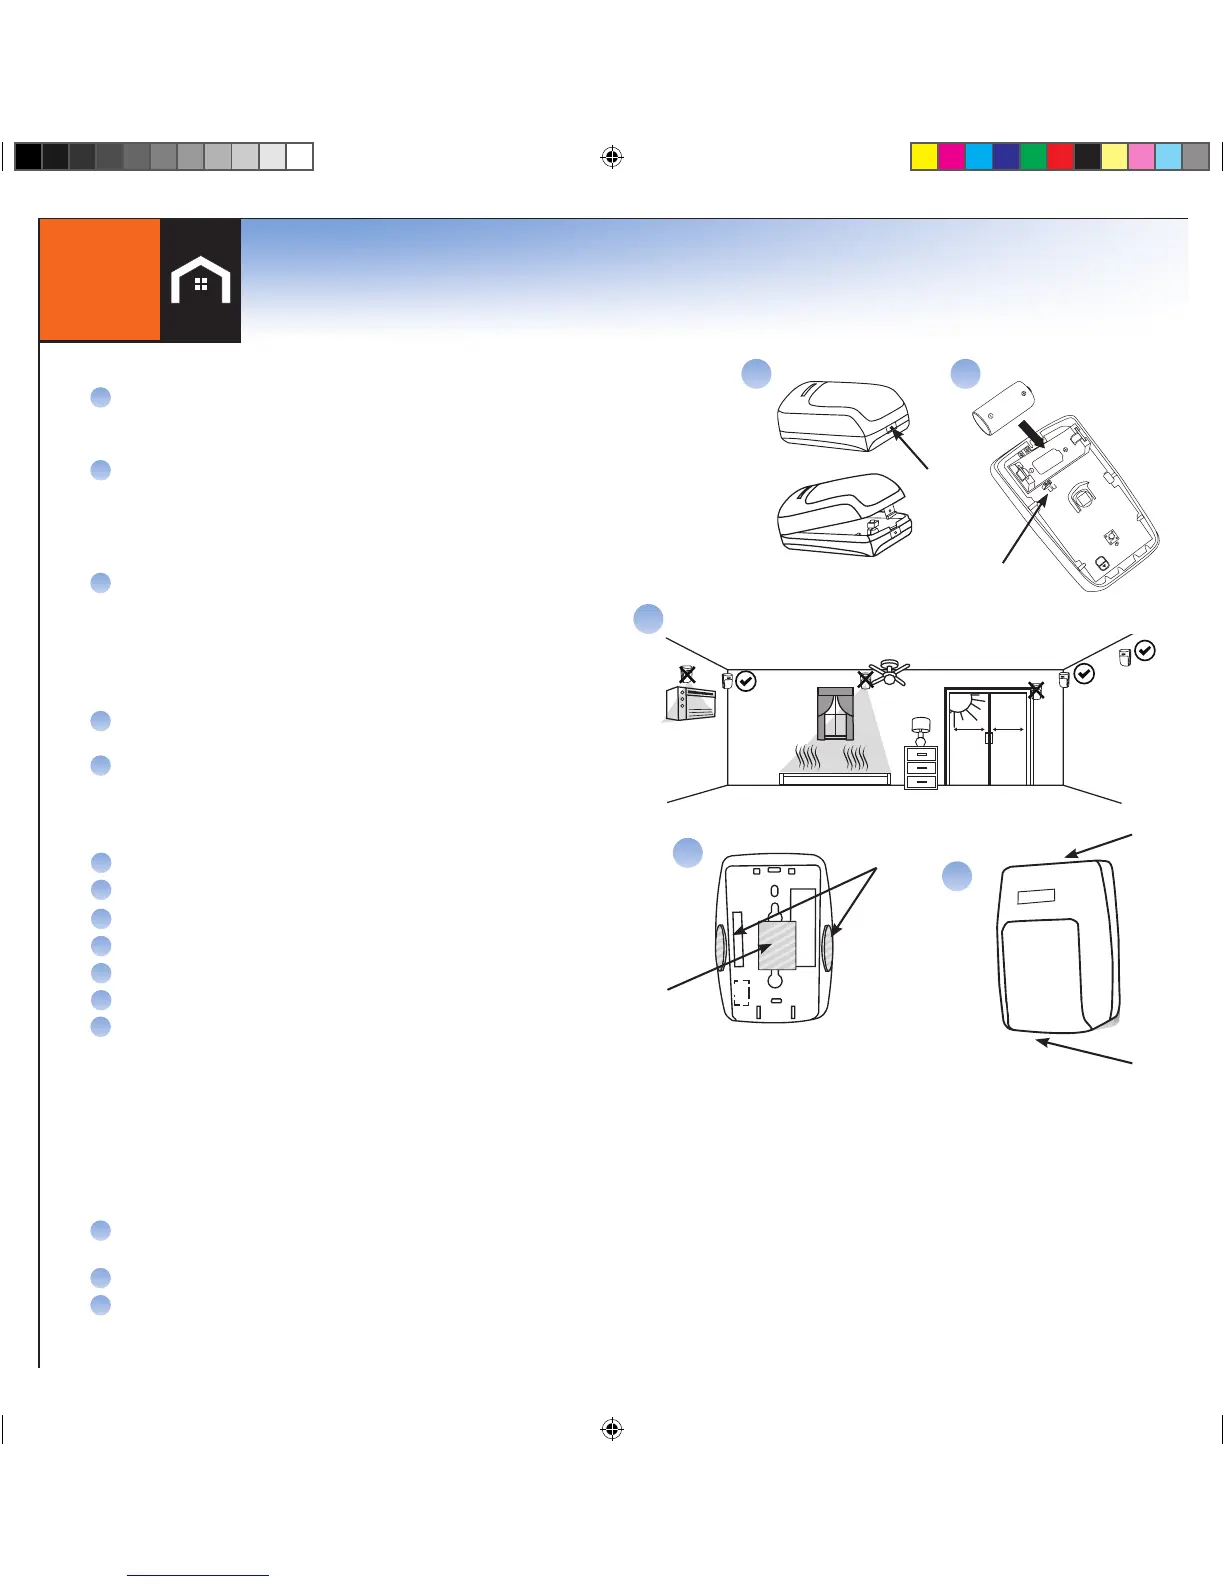
Prepare Motion Sensor
A
B
Separate the Front and Back Covers of the Motion Sensor by pressing the
tab with your finger or the top of a pen (Figure A). Insert the battery.
Select the desired sensitivity. As shown in Figure B, place the jumper over
both pins for Normal Sensitivity, or place the jumper over just one pin for
High Sensitivity. In most cases, Normal Sensitivity is the recommended
setting. This can always be changed later if your experience shows the
Normal is not meeting your needs
Press
A
B
Battery
Sensitivity
Jumper
Tape For
Corner Mount
Tape For
Wall Mount
D
C
Place the Motion Sensor
Place the Motion Sensor following the location
recommendations (check marked locations) shown in Figure
C. Avoid the example locations marked with the “X” which are
household areas that typically cause false alarms, such as heat,
air conditioning, fans, or direct sunlight. The recommended
mounting height is 7.5 feet for both coverage and pet
immunity purposes
Apply the 3M adhesive tape in the locations shown in Figure D
for corner mounting or wall mounting
The rounded end of the Motion Sensor that has the release
tab is the bottom of the sensor, which should be closest to the
floor when installed properly.
C
D
E
E
Top
Bottom
Add Additional Motion Sensors
On the Handset or Console, press MENU.
Scroll to Security Setup, press SELECT
Enter the Master Code*
Scroll to Sensors, press SELECT.
Scroll to <Add New>, press SELECT.
Scroll to Motion, press SELECT.
Following the instructions displayed on the LCD screen:
- Wait 5 seconds
- If the display reads “Un-clip Sensor from Bracket”, insert the battery into the Motion Sensor.
- If the display reads “Insert Battery”, insert the battery into the Motion Sensor observing correct
polarity as shown in Figure B. (You will have 30 seconds to complete this step.)
A
G
B
C
D
E
F
When the Motion Sensor has successfully been added you will hear 4 fast confirmation beeps from the
LifeShield system. If there are no confirmation beeps, remove the battery from the Motion Sensor then
re-insert the battery into the Motion Sensor to cause another power-up registration message to be sent.
Once the Motion Sensor has been added to the LifeShield system:
Use the Edit feature to rename the device (if desired). Press DELETE to erase text
and the keypad keys to type new text.
Press OK, then press BACK until the Main Menu is displayed.
Re-attach the Front and Back Covers of the Motion Sensor.
H
I
J
*NOTE: WHEREVER MASTER CODE IS SHOWN PLEASE USE YOUR UNIQUE MASTER CODE FOUND IN THE FRONT COVER OF THIS BOOK
 Loading...