b. Ifanextensioncordis needed,useonlya 14-gaugegeneral-purposecordoffivefeetor lessinlength.
c. If thewalkingbeltis overtightenedotreadmillperformance
maydecreaseandthewalkingbeltmaybepermanently
damaged.RemovethesafetykeyandUNPLUGTHE
POWERCORD. Usingthe allenwrench,turnbothrear
rolleradjustmentboltscounterclockwise,1/4of a turn.
Whenthewalkingbeltis properlytightened,youshould
beableto lift eachsideof thewalkingbelt3-4inchesoff
thewalkingplatform. The centerof thewalkingbelt
shouldjust touchthe walkingplatform. Becarefulto
keepthe walkingbeltcentered. Plugin thepowercord,
insertthesafetykey and runthe treadmillfora few min-
utes. Repeatuntilthe walkingbeltis properlytightened.
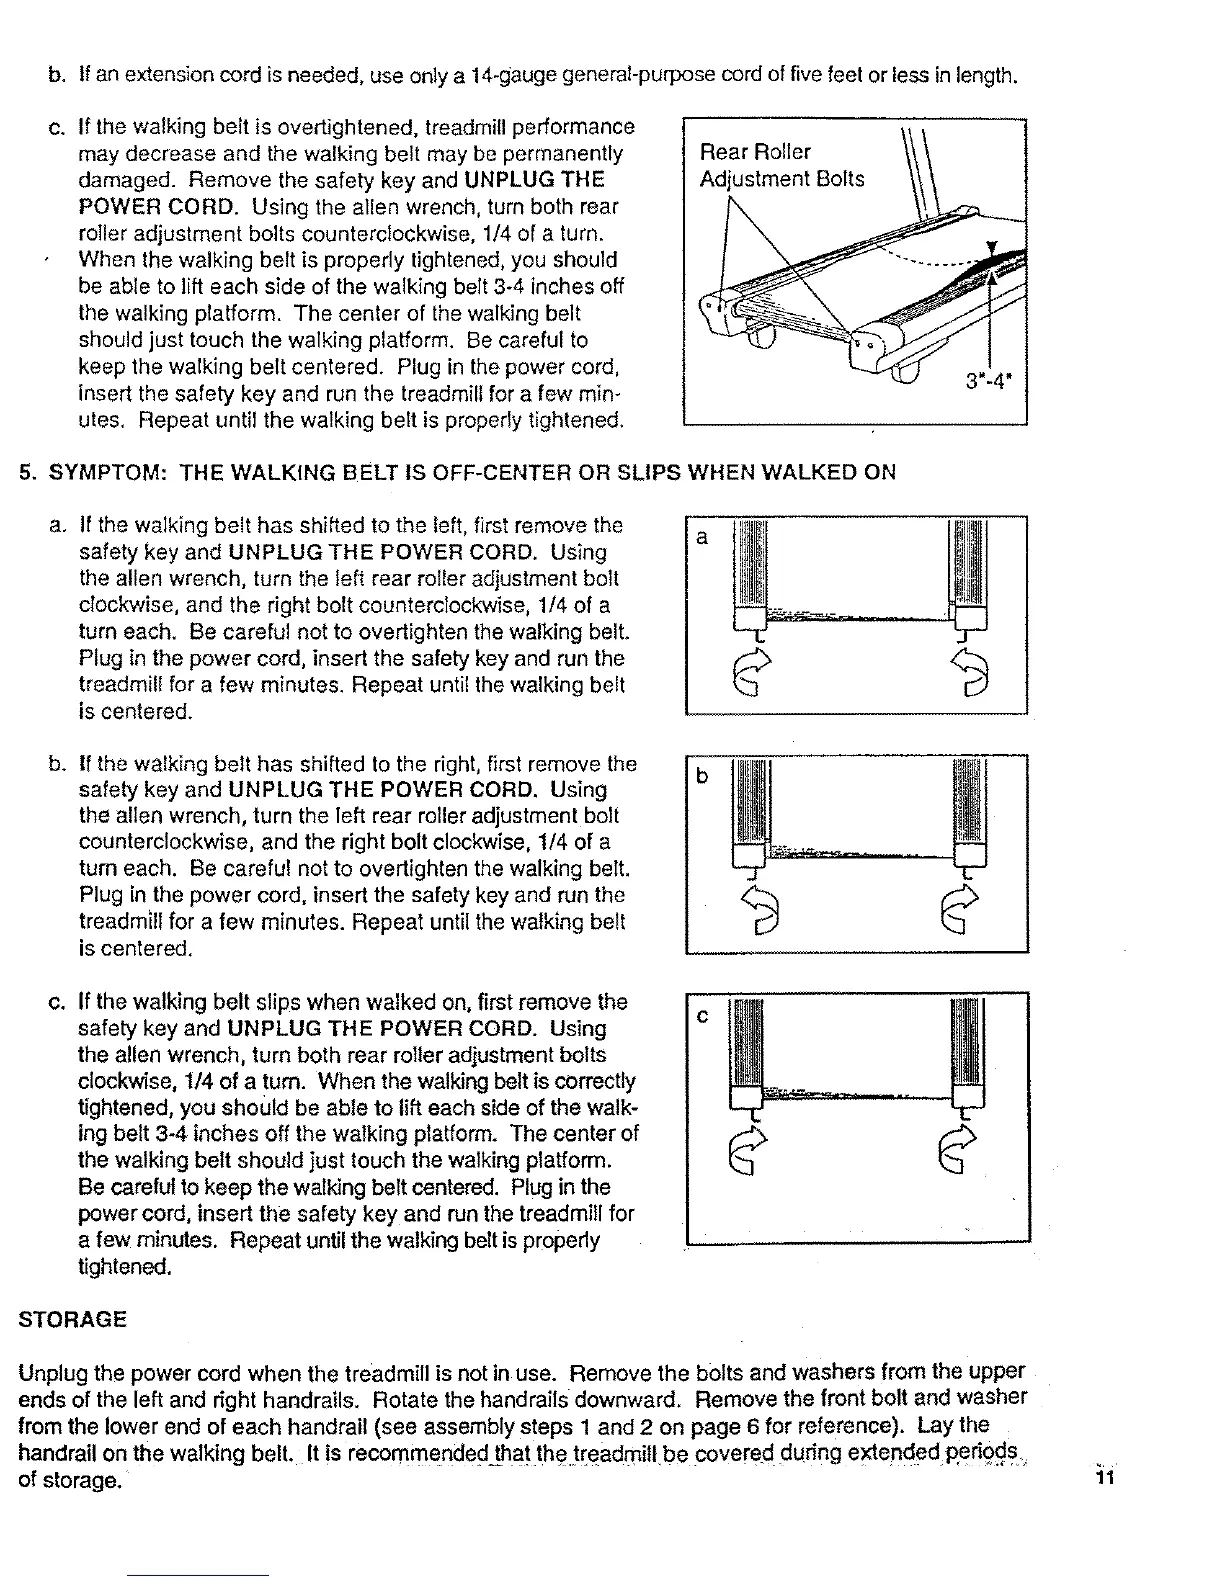
RearRoller
AdjustmentBolts
5. SYMPTOM:THE WALKtNGBELTIS OFF-CENTERORSLIPSWHENWALKEDON
a. Ifthe walkingbelthasshiftedtothe left,firstremovethe
safetykeyand UNPLUGTHE POWERCORD. Using
theallenwrench,turn theleftrearrolleradjustmentbolt
clockwise,andthe rightboltcounterclockwise,1/4of a
turneach. Becarefulnotto overtightenthewalkingbelt.
Pluginthe powercord,insertthe safetykeyandrunthe
treadmillfora few minutes.Repeatuntilthewalkingbelt
is centered.
a
b. If the walking belt has shifted to the right, first remove the
safety key and UNPLUG THE POWER CORD. Using
the allen wrench, turn the left rear roller adjustment bolt
counterclockwise, and the right bolt clockwise, 1/4 of a
turn each. Be careful not to overtighten the walking belt.
Plug in the power cord, insert the safety key and run the
treadmill for a few minutes. Repeat until the walking belt
is centered.
b
L
c. If the walking belt slips when walked on, first remove the
safety key and UNPLUG THE POWER CORD. Using
the allen wrench, turn both rear roller adjustment bolts
clockwise, 1/4 of a turn. When the walking belt is correctly
tightened, you should be able to lift each side of the walk-
ing belt 3-4 inches off the walking platform. The center of
the walking belt should just touch the walking platform.
Be careful to keep the walking belt centered. Plug in the
power cord, insert the safety key and run the treadmill for
a few minutes. Repeat until the walking belt is properly
tightened.
STORAGE
C
Unplug the power cord when the treadmill is not in use. Remove the bolts and washers from the upper
ends of the left and right handrails. Rotate the handrails downward. Remove the front bolt and washer
from the lower end of each handrail (see assembly steps 1 and 2 on page 6 for reference). Lay the
handrail on the walking belt. It is recommended that the,!reada3iU be covere d during extended perigds
of storage.
11
 Loading...