TOOLS AND HARDWARE REQUIRED FOR THIS PAGE
27
SEC
SEC
SEC
2.15
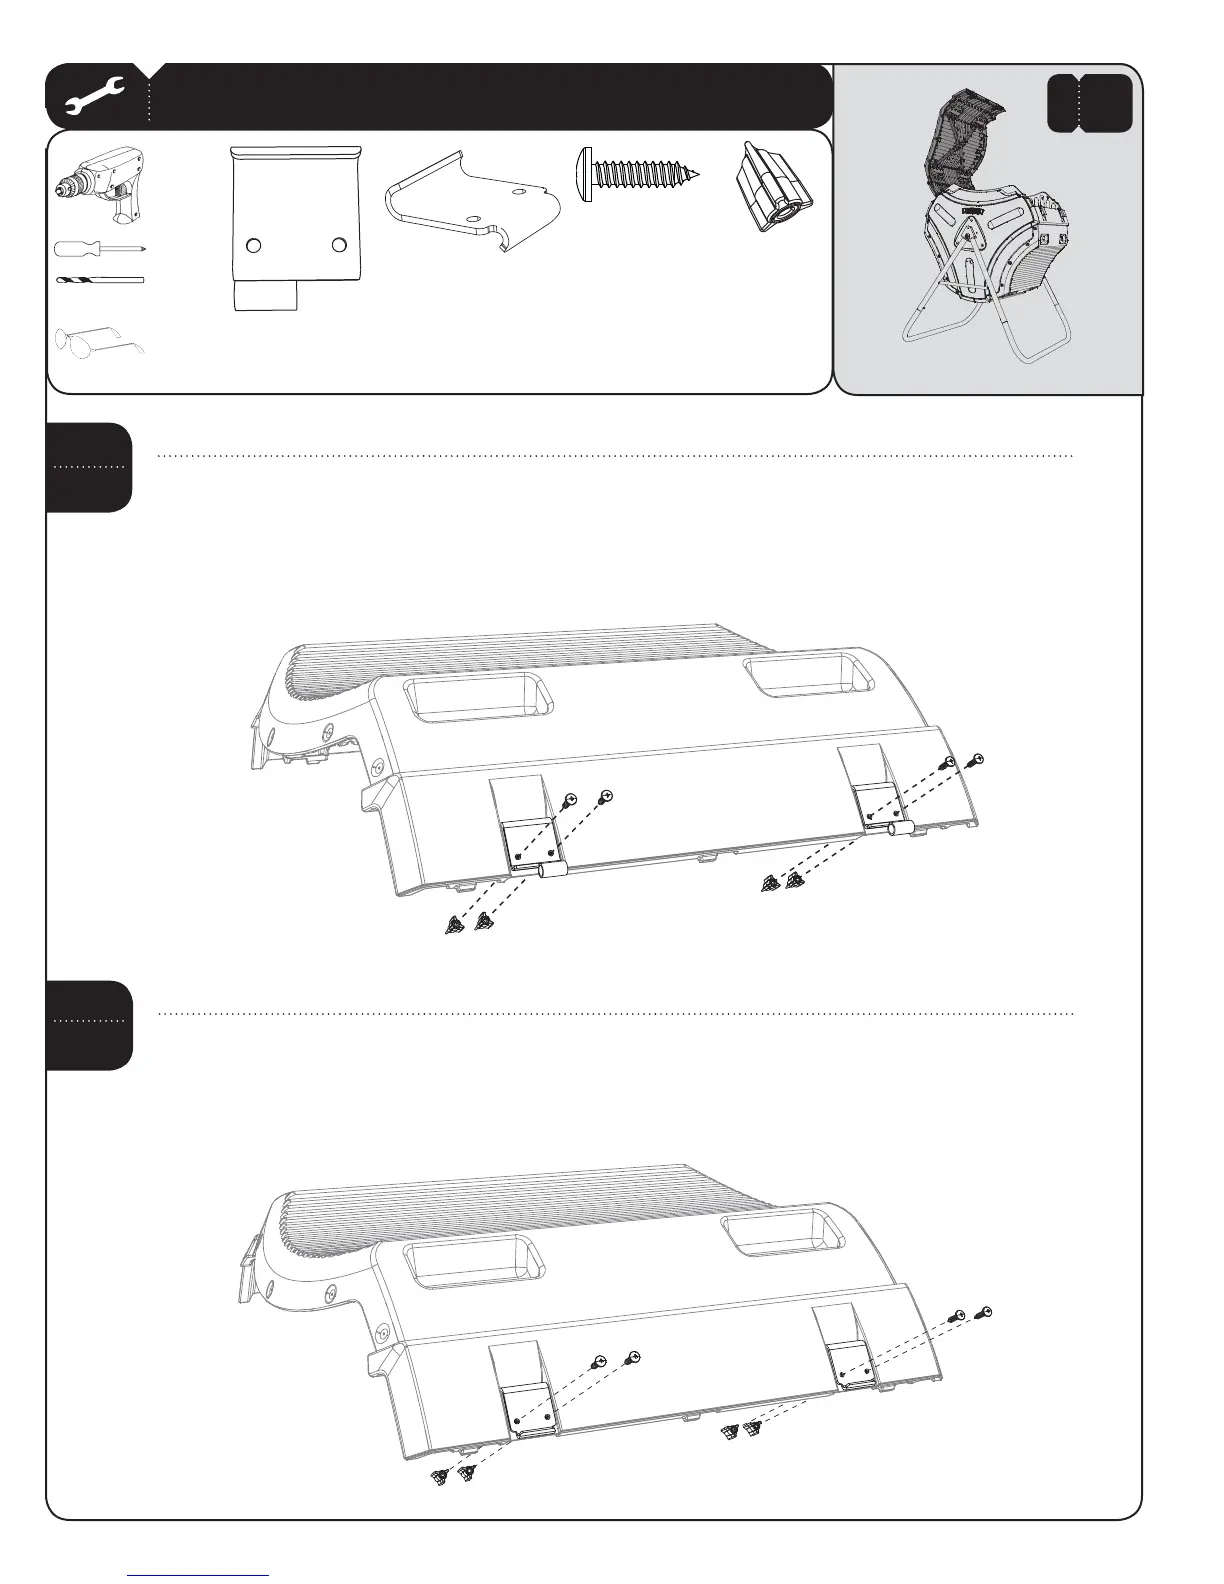
Place two Hinge Tubes (BJB)ONTOTHELid (BHN)ATTHELOCATIONSSHOWN$RILLTWOvHOLESINTOTHEHOLESINEACH
(INGE4UBEANDTHROUGHTHE,ID4HENINSERTFOURXv0HILLIPS0AN(EAD3CREWS!$7. It’s OK if the Screws
(ADW) spin freely at this point. Do not worry about stripping the plastic. &INALLYplace a Plastic Nut (BHK)OVEREACH3CREW
ANDCONTINUETIGHTENINGTHE3CREWSBYHANDUNTILTHE0LASTIC.UTSlTTIGHTANDmUSHAGAINSTTHE,IDTighten the
Screws (ADW) into the Plastic Nuts (BHK) with a screwdriver only. Do not overtighten.
BHK
ADW
BHN
BJB
BJB
BIZ
BIZ
ADW
ADW
ADW
BHK
BHK
BHK
BHKX
ADWX
2
BIZX
BJBX
Place two Latch Hooks (BIZ)ONTOTHEOPPOSITEENDOF,IDATTHELOCATIONSSHOWN$RILLTWOvHOLESINTOTHE
HOLESINEACH,ATCH(OOKANDTHROUGHTHE,ID4HENINSERTFOURXv0HILLIPS0AN(EAD3CREWS!$7. It’s
OK if the Screws (ADW) spin freely at this point. Do not worry about stripping the plastic. Place a Plastic Nut (BHK)OVEREACH
3CREWANDCONTINUETIGHTENINGTHE3CREWSBYHANDUNTILTHE0LASTIC.UTSlTTIGHTANDmUSHAGAINSTTHE,ID
Tighten the Screws (ADW) into the Plastic Nuts (BHK) with a screwdriver only. Do not overtighten. Set aside for later.
ARAX