43
TOOLS AND HARDWARE REQUIRED / OUTILS ET QUINCAILLERIE REQUIS / INSTRUMENTAL Y HERRAJE REQUERIDOS
X SECTION 8 (CONTINUED) / SECTION 8 (SUITE) / SECCIÓN 8 (CONTINUACIÓN)
ADZ (x25)
AIW (x1)
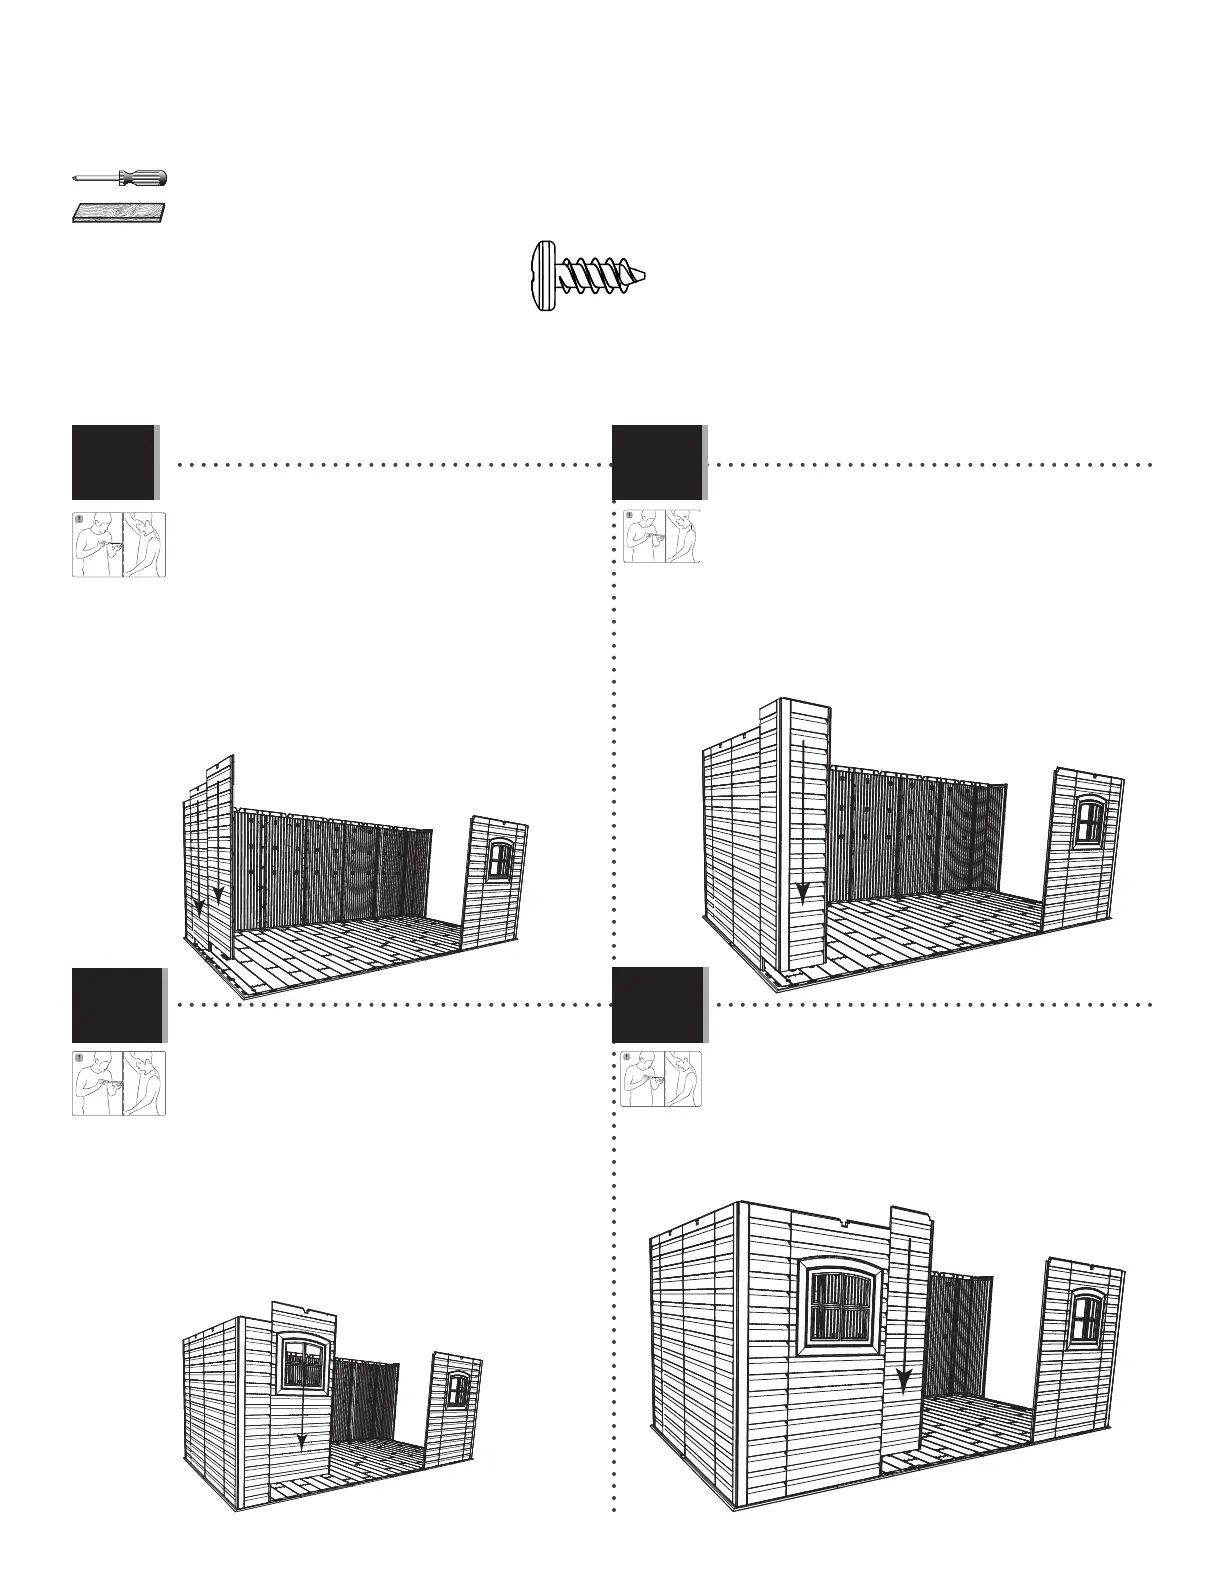
8.9
8.10
AGL
AHD
AHD
• Insert Wall Panels (AHD) along the left side of the
Floor one at a time, and slide them toward the
rear. Secure with Screws (ADZ).
• Insérez les panneaux muraux (AHD) le long du bord
gauche du plancher un par un, et glissez-les vers
la partie arrière du plancher. Attachez-les bien à
l’aide des vis (ADZ).
• Inserte los últimos paneles murales (AHD) a lo
largo del borde izquierdo del piso uno por uno, y
deslícelos hacia la parte trasera del piso. Sujételos
los unos con los otros usando los tornillos (ADZ).
• For the left, front Corner Panel (AGL), repeat the
step you did for the right, front Corner Panel.
• Pour le panneau angulaire (AGL) avant gauche,
répétez les étapes que vous avez réalizé pour le
panneau angulaire avant droit.
• Para el panel angular (AGL) delantero izquierdo,
repita los pasos que se efectuaron para el panel
angular delantero derecho.
• Insert the Window Wall Panel (AHH) into the next
four slots, and slide the Panel to the left. Secure
the two Panels together with fi ve Screws (ADZ).
• Insérez le panneau pour la fenêtre (AHH) dans les
quatre rainures suivantes, et faites glisser le
panneau à gauche. Attachez bien les panneaux à
l’aide de cinq (5) vis (ADZ).
• Inserte el panel para la ventana (AHH) en las
próximas cuatro ranuras, y deslice el panel a la
izquierda. Sujete los paneles usando cinco (5)
tornillos (ADZ).
AHH
CKK
• Insert the Left Half-Wall Panel (CKK), slide it to the
left, and secure with Screws (ADZ).
• Insérez le panneau étroit gauche (CKK), glissez-le à
gauche, et attachez-le à l’aide des vis (ADZ).
• Introduzca el panel izquierdo angosto (CKK), deslícelo
a la izquierda, y suejtelo usando tornillos (ADZ).
8.12
8.11