36
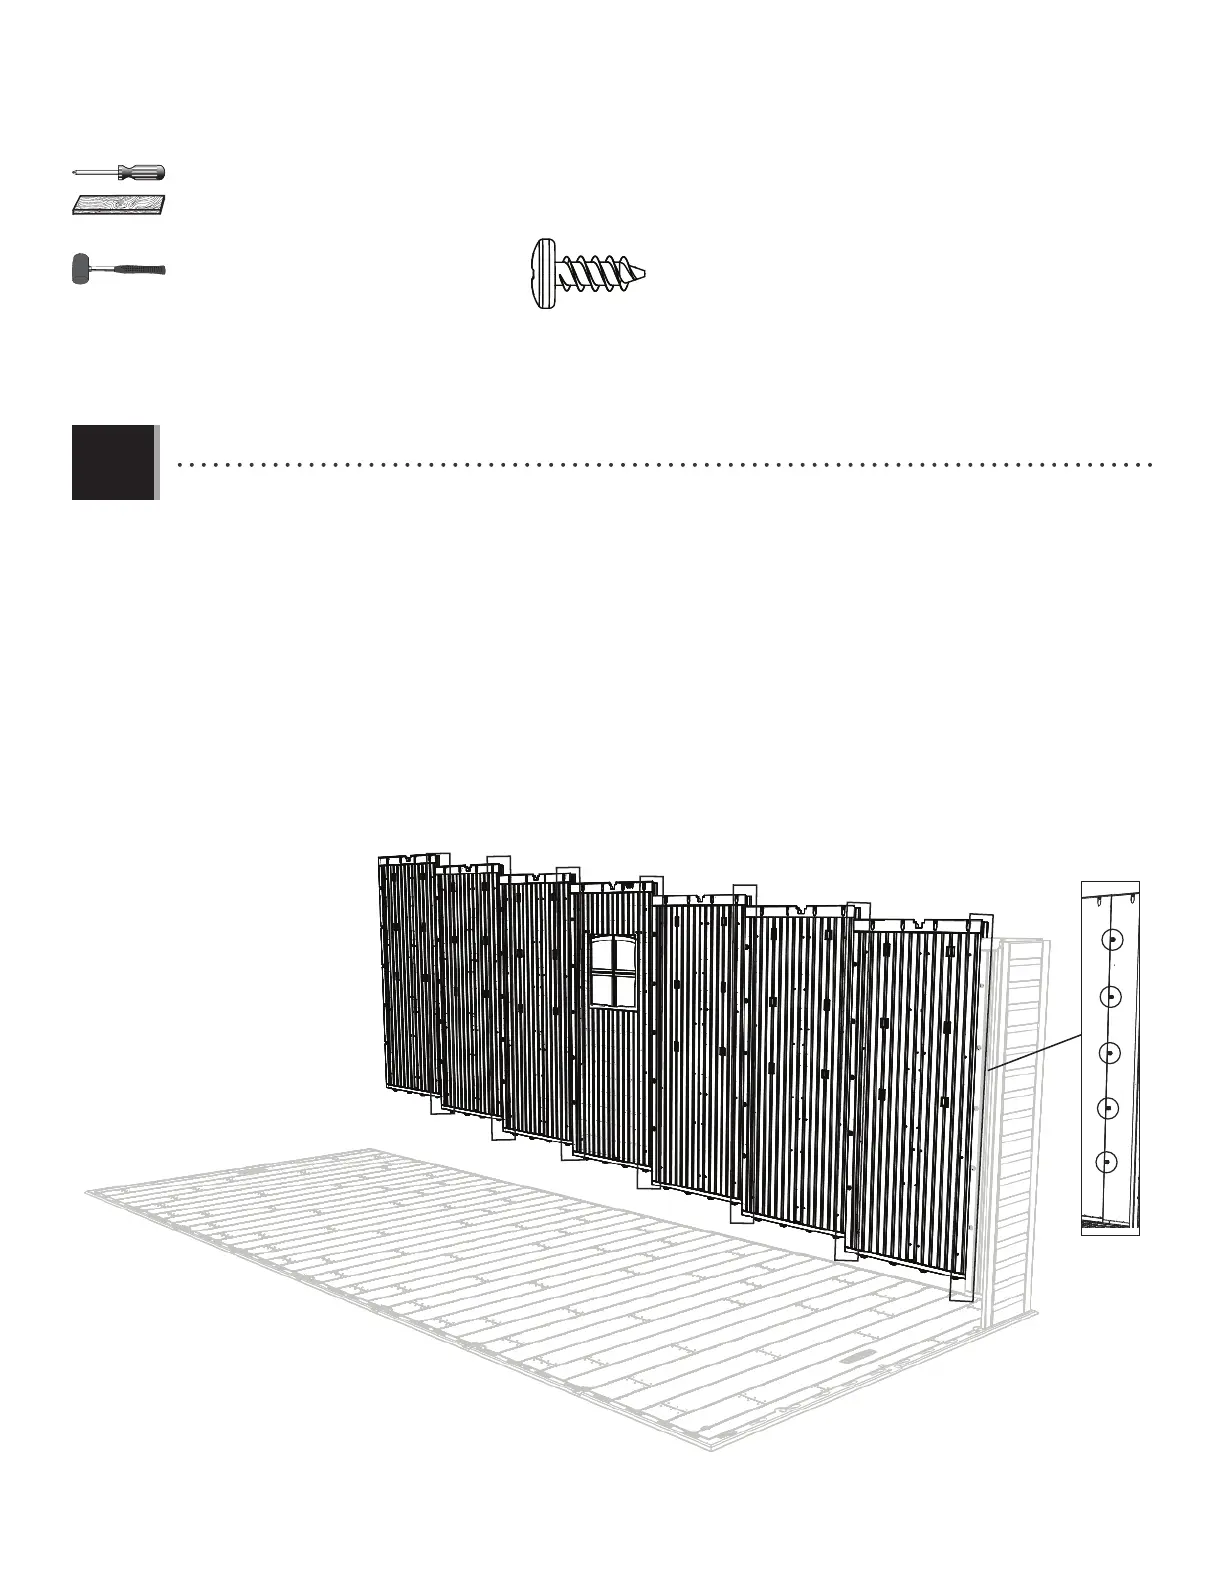
TOOLS AND HARDWARE REQUIRED / INSTRUMENTAL Y HERRAJE REQUERIDO / OUTILS ET QUINCAILLERIE REQUIS
X SECTION 7 (CONTINUED) / SECCIÓN 7 (CONTINUACIÓN) / SECTION 7 (SUITE)
AHD
AHD
AHH
AHD
AHD
AHD
AHD
7.4
• One at a time, insert the four tabs at the bottom of the Wall Panels (AHD) or Window Wall Panels (AHH) into the next four
slots along the edge of the Floor, and slide the Panels forward. Insert the Window Wall Panels on either side of the Shed.
You may need to use a rubber mallet and the block of wood to gently tap the Panel forward. Attach the Panels together with fi ve
(5) Screws (ADZ).
• Uno por uno, inserte las cuatro lengüetas al borde inferior de los Paneles murales (AHD) o Paneles murales para la
ventana (AHH) en las cuatro ranuras siguientes a lo largo del borde del Piso, y deslice los Paneles hacia el borde
delantero. Inserte los Paneles murales para la ventana en cualquiera de los dos lados de la caseta. Puede que necesite usar un
mazo de goma y el bloque de madera para dar un golpecito al Panel para ubicar cuidadosamente el Panel en su lugar. Sujete los
Paneles los unos a los otros usando cinco (5) Tornillos (ADZ).
• Un par un, insérez les quatre languettes au bord inférieur des Panneaux muraux (AHD) ou Panneaux muraux pour la
fenêtre (AHH) dans les quatre rainures suivantes le long du bord du Plancher, et glissez les Panneaux vers le bord
avant. Insérez les Panneaux muraux pour la fenêtre soit le côté droit soit le côté gauche de l’abri. Vous pouvez utiliser un maillet en
caoutchouc et le bloc en bois pour mettre en place les Panneaux. Attachez les Panneaux l’un à l’autre à l’aide de cinq (5)
Vis (ADZ).
ADZ (x35)
AIW (x1)
4