79
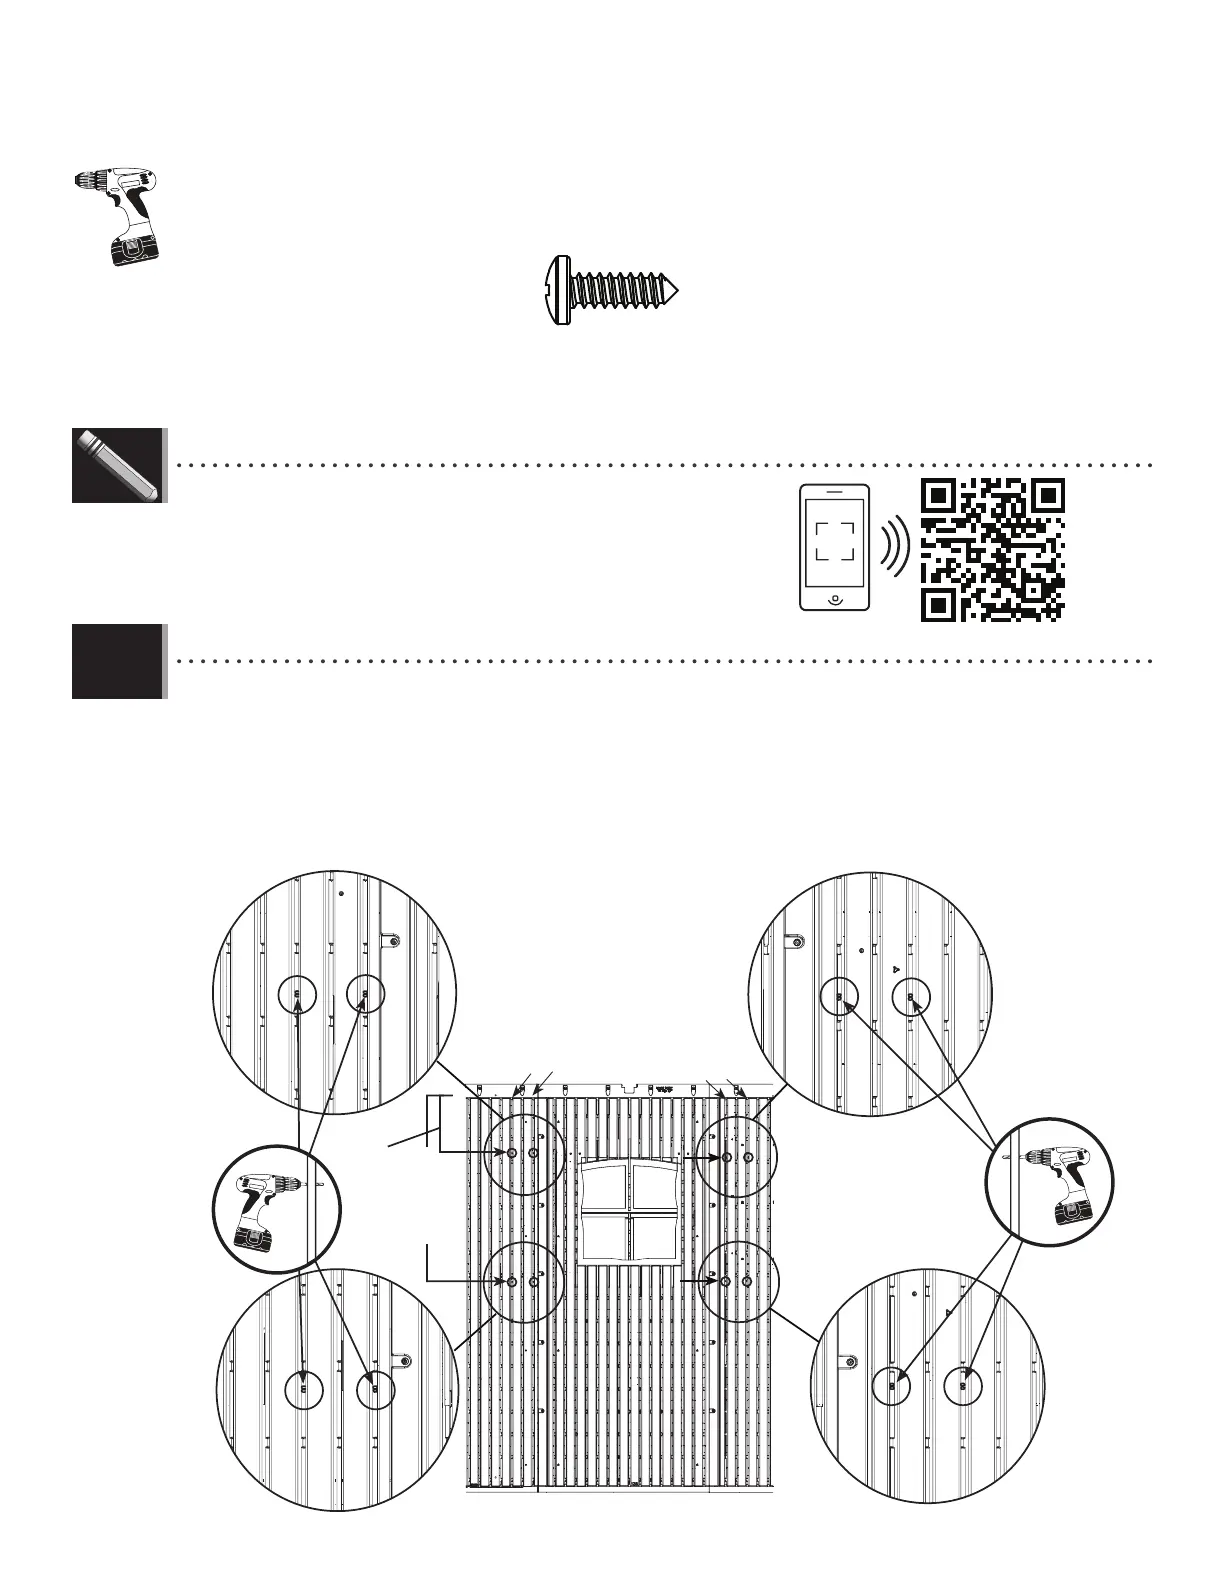
TOOLS AND HARDWARE REQUIRED / INSTRUMENTAL Y HERRAJE REQUERIDO / OUTILS ET QUINCAILLERIE REQUIS
X SECTION 13 (CONTINUED) / SECCIÓN 13 (CONTINUACIÓN) / SECTION 13 (SUITE)
13.1
9 1/2” (24,13 cm)
32 1/4” (81,92 cm)
#1
#1
#3
#3
• If you have trouble with this section, follow the code below to view a video on how to install
the Shutters.
• Si tiene problemas con esta sección, siga el código debajo para ver un video sobre la
instalación de las Contraventanas.
• Si vous avez des problèmes avec cette section, suivez le code en bas pour voir un vidéo sur
l’installation des Volets.
http://go.lifetime.com/8horizshutter
LIFETIME
©
• There are four sets of two screw location indicators. The measurements are shown to help you locate them. One by one,
insert the Screws (ARV) through the indicators from the inside of the shed outward, and attach the Shutters (AYI) to the
outside of the Wall Panels. See step 13.2–13.3
• Hay cuatro juegas de dos indicadores para la ubicación del tornillo. Las medidas indican donde se los pueden hallar.
Uno por uno, inserte los Tornillos (ARV) por los indicadores del interior al exterior, y sujete las Contraventanas (AYI) al
exterior de los Paneles murales. Vea el paso 13.2–13.3.
• Il y a quatre groupes de deux indicateurs pour l’emplacement de la vis. Les mesures indiquent où vous pouvez les
trouver. Une par une, insérez les Vis (ARV) à travers les indicateurs de l’intérieur à l’extérieur, et attachez les Volets
(AYI) à l’extérieur des Panneaux muraux. Voyez l’étape 13.2 – 13.3.
ARV (x1)