24
TOOLS AND PARTS REQUIRED / OUTILS ET PIÈCES REQUIS / INSTRUMENTAL Y HERRAJE REQUERIDOS
X SECTION 4 (CONTINUED) / SECTION 4 (SUITE) / SECCIÓN 4 (CONTINUACIÓN)
BYS (x1)
BYS
BYR
BYR (x1)
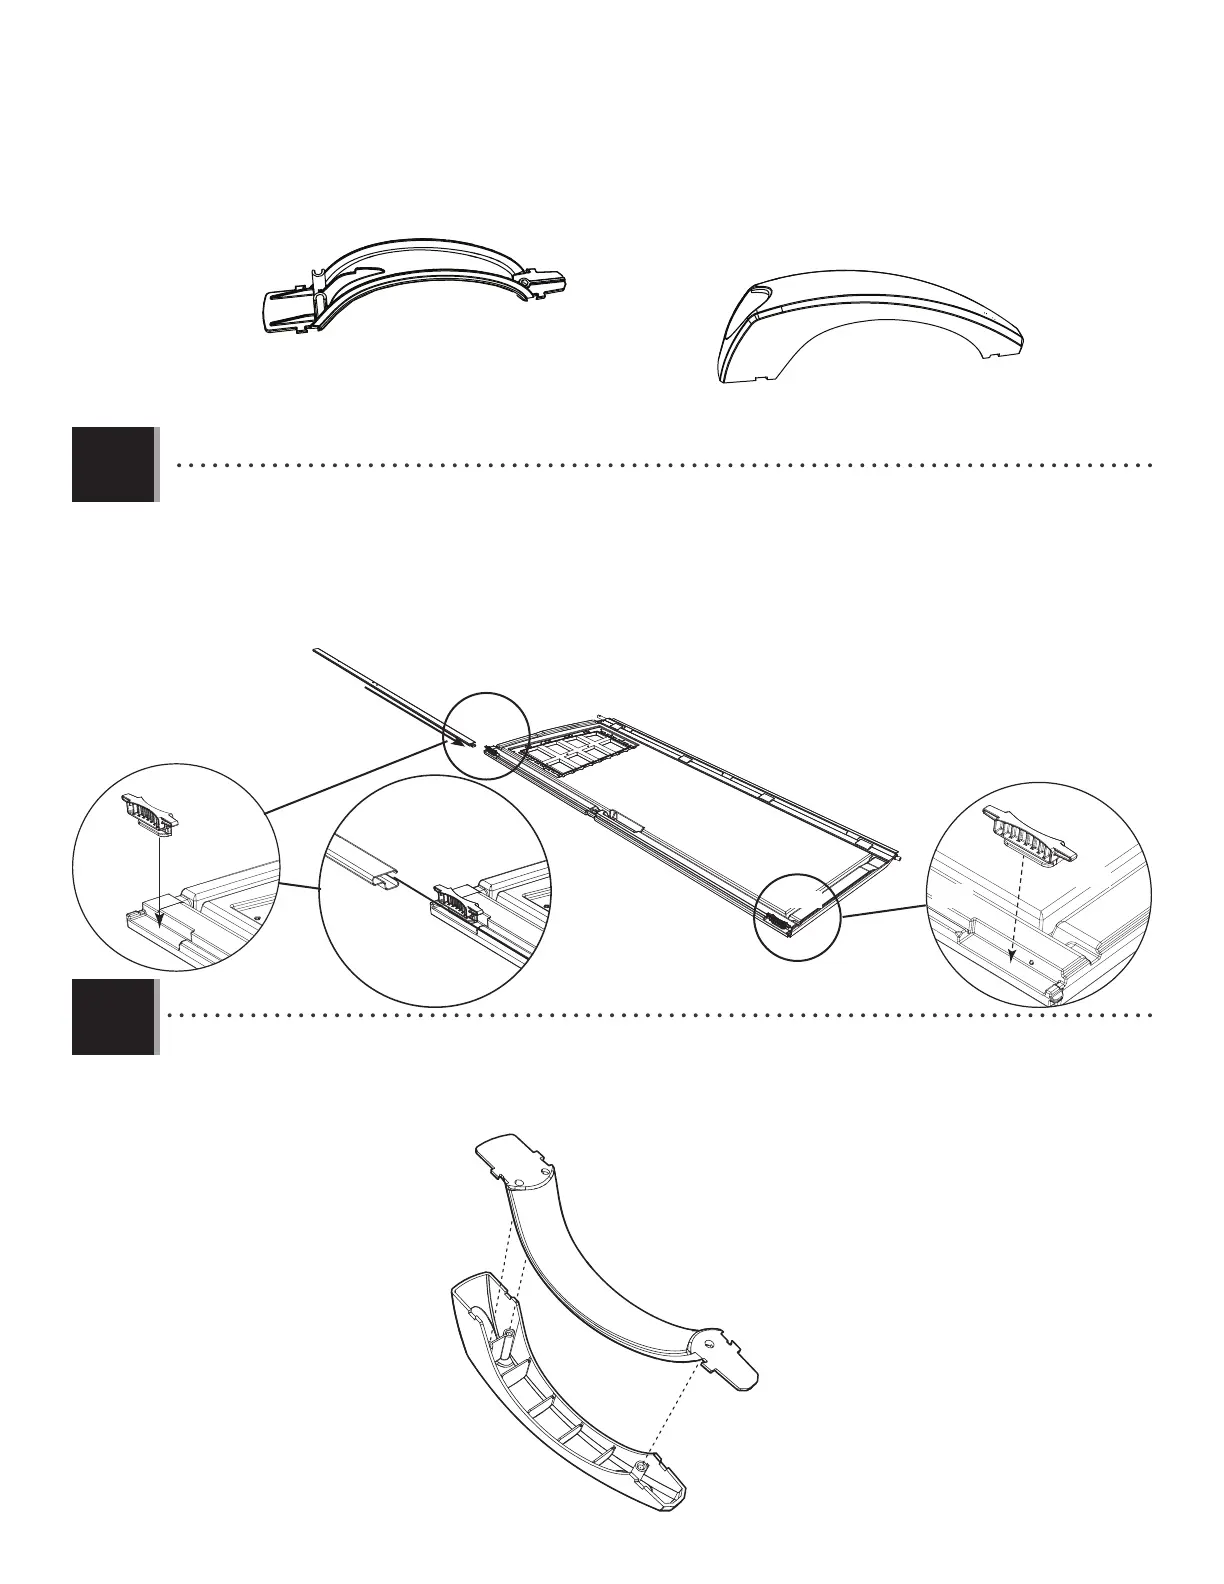
• Attach the two Handle Pieces (BYR & BYS) together as shown.
• Attachez les deux pièces de la Poignée (BYR et BYS) comme illustré.
• Conecte las dos piezas del Picaporte (BYR y BYS) como se muestra.
4.2
4.3
BLH
BLH
BLH
AHM
AHM
AHM
AHM
• Set the Deadbolts (AHM) down into the recesses at the top and bottom of the Door. Then, slide the Door End Channel
(BLH) over the edge of the Door and the bottom of the Deadbolts as shown.
• Mettez les loquets à pêne dormant (AHM) dans les espaces vides aux parties supérieure et inférieure de la porte.
Ensuite, faites glisser le canal de la porte (BLH) sur le bord de la porte et les parties inférieures des loquets à pêne
dormant comme illustré.
• Ponga los cerrojos (AHM) en los huecos a las partes superior e inferior de la puerta. Entonces, deslice el canal para el
borde de la puerta (BLH) sobre el borde de la puerta y las partes inferiores de los cerrojos come se muestra.
AHM