28
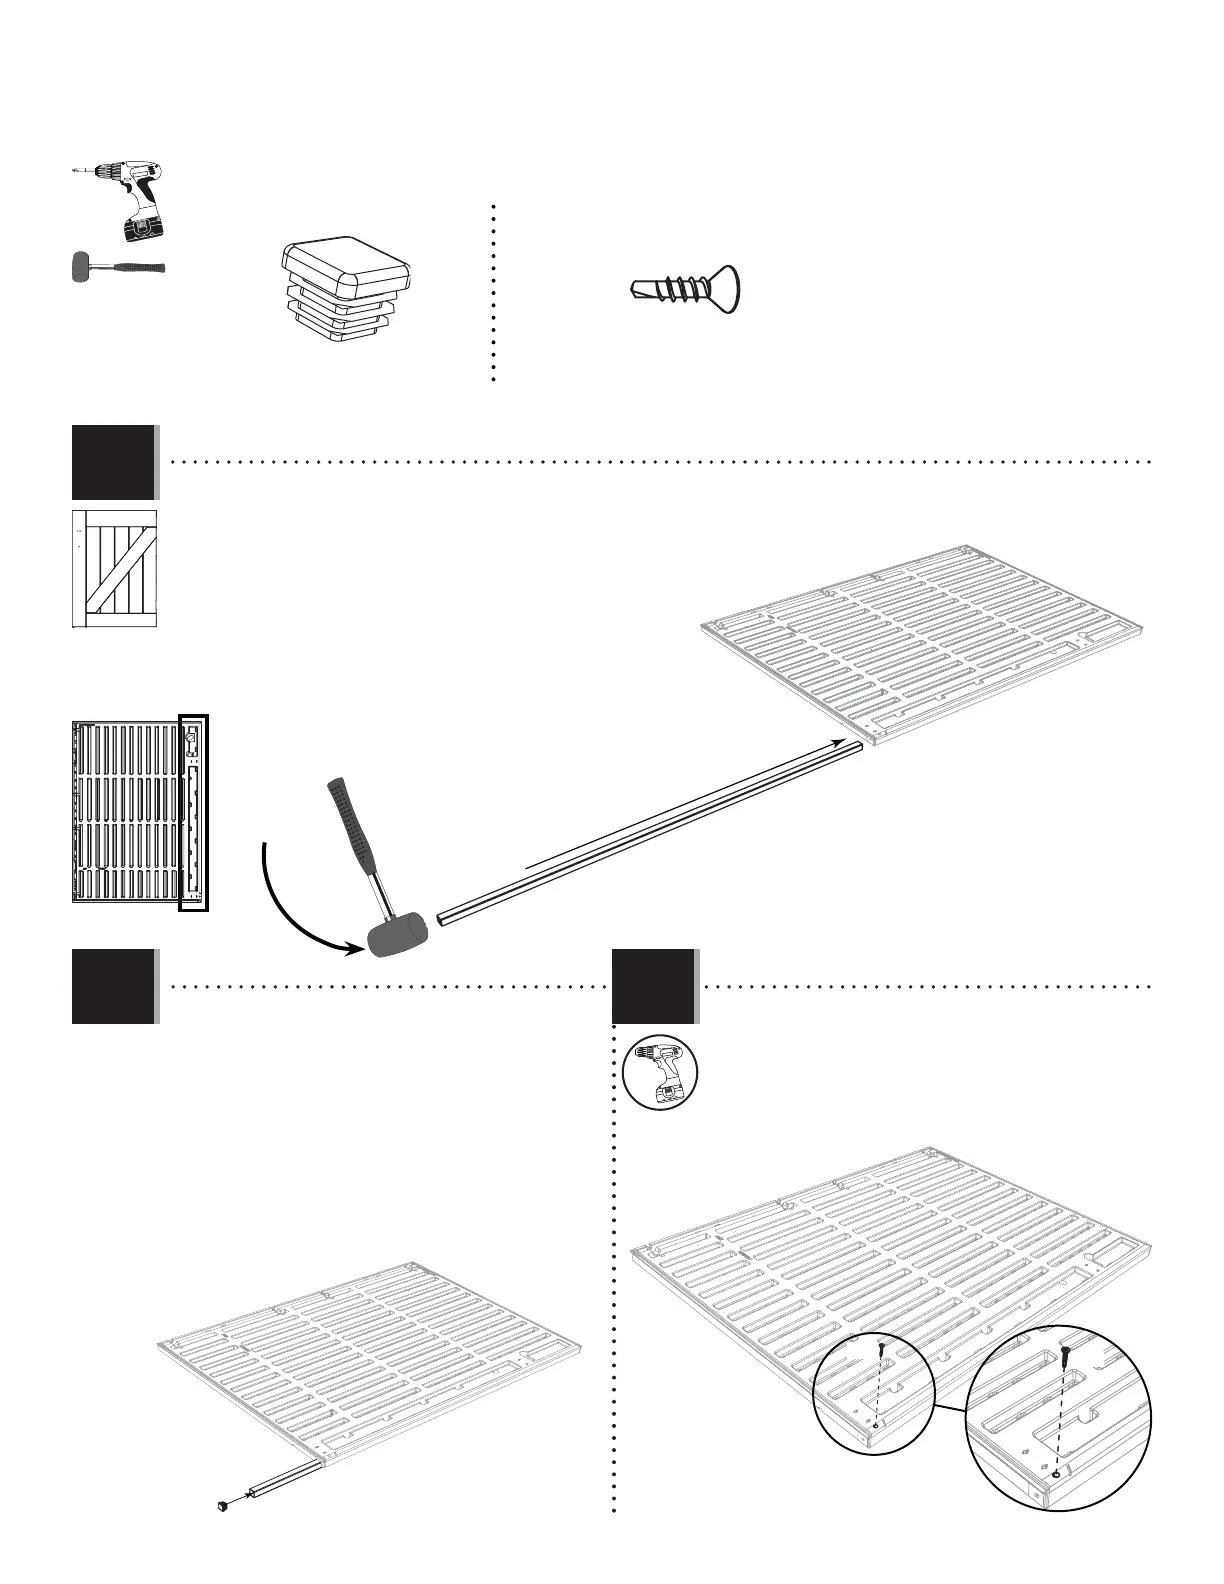
TOOLS & HARDWARE REQUIRED / OUTILS ET QUINCAILLERIE REQUIS / INSTRUMENTAL Y HERRAJE REQUERIDOS
X SECTION 2 (CONTINUED) / SECTION 2 (SUITE) / SECCIÓN 2 (CONTINUACIÓN)
AGZ
DWK
AGZ
2.8 2.9
2.7
AHS
DUL (x1)
AHS (x1)
DUL
DUL
• Slide the Tube (DWK) into the Right Door (AGZ) until it hangs out about six inches.
• Faites glisser le tube (DWK) dans la porte droite (AGZ) jusqu’à ce qu’il étende quinze centimètres.
• Deslice el tubo (DWK) dentro de la puerta derecha (AGZ) hasta que extienda unos quince centímetros.
• Insert the End Cap (AHS) into the end of the Tube.
Gently push the Tube into the Door until the Cap
is flush with the bottom of the Door.
• Insérez le capuchon (AHS) dans l’extrémité du
Tube. Faites glisser attentivement le tube dans la
porte jusqu’à ce qu’il soit au ras du bord inférieur
de la porte.
• Introduzca el tapón (AHS) en el extremo del tubo.
Deslice cuidadosamente el tubo en la puerta
hasta que el tapón esté a ras del borde inferior de
la puerta.
• Insert a Self-Drilling Screw (DUL) to secure the Tube
in place.
• Insérez une vis autoperforante (DUL) pour fixer le
tube en place.
• Inserte un tornillo auto-perforante (DUL) para sujetar
el tubo en su lugar.