12
TOOLS AND HARDWARE REQUIRED / OUTILS ET QUINCAILLERIE REQUIS / INSTRUMENTAL Y HERRAJE REQUERIDOS
X SECTION 2 (CONTINUED) / SECTION 2 (SUITE) / SECCIÓN 2 (CONTINUACIÓN)
ADK (x12)
ADK (x4)
DTK (x4)
DTK (x12)
3/8 in/po
(10 mm)
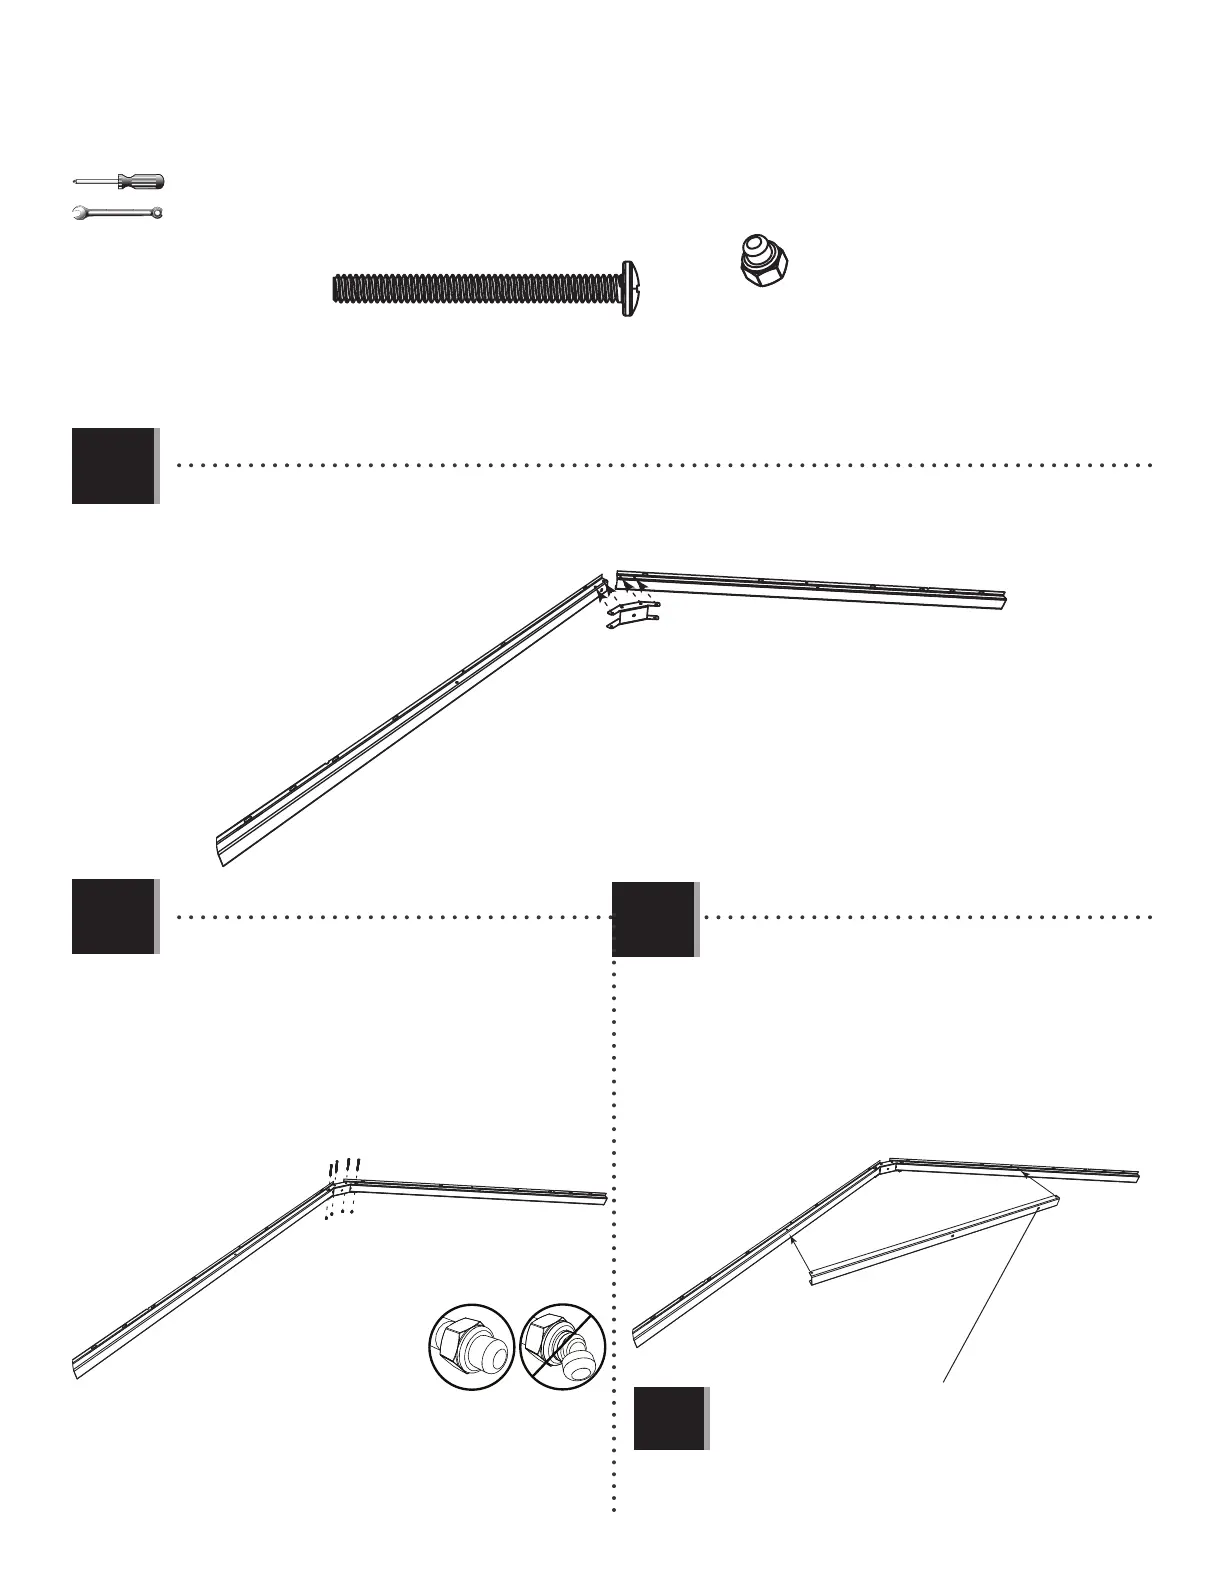
• Attach the Connector using the hardware
indicated. Do not overtighten the Cap Nuts.
• Attacher le raccord (AIP) à l’aide de la quincaillerie
indiquée. Ne pas serrer excessivement les écrous
borgnes.
• Sujetar el connector (AIP) usando el herraje
indicado. No apretar demasiado las tuercas ciegas.
2.2
2.3
AFG
• Slide a Truss Brace (AFG) onto the Truss Gutter
Channels as shown, and align the holes.
• Faire glisser un support de ferme (AFG) sur les
canaux de gouttière comme illustré, et aligner les
trous.
• Deslizar un soporte de cercha (AFG) sobre los
canalones de cercha como se muestra, y alinear
los agujeros.
• This square hole is for manufactuing purposes only.
• Ce trou carré est pour la seule fi n de la fabrication.
• Este agujero cuadrado sirve sólo para los fi nes de fabricación.
AIP
DSR
DSR
• Slide a Connector (AIP) onto the ends of two Truss Gutter Channels (DSR) as shown.
• Faire glisser un raccord (AIP) sur les extrémités des canaux de gouttière (DSR) comme illustré.
• Deslizar un connector (AIP) en los extremos de los canalones de cercha (DRS) como se muestra.
2.1
!