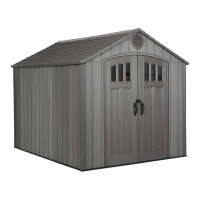
19
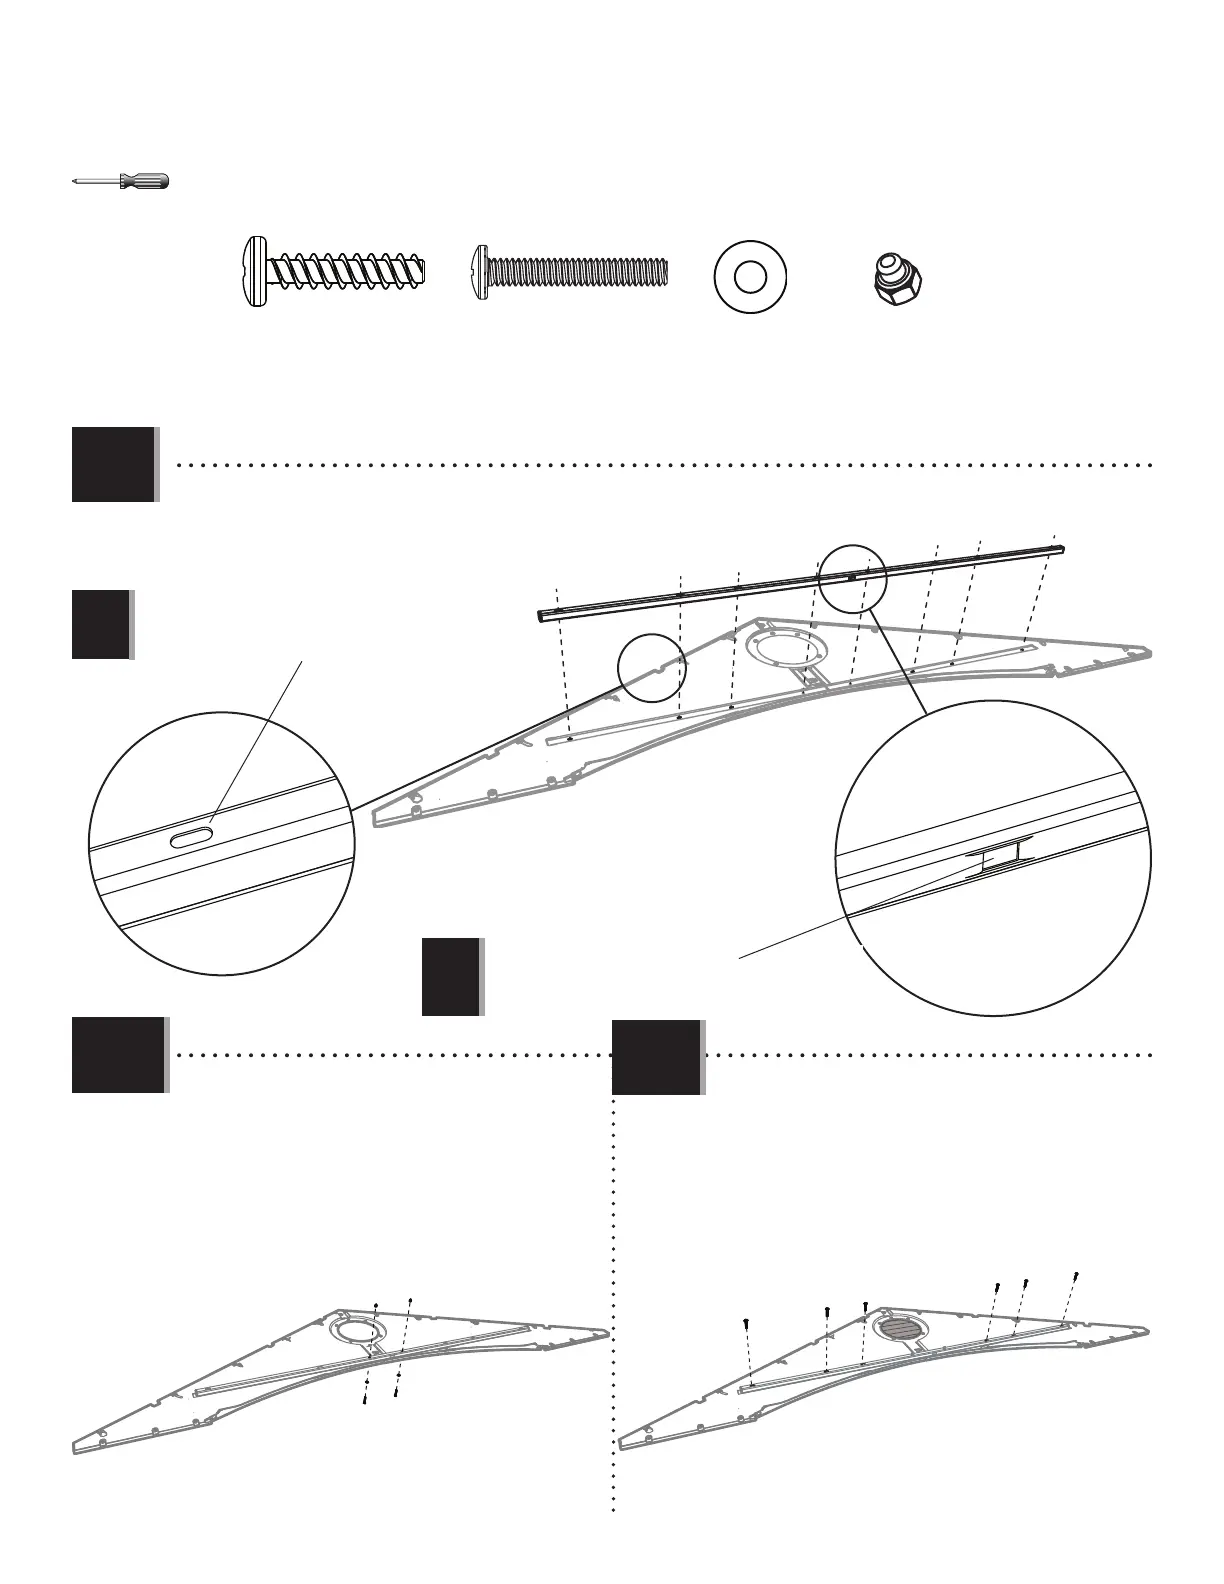
TOOLS AND HARDWARE REQUIRED / OUTILS ET QUINCAILLERIE REQUIS / INSTRUMENTAL Y HERRAJE REQUERIDOS
X SECTION 3 (CONTINUED) / SECTION 3 (SUITE) / SECCIÓN 3 (CONTINUACIÓN)
ADV (x6)
ADK (x2)
ADV
ADV
EYR
EYR
AEE
AEE
ADK
ADK
ADV
ADV
ADV
ADV
• Secure with two (2) Screws (EYR), two (2) Washers
(AEE), and two (2) Nuts (ADK). Do not overtighten.
• Fixer le linteau à l’aide de deux (2) vis (EYR),
deux (2) rondelles (AEE), et deux écrous (ADK). Ne pas
trop serrer.
• Sujetar el dintel con dos (2) tornillos (EYR), dos
(2) rondanas (AEE), y dos tuercas (ADK). No apretar
demasiado.
• Secure the header with six (6) more Screws (ADV).
• Bien attacher le linteau à l’aide de six (6) vis (ADV) de
plus.
• Fijar el dintel con seis (6) tornillos (ADV) más.
• Align the holes in the Header with those in the Gable.
• Aligner les trous dans le linteau avec ceux dans le pignon.
• Alinear los agujeros en el dintel con los de la fachada.
Note: The fl at holes face away from the Gable.
Remarque : Les trous plats font face de l’autre côté du pignon.
Nota: Los agujeros lisos miran en contra de la fachada.
Note: The dented hole faces downward.
Remarque : Le trou bosselé est orienté vers le bas.
Nota: El agujero dentado mira hacia abajo.
!
!
3.9
3.10
3.11
AEE (x2)
EYR (x2)