23
TOOLS AND HARDWARE REQUIRED / OUTILS ET QUINCAILLERIE REQUIS / INSTRUMENTAL Y HERRAJE REQUERIDOS
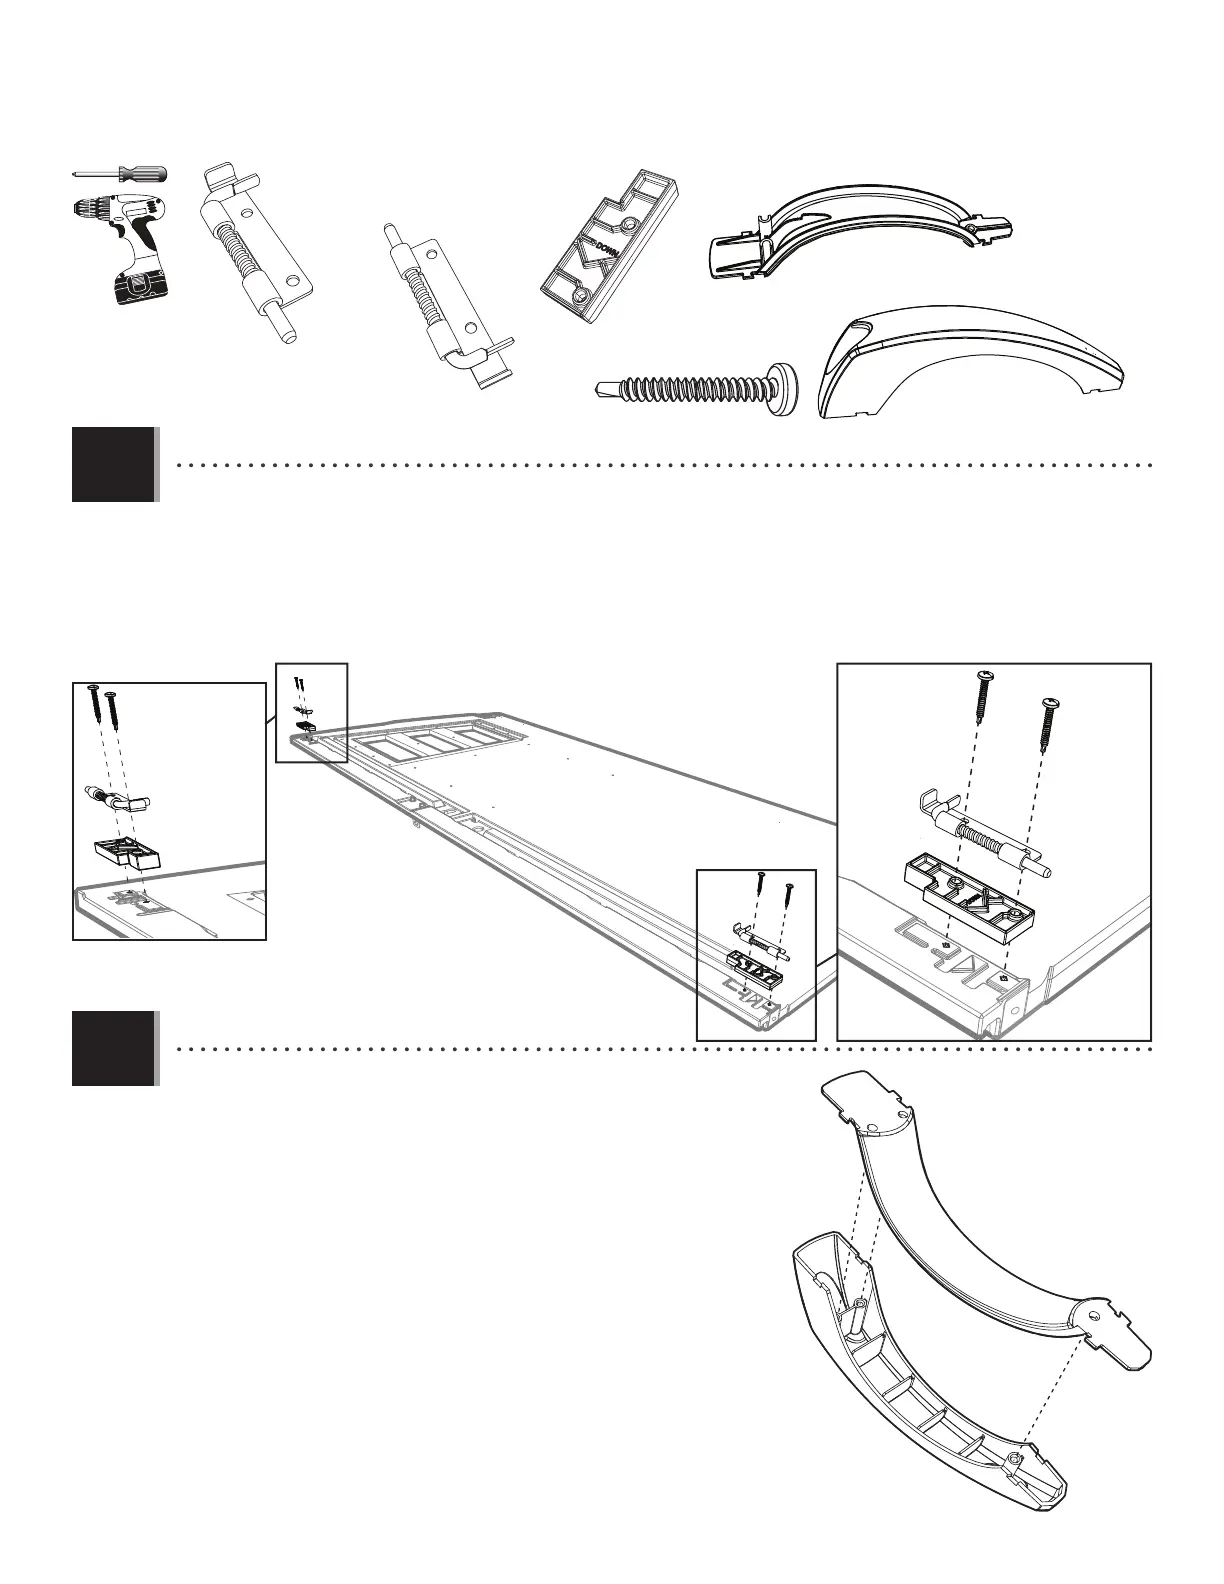
X SECTION 4 (CONTINUED) / SECTION 4 (SUITE) / SECCIÓN 4 (CONTINUACIÓN)
4.5
4.6
BYS
BYR
• Attach the two Handle Pieces (BYR & BYS) together as shown.
• Attacher les deux pièces de la poignée (BYR et BYS) comme illustré.
• Conectar las dos piezas del picaporte (BYR y BYS) como se muestra.
• Attach the Locks (DGS & DGR) and Spacers (ENP) to the top and bottom of the Left Door. If the pins in the Locks do not
move freely, loosen the Screws (ENO) just a tad.
• Attacher les verrous (DGS et DGR) et les écarteurs (ENP) en haut et en bas de la porte gauche. Si les broches ne se dépla-
cent pas librement, deserrer un peu les vis (ENO).
• Sujetar los pasadores (DGS y DGR) y los espaciadores (ENP) al tope y al fondo de la puerta izquierda. Si los pasadores no
se mueven libremente, afl ojar los tornillos (ENP) un poquito.
DGR (x1)
DGR
ENO
ENO
ENO
DGS
DGS (x1)
ENP (x2)
ENO (x4)
ENP
ENP
Upper / Supérieur / Superior
Lower / Inférieur / Inferior
BYS (x1)
BYR (x1)