35
TOOLS AND HARDWARE REQUIRED / OUTILS ET QUINCAILLERIE REQUIS / INSTRUMENTAL Y HERRAJE REQUERIDOS
X SECTION 6 (CONTINUED) / SECTION 6 (SUITE) / SECCIÓN 6 (CONTINUACIÓN)
CUD
CUW
CUW
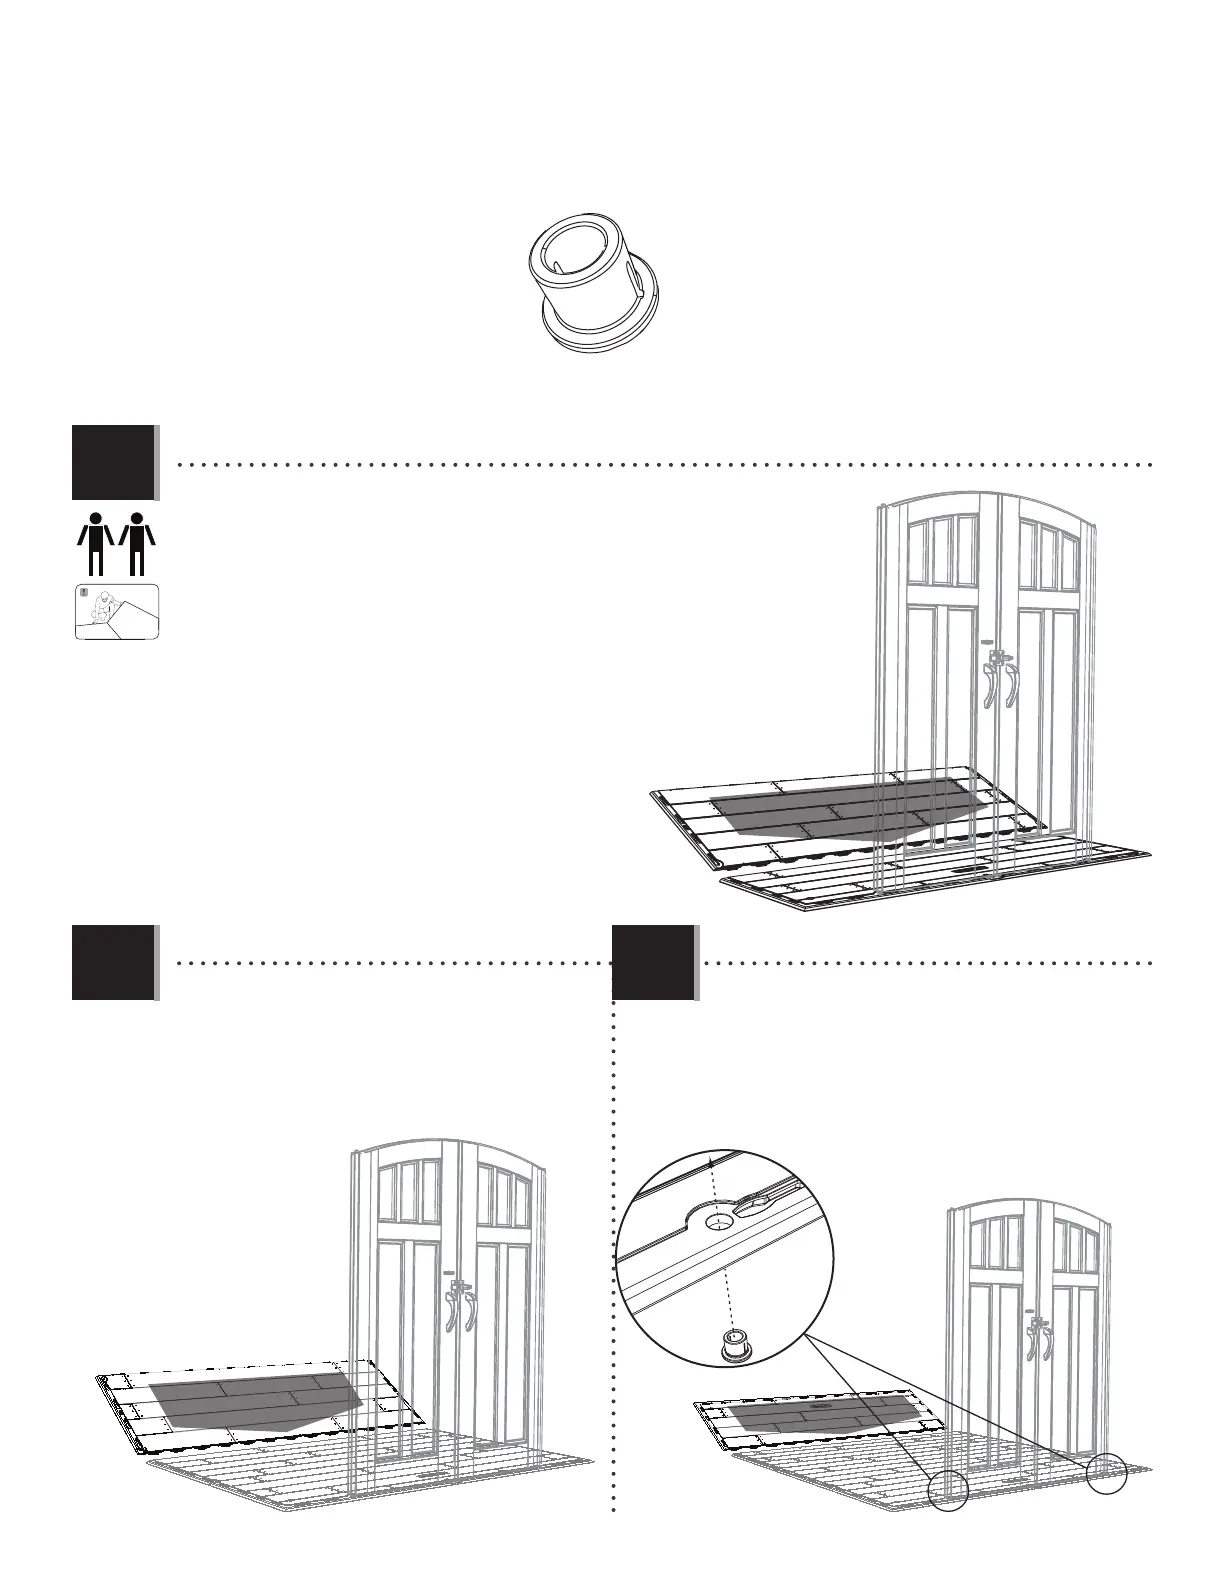
• Attach the second Inner Floor Panel (CUD) to the
fi rst Inner Floor Panel.
• Attacher le deuxième panneau de plancher
intérieur (CUD) au premier panneau de plancher
intérieur.
• Fijar el segundo panel de piso interior (CUD) al
primer panel de piso interior.
• Then, attach an Outer Floor Panel (CUW) to the Inner
Floor Panel. Insert the Bushings (AHO).
• Ensuite, attacher un autre panneau de plancher
extérieur (CUW) au panneau de plancher intérieur.
Insérer les bagues (AHO).
• Entonces, fi jar otro panel de piso exterior (CUW) al
panel de piso interior. Insertar los casquillos (AHO).
6.2
6.1
6.3
CUD
AHO
AHO (x2)
• Hold an Inner Floor Panel (CUD) at a 45° angle and slide the tabs along the edge
underneath an Outer Floor Panel (CUW). The tabs interlock. Lay Panel fl at.
• Poser un panneau de plancher intérieur (CUD) à un angle de 45°, et faire glisser les
languettes le long du bord au-dessus du panneau de plancher extérieur (CUW). Les
languettes s’imbriquent les unes les autres. Les étendre à plat.
• Colocar un panel de piso interior (CUD) a un ángulo de 45°, y deslizar las
lenguetas a lo largo del borde debajo el panel de piso exterior (CUW). Las lengüetas
se entrelazan las unas con las otras. Aplanar el panel.
2