52
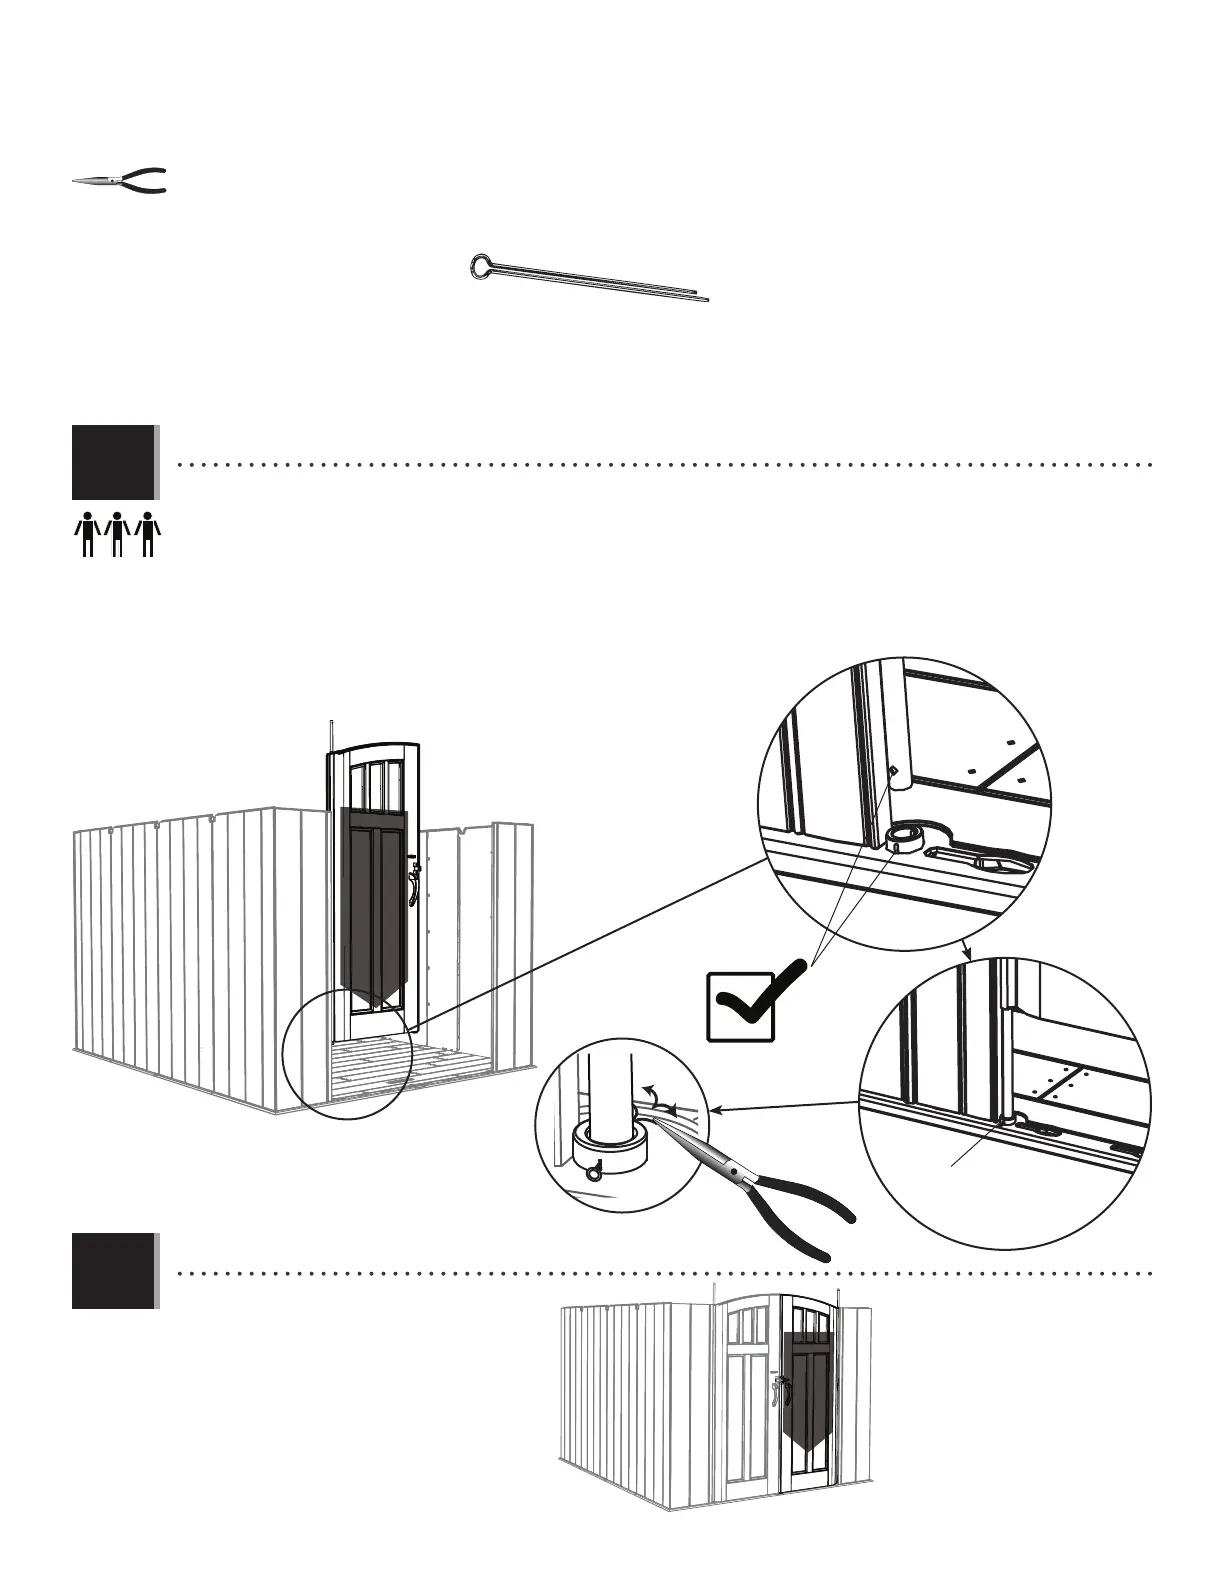
TOOLS AND HARDWARE REQUIRED / OUTILS ET QUINCAILLERIE REQUIS / INSTRUMENTAL Y HERRAJE REQUERIDOS
X SECTION 9 (CONTINUED) / SECTION 9 (SUITE) / SECCIÓN 9 (CONTINUACIÓN)
AHP (x2)
AHP
• Pull the Hinge Tube down out of the Door about 15 cm (6 in). Align the hole at the bottom of the Hinge Tube with the
slit in the Bushing, and insert the Tube. Insert a Cotter Pin (AHP) and bend the ends.
• Baisser le tube d’articulation d’à peu près quinze centimètres du bord inférieur de la porte. Aligner le trou dans la partie
inférieure du tube avec la fente dans la bague, et insérer le tube. Insérer une goupille fendue (AHP), et plier les extrémités.
• Extender el tubo de articulación unos qunice centimetros del borde inferior de la puerta. Alinear el agujero en la parte
inferior del tubo con la rendija en el casquillo, e insertar el tubo. Insertar una clavija (AHP), y doblar los extremos.
• Repeat the previous step for the Right Door.
• Répéter l’étape précédente pour la porte droite.
• Repetir el paso anterior para la puerta derecha.
9.1
9.2