23
TOOLS AND HARDWARE REQUIRED / OUTILS ET QUINCAILLERIE REQUIS / INSTRUMENTAL Y HERRAJE REQUERIDOS
X SECTION 4 (CONTINUED) / SECTION 4 (SUITE) / SECCIÓN 4 (CONTINUACIÓN)
4.3
4.4
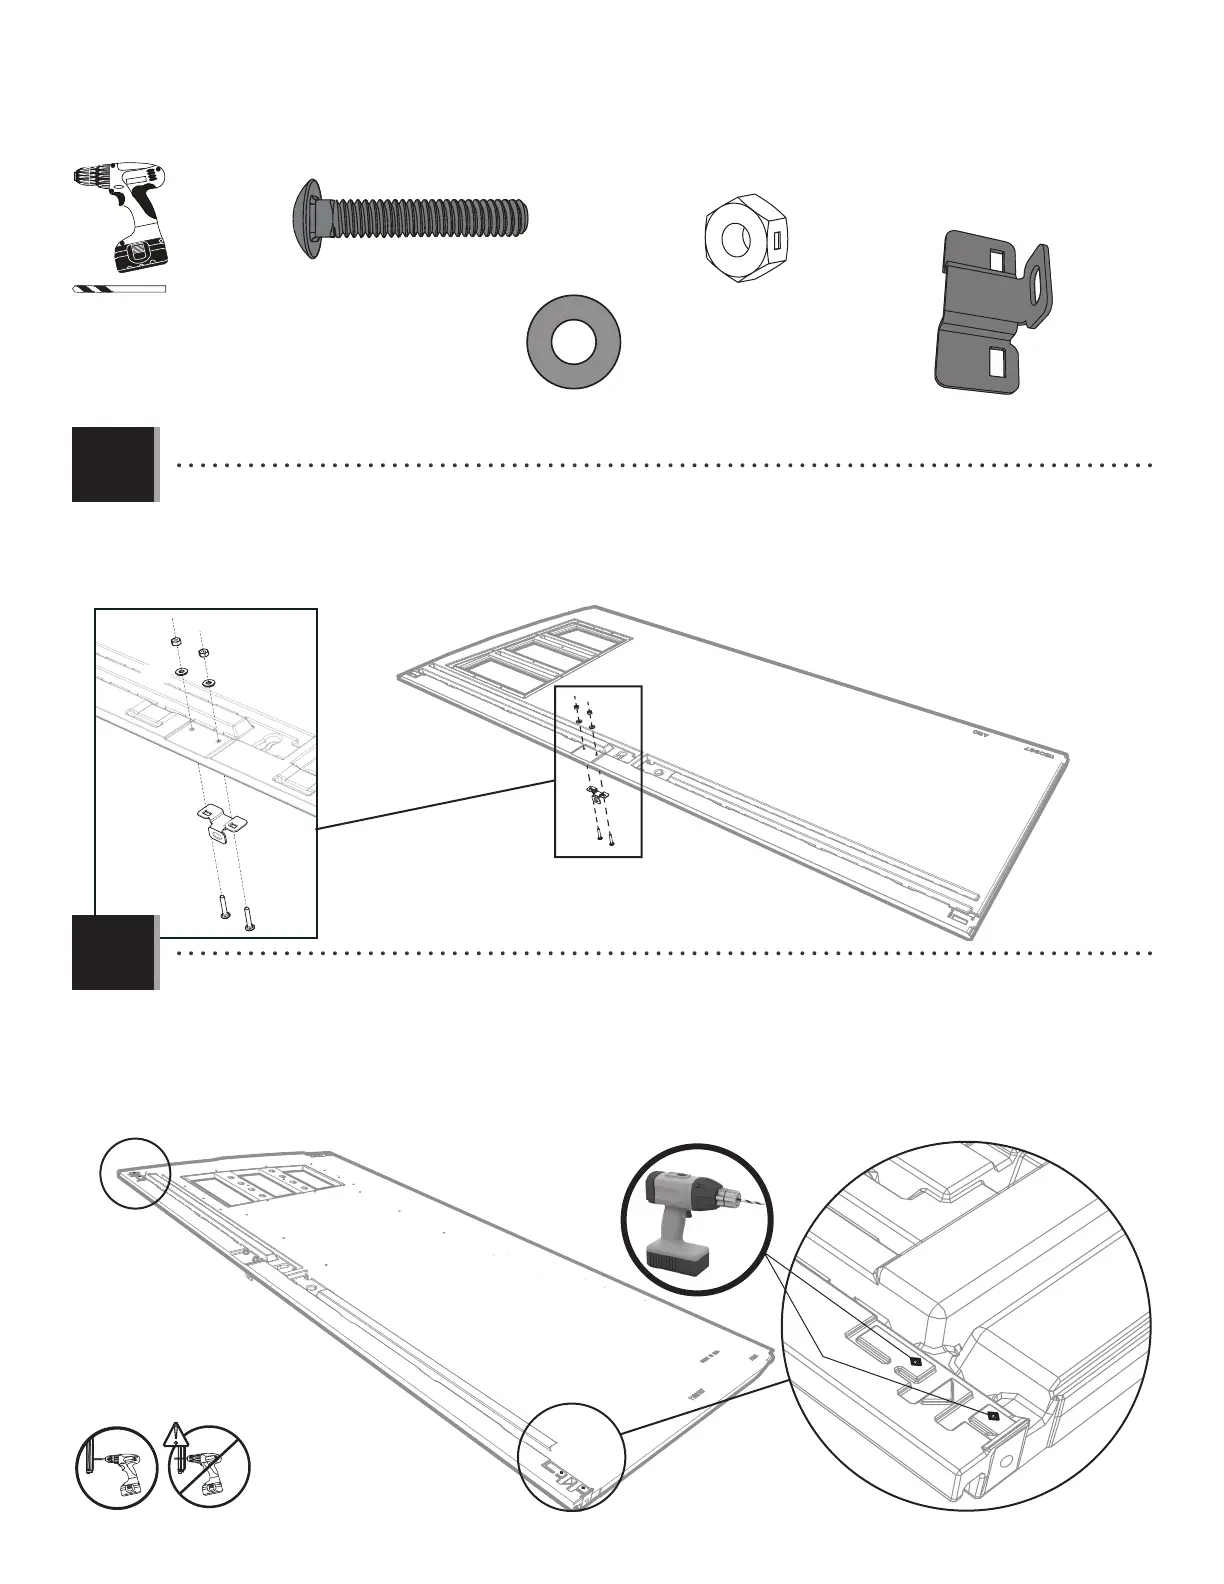
• Attach the Left Latch Bracket (EEP) to the Door using the hardware included. Tighten only by hand at this point.
• Attacher le support gauche à loquet (EEP) à la porte à l’aide de la quincaillerie incluse. Serrer-les à la main seulement en
ce moment.
• Sujetar el soporte izquierdo para el pestaño (EEP) a la puerta usando el herraje incluido. Apretarlos sólo a mano en este
momento.
AAB (x2)
AAB
AAB
ACH (x2)
ACH
ACH
AEB (x2)
AEB
AEB
EEP (x1)
EEP
• Drill into the divots at the top and bottom of the Door and into the Tube inside but not all the way through the
Door. Use the 1/8" (3 mm) Drill Bit (ARA) included.
• Percer les marques à la partie supérieure et inférieure de la porte et dedans le tube à l’intéreiur mais pas à travers
la porte entière. Utiliser le Foret de 3 mm (1/8 po) (ARA) inclus.
• Taladrar las marcas al tope y al fondo de la puerta y dentro del tubo adentro mas no por la puerta entera. Usar la
broca de 3 mm (1/8 in.) (ARA) incluida.
!
1/8 in/po
(3 mm)
ARA (x1)
 Loading...