37
TOOLS AND HARDWARE REQUIRED / OUTILS ET QUINCAILLERIE REQUIS / INSTRUMENTAL Y HERRAJE REQUERIDOS
X SECTION 6 (CONTINUED) / SECTION 6 (SUITE) / SECCIÓN 6 (CONTINUACIÓN)
• Repeat the previous step.
• Répéter l’étape précédente.
• Repetir el paso anterior.
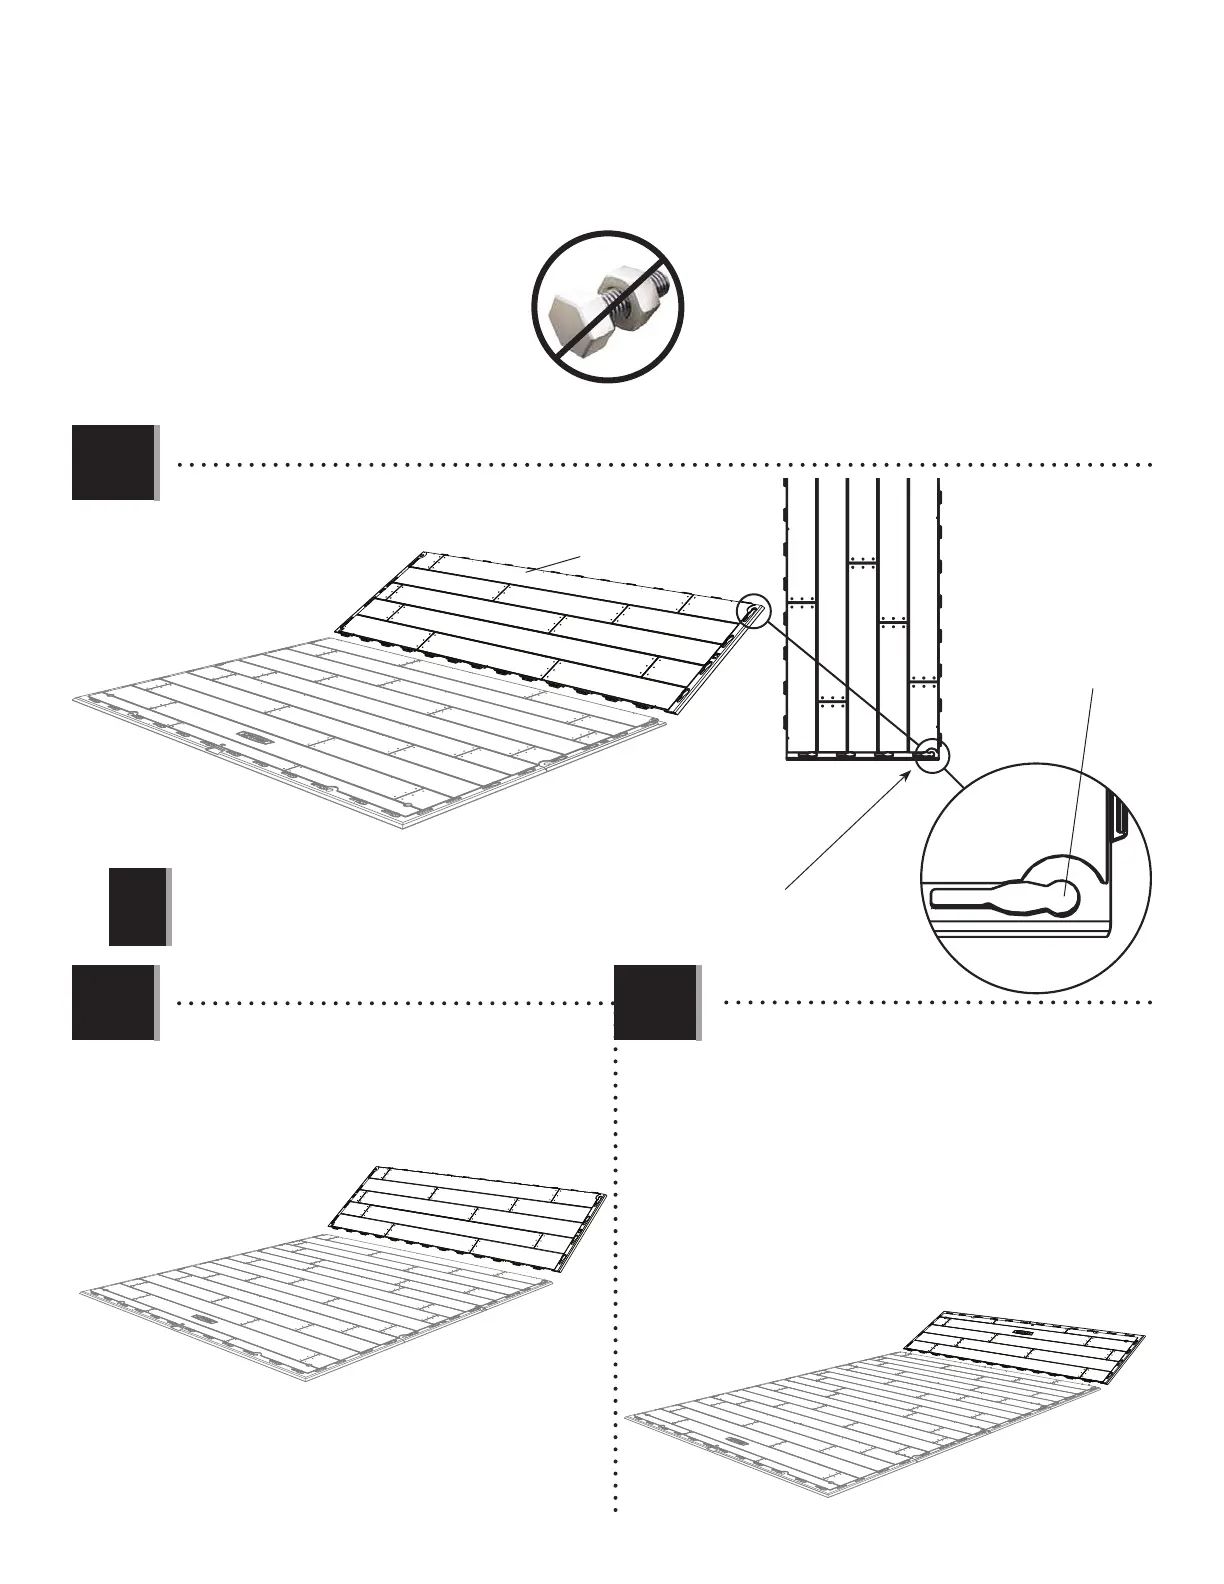
Note: If the hole is not at this corner, turn the Panel 180°. The Right Door Hinge goes here later.
Remarque : Si le trou n’est pas ici, tourner le panneau 180°. La charnière de la porte droite s’insère ici plus tard.
Nota: Si el agujero no está aquí, girar el panel 180°. La bisagra de la puerta derecha se inserta aquí más tarde.
CUD
Hole / Trou / Agujero
!
6.2
CUD
CUW
• Lay down another Inner Floor Panel (CUD).
• Poser un autre panneau de plancher intérieur (CUD).
• Colocar otro panel de piso interior (CUD).
6.3 6.4
• Hold an Outer Floor Panel (CUW) at an angle and
slide the tabs along the edge underneath the last
Inner Floor Panel. Lay Panel down fl at.
• Poser un panneau de plancher extérieur (CUW) à
un angle, et faire glisser les languettes le long du
bord au-dessus du dernier panneau de plancher
intérieur. Étendre-le par terre.
• Colocar un panel de piso exterior (CUW) a un
ángulo, y deslizar las lenguetas a lo largo del
borde debajo el último panel de piso interior.
Aplanar el panel.