4343
TOOLS AND HARDWARE REQUIRED / OUTILS ET QUINCAILLERIE REQUIS / INSTRUMENTAL Y HERRAJE REQUERIDOS
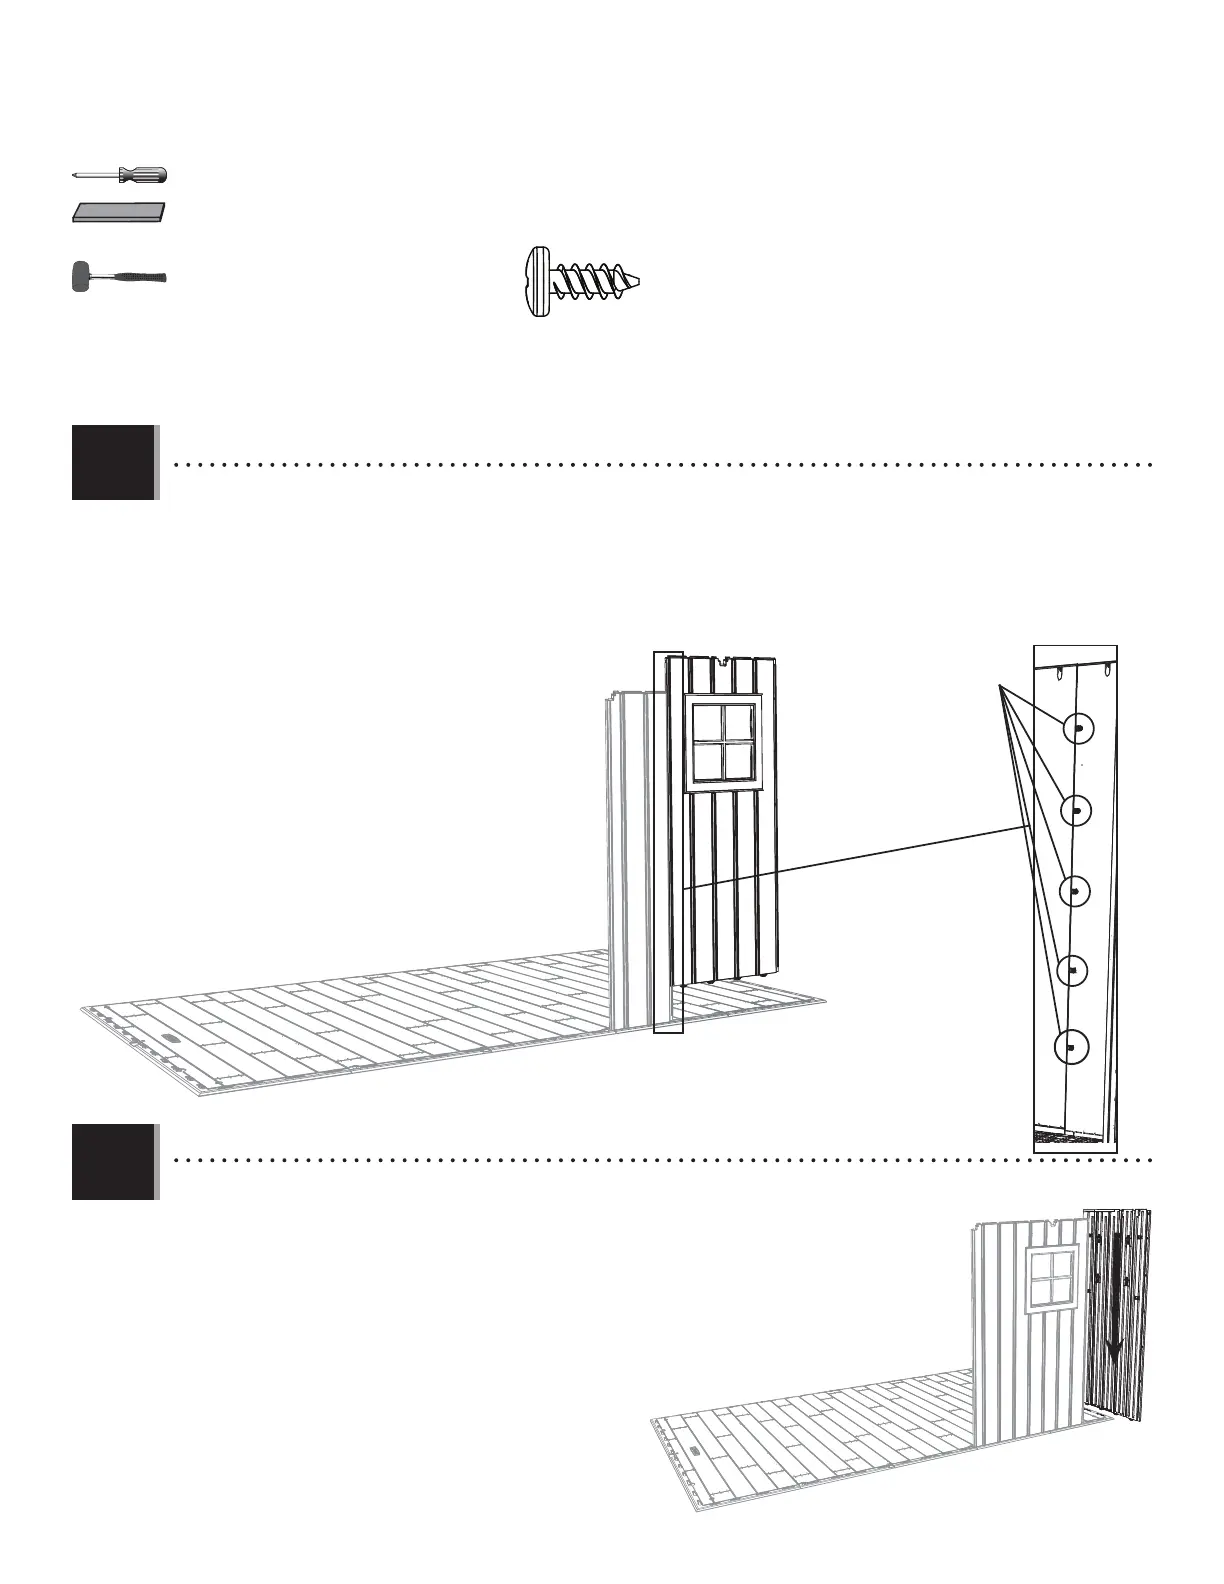
X SECTION 7 (CONTINUED) / SECTION 7 (SUITE) / SECCIÓN 7 (CONTINUACIÓN)
• Insert the four tabs at the bottom of the Window Wall Panel (AHH) into the fl oor slots next to the Narrow Wall Panel,
and slide the Panel to the left. Align the fi ve holes, and secure the two Panels using fi ve (5) Screws (ADZ).
• Insérer les quatre languettes au bord inférieur du panneau mural avec fenètre (AHH) dans les rainures à côté du
panneau mural étroit droit, et faire glisser le panneau à gauche. Aligner les cinq trous, et attacher bien les deux
panneaux à l’aide de cinq (5) vis (ADZ).
• Insertar las cuatro lengüetas al borde inferior del panel mural con ventana (AHH) en las ranuras a lado del panel
mural angosto derecho, y deslizar el panel a la izquierda. Alinear los cinco agujeros, y sujetar los dos paneles
usando cinco (5) tornillos (ADZ).
AHH
ADZ
ADZ (x5)
AIW (x1)
• Insert tabs at the bottom of the Corner Panel (AGW) into the fi rst two slots along the right
edge of the Floor, and slide the Panel toward the front of the Floor.
• Insérer les languettes au bord inférieur du panneau angulaire (AGW) dans les premières
rainures le long du bord droit du plancher, et faire glisser le panneau vers la partie avant
de l’abri.
• Insérer las lengüetas al borde inferior del panel angular (AGW) en las primeras dos ranuras
a lo largo del borde derecho del piso, y deslizar el panel hacia la parte delantera de la
caseta.
AGW
7.6
7.7
 Loading...