41
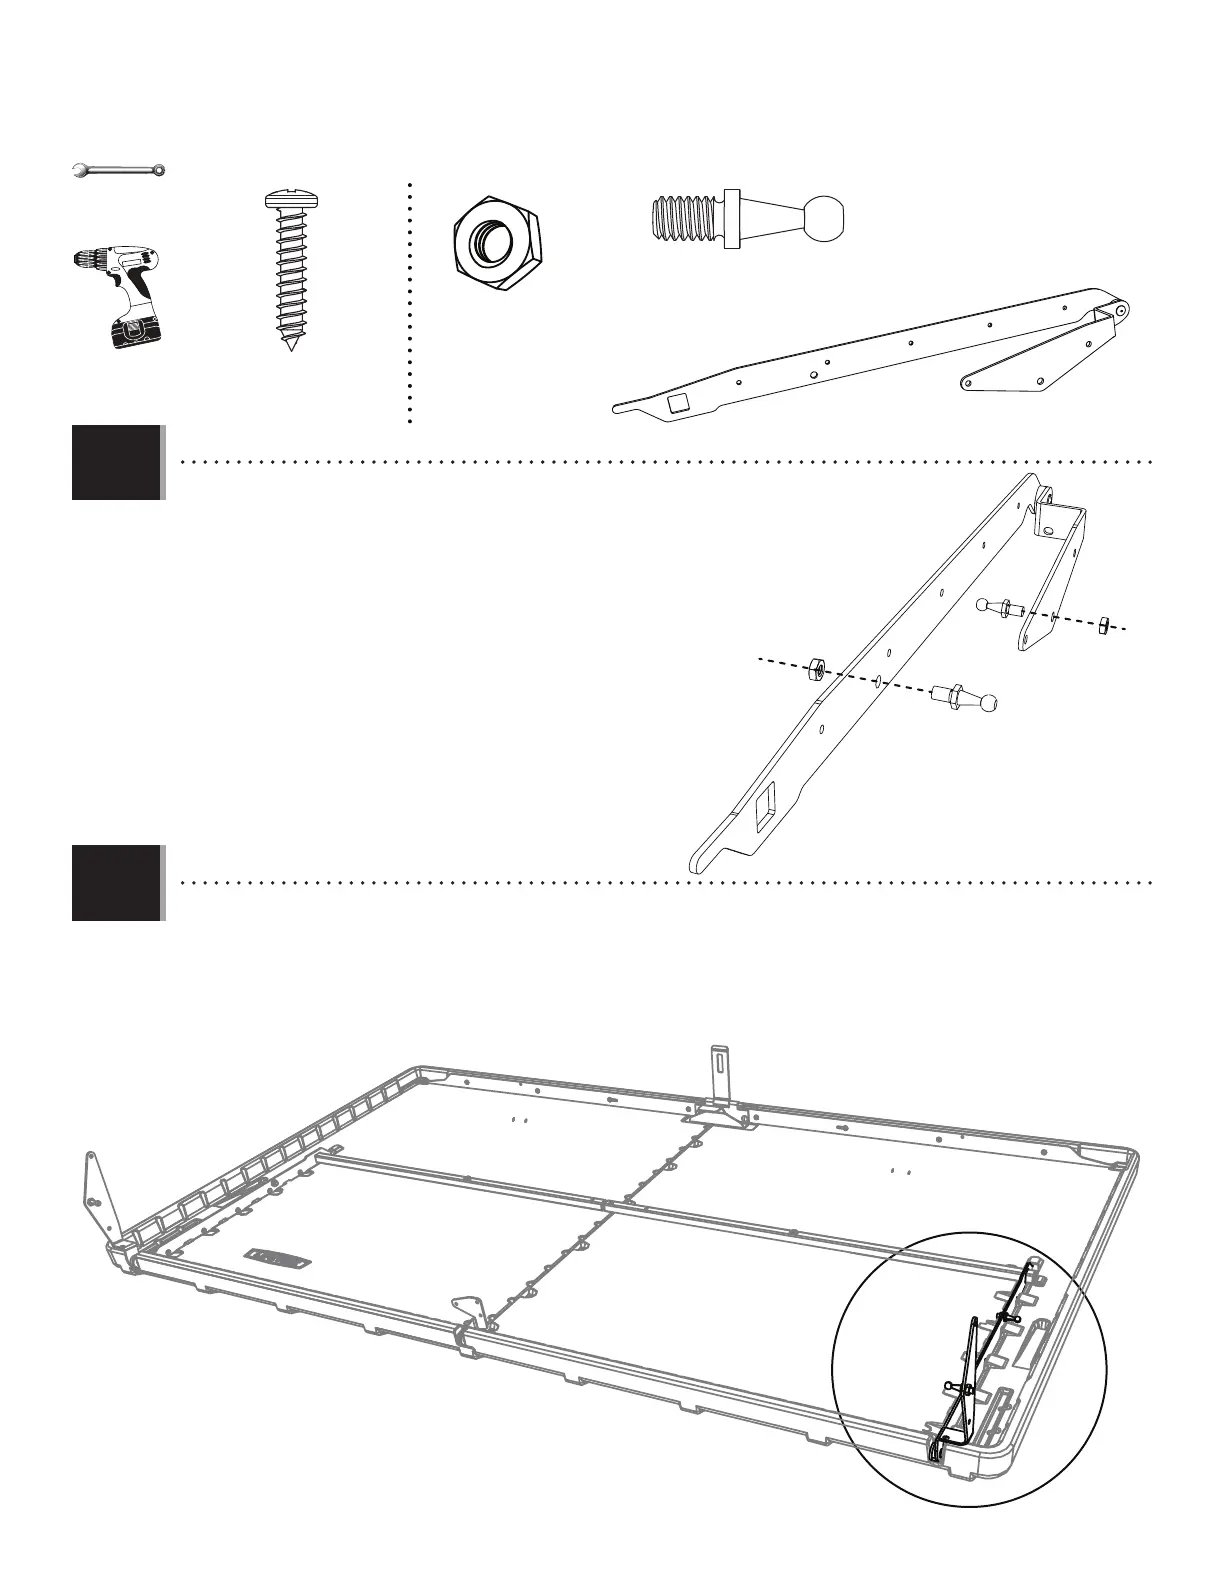
TOOLS & HARDWARE REQUIRED / OUTILS ET QUINCAILLERIE REQUIS / INSTRUMENTAL Y HERRAJE REQUERIDOS
X SECTION 3 (CONTINUED) / SECTION 3 (SUITE) / SECCIÓN 3 (CONTINUACIÓN)
BET (x2)
DDL (x5)
FPH (x1)
3.14
3.15
1/2 in/po (x2)
(13 mm) (x2)
• Insert the Crossbar into the Right Hinge, and repeat steps 3.8–3.9 for the right side. Then, rotate the hinges to 90° angles. Please
use a drill and Phillips bit for this step.
• Répéter les étapes 3.8–3.9 pour le côté droit. Ensuite, tournez les charnières à 90°. Veiller à utiliser une perceuse éléctrique et un
foret Phillips pour cette étape.
• Repetir los pasos 3.8 – 3.9 para el lado derecho. Entonces, rote las bisagras a ángulos de 90°. Usar un taladro eléctrico y una
broca Phillips para este paso.
• Attach the hardware to the Right Hinge (FPH), and tighten securely.
• Attacher la quincaillerie à la charnière droite (FPH), et serrer-la bien.
• Sujetar el herraje a la bisagra derecha (FPH), y apretarlos bien.
BET
BET
AAV
AAV
FPH
AAV (x2)