44
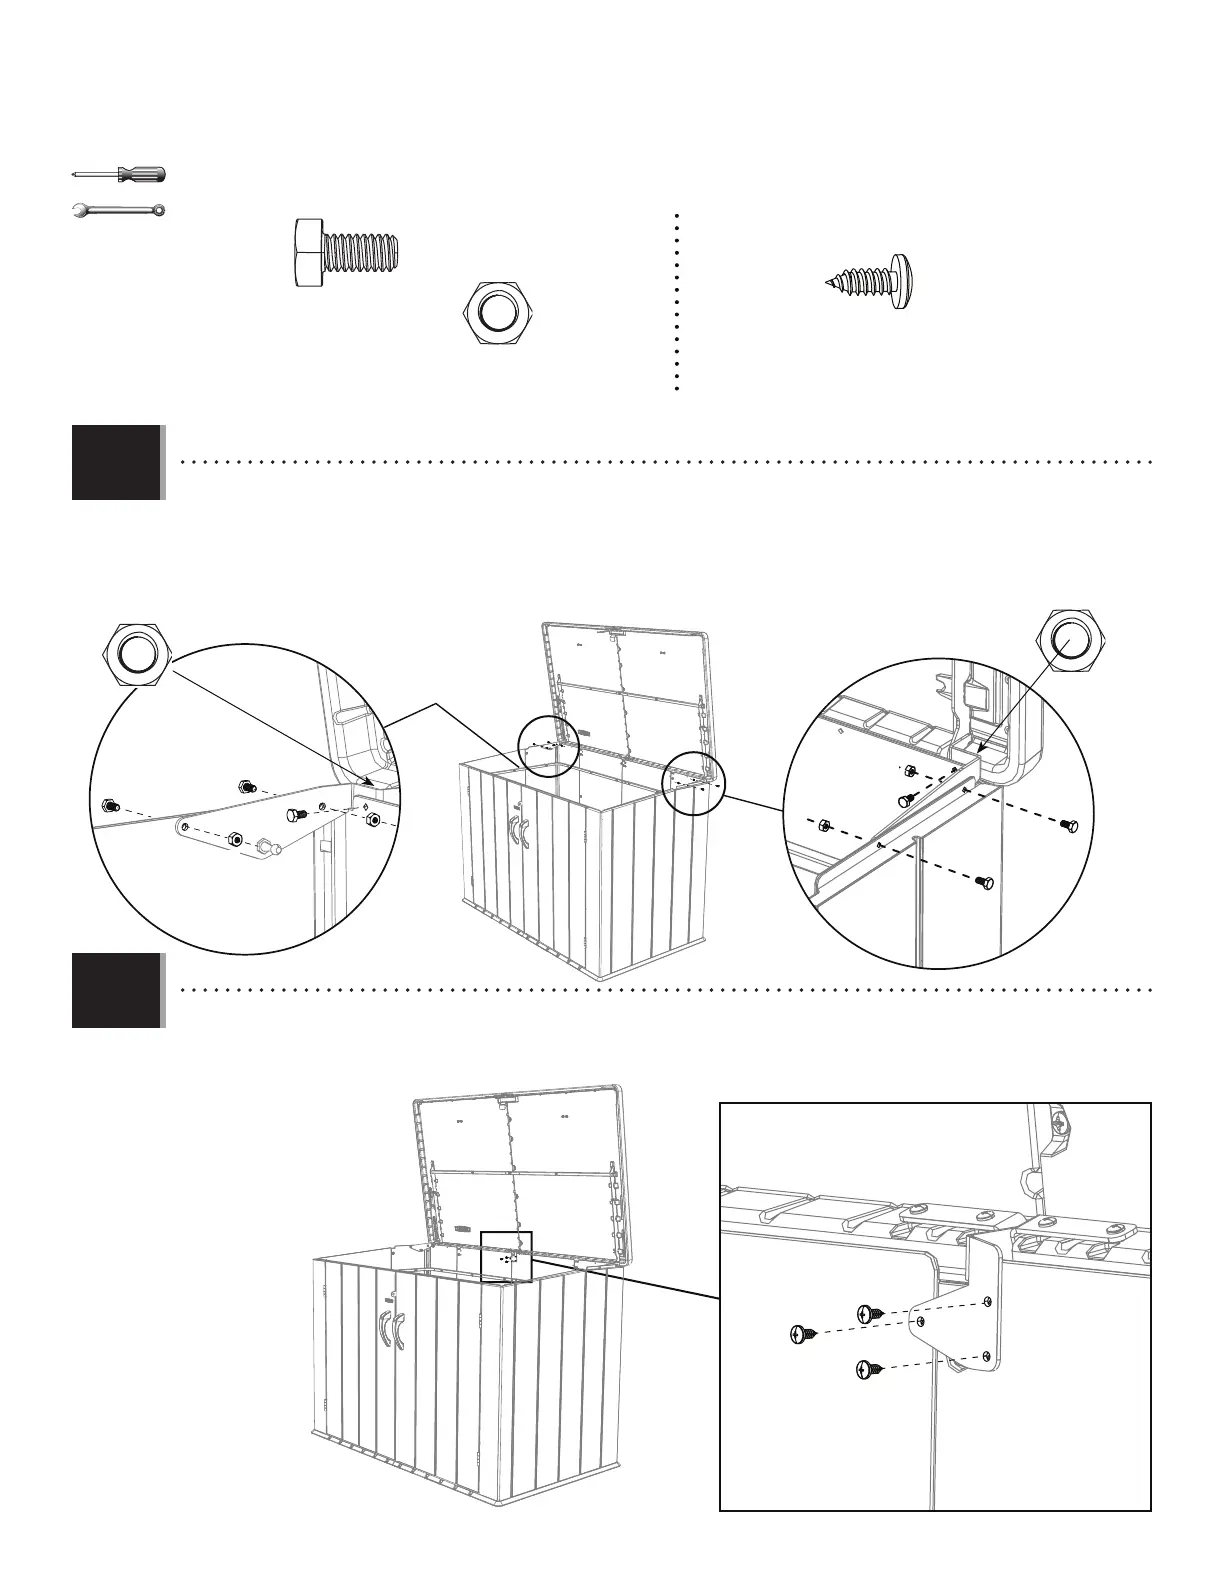
TOOLS & HARDWARE REQUIRED / OUTILS ET QUINCAILLERIE REQUIS / INSTRUMENTAL Y HERRAJE REQUERIDOS
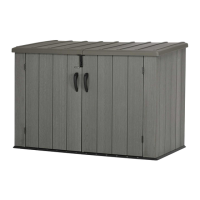
X SECTION 3 (CONTINUED) / SECTION 3 (SUITE) / SECCIÓN 3 (CONTINUACIÓN)
BER (x6)
BER
BER
BER
BER
BER
BER
BES
BES (x6)
BES
BES
BES
BES
BES
ADX
ADX
ADX
ADX (x3)
3.18
3.19
7/16 in/po (x2)
(11 mm) (x2)
• Place the Hinges down onto the rear Panels. Align the three holes, and secure with the hardware shown. Do not
overtighten Nuts.
• Mettre les charnières sur les panneaux arrières. Aligner les trois trous, et attacher les charnières à l’aide de la
quincaillerie indiquée. Ne pas trop serrer les écrous.
• Colocar las bisagras en los paneles traseros. Alinear los tres agujeros, y sujetar las bisagras usando el herraje
indicado. No apretar demasiado las tuercas.
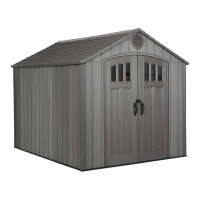
• Secure the Center Hinge to the rear Wall Panels using three (3) Screws (ADX).
• Attacher la charnière centrale aux panneaux muraux arrières à l’aide de trois (3) vis (ADX).
• Sujetar la bisagra central a los paneles murales traseros usando tres (3) tornillos (ADX).