29
TOOLS AND HARDWARE REQUIRED / OUTILS ET QUINCAILLERIE REQUIS / INSTRUMENTAL Y HERRAJE REQUERIDOS
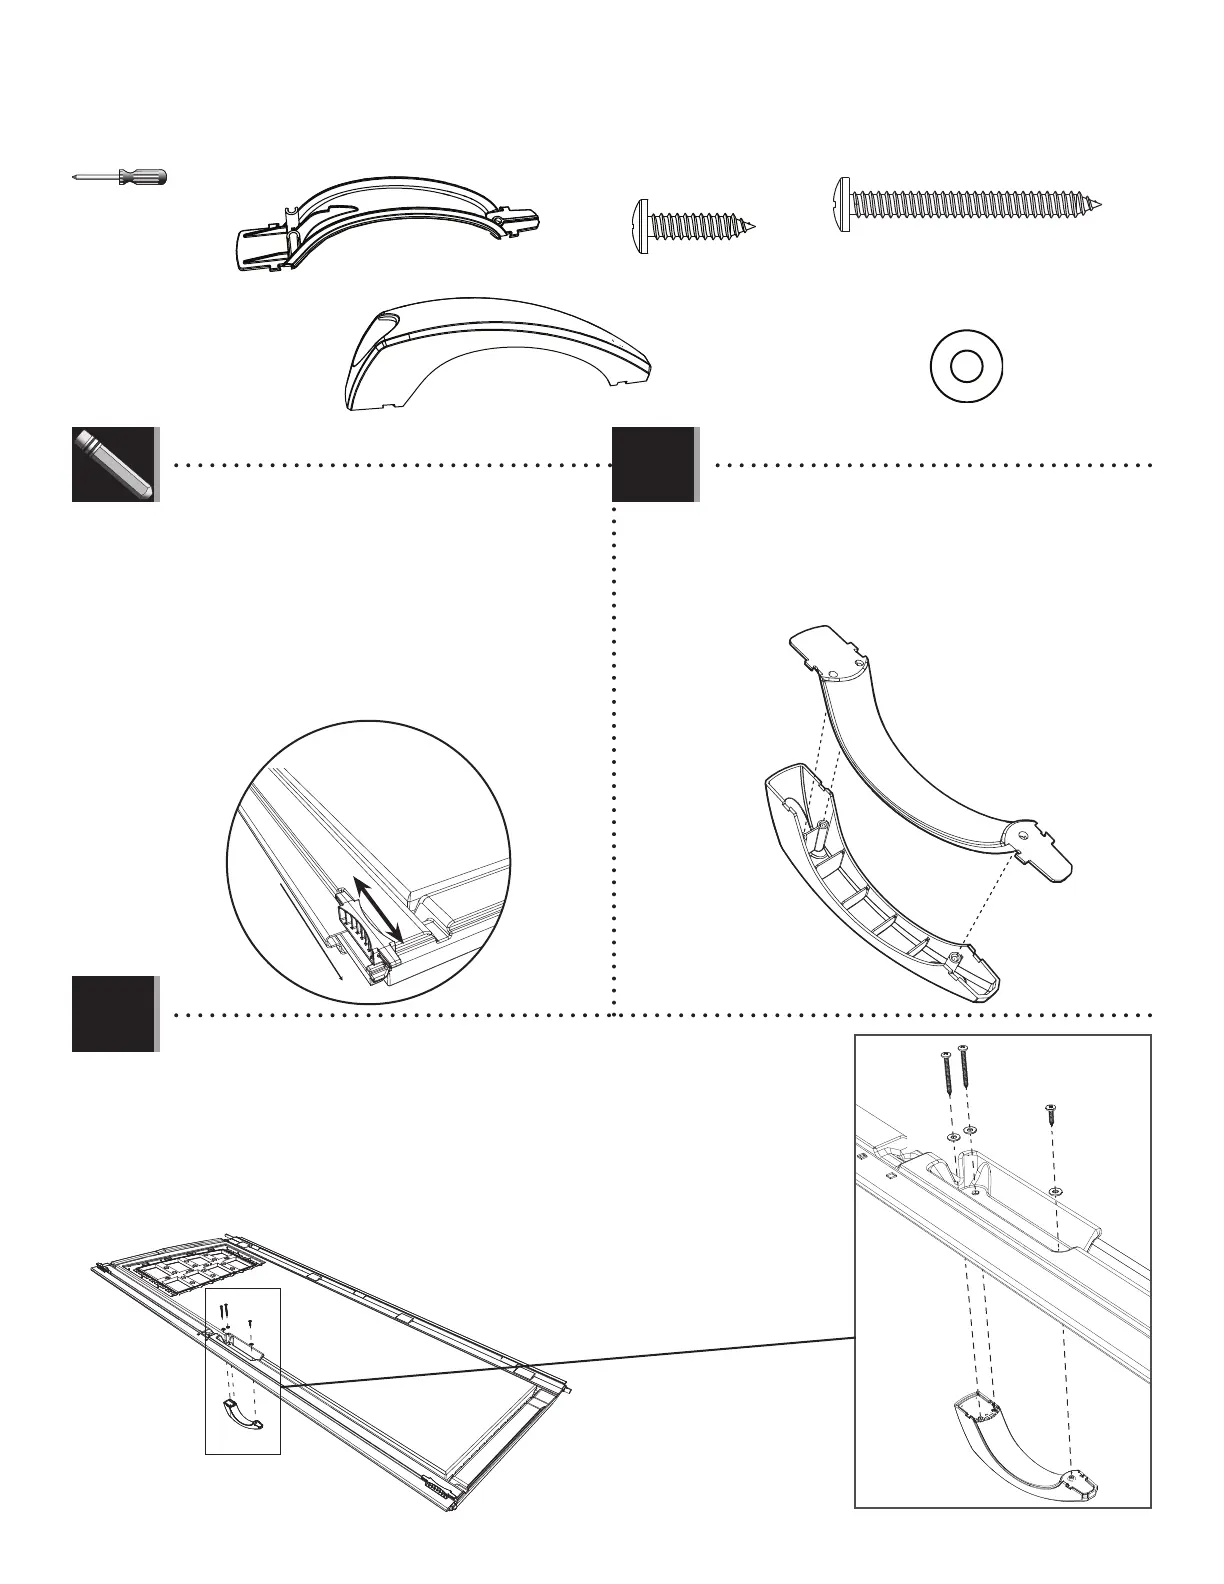
X SECTION 4 (CONTINUED) / SECTION 4 (SUITE) / SECCIÓN 4 (CONTINUACIÓN)
ADW (x1)
BYZ (x2)
AEE (x3)
BYS (x1)
BYS
BYR
BYR (x1)
• Attach the two Handle Pieces (BYR & BYS) together
as shown.
• Attacher les deux pièces de la poignée (BYR et BYS)
comme illustré.
• Conectar las dos piezas del picaporte (BYR y BYS)
como se muestra.
• Attach the Handle to the Door using the hardware provided. Do not overtighten.
• Attacher la poignée à la porte à l’aide de la quincaillerie incluse. Ne pas trop
serrer.
• Sujetar el picaporte a la puerta usando el herraje incluido. No apretar
demasiado.
4.4
4.3
BYZ
BYZ
ADW
AEE
AEE
AEE
• Note: The Deadbolts are used for locking the door. They may not
move freely at fi rst. You may need to tap them up and down a few
times with a rubber mallet to work them in.
• Remarque : On utilise les loquets pour fermer la porte. Au debut,
il se peut que les loquets ne se déplaceraient librement. Vous
devrez peut-être les taper légèrement à l’aide d’un maillet en
caoutchouc pour les desserrer.
• Nota: Se usan los cerrojos para cerrar la puerta. Al principio,
pueden que no se desplacen libremente. Puede que necesite darlos
unos golpecitos con un mazo de goma para afl ojarlos.
LIFETIME
©