41
TOOLS AND HARDWARE REQUIRED / OUTILS ET QUINCAILLERIE REQUIS / INSTRUMENTAL Y HERRAJE REQUERIDOS
X SECTION 6 (CONTINUED) / SECTION 6 (SUITE) / SECCIÓN 6 (CONTINUACIÓN)
LIFETIME
©
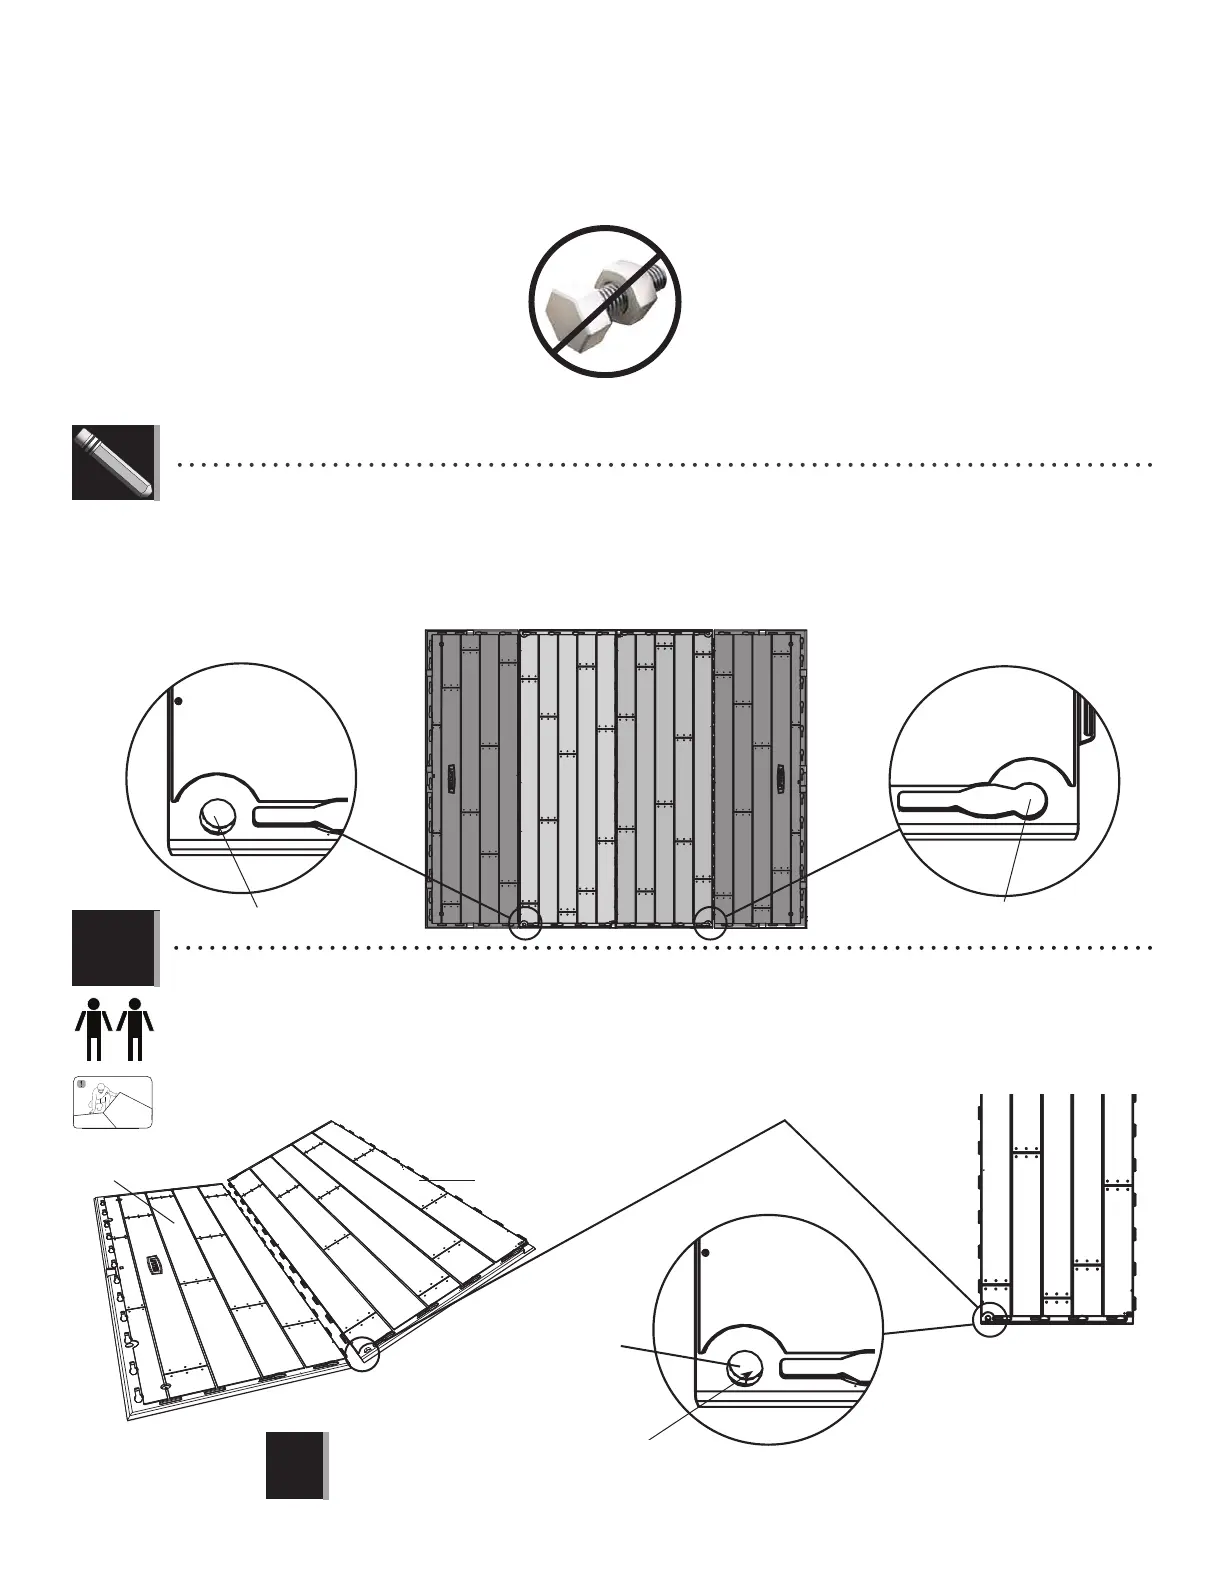
• When the two Inner Floor Panels (CUD) are attached to each other, one of each of these holes should be on the same edge as shown below.
This edge will be the side of the shed where the Doors are installed.
• En attachant les deux panneaux de plancher interns (CUD), un de chaque trou doit être sur le même bord comme indiqué ci-dessous. Les
deux portes s’installent le long de ce bord.
• Al ensamblar los dos paneles de piso internos (CUD), uno de cada agujero debe restar en el mismo borde como se meustra abajo. Se
instalarán las dos puertas a lo largo de este borde.
Hole / Trou / AgujeroHole / Trou / Agujero
12
6.1
• Hold an Inner Floor Panel (CUD) at an angle and slide the tabs along the edge underneath an Outer Floor Panel (CUW).
The tabs interlock. Lay Panel down fl at.
• Poser un panneau de plancher intérieur (CUD) à un angle et glissez les languettes le long du bord au-dessus du
panneau de plancher extérieur (CUW). Les languettes s’enclenchent les uns les autres. Étendre-le par terre.
• Colocar un panel de piso interior (CUD) a un ángulo y deslice las lenguetas a lo largo del borde debajo el panel de piso
exterior (CUW). Las lengüetas se entrelazan las unas con las otras. Aplanarlo.
CUD
CUW
Hole / Trou / Agujero
Note: If this hole is not at this corner, turn the Panel 180°.
Remarque : Si ce trou n’est pas ici, tourner le panneau 180°.
Nota: Si este agujero no está aquí, girar el panel 180°.
!