72
TOOLS AND HARDWARE REQUIRED / OUTILS ET QUINCAILLERIE REQUIS / INSTRUMENTAL Y HERRAJE REQUERIDOS
X SECTION 9 (CONTINUED) / SECTION 9 (SUITE) / SECCIÓN 9 (CONTINUACIÓN)
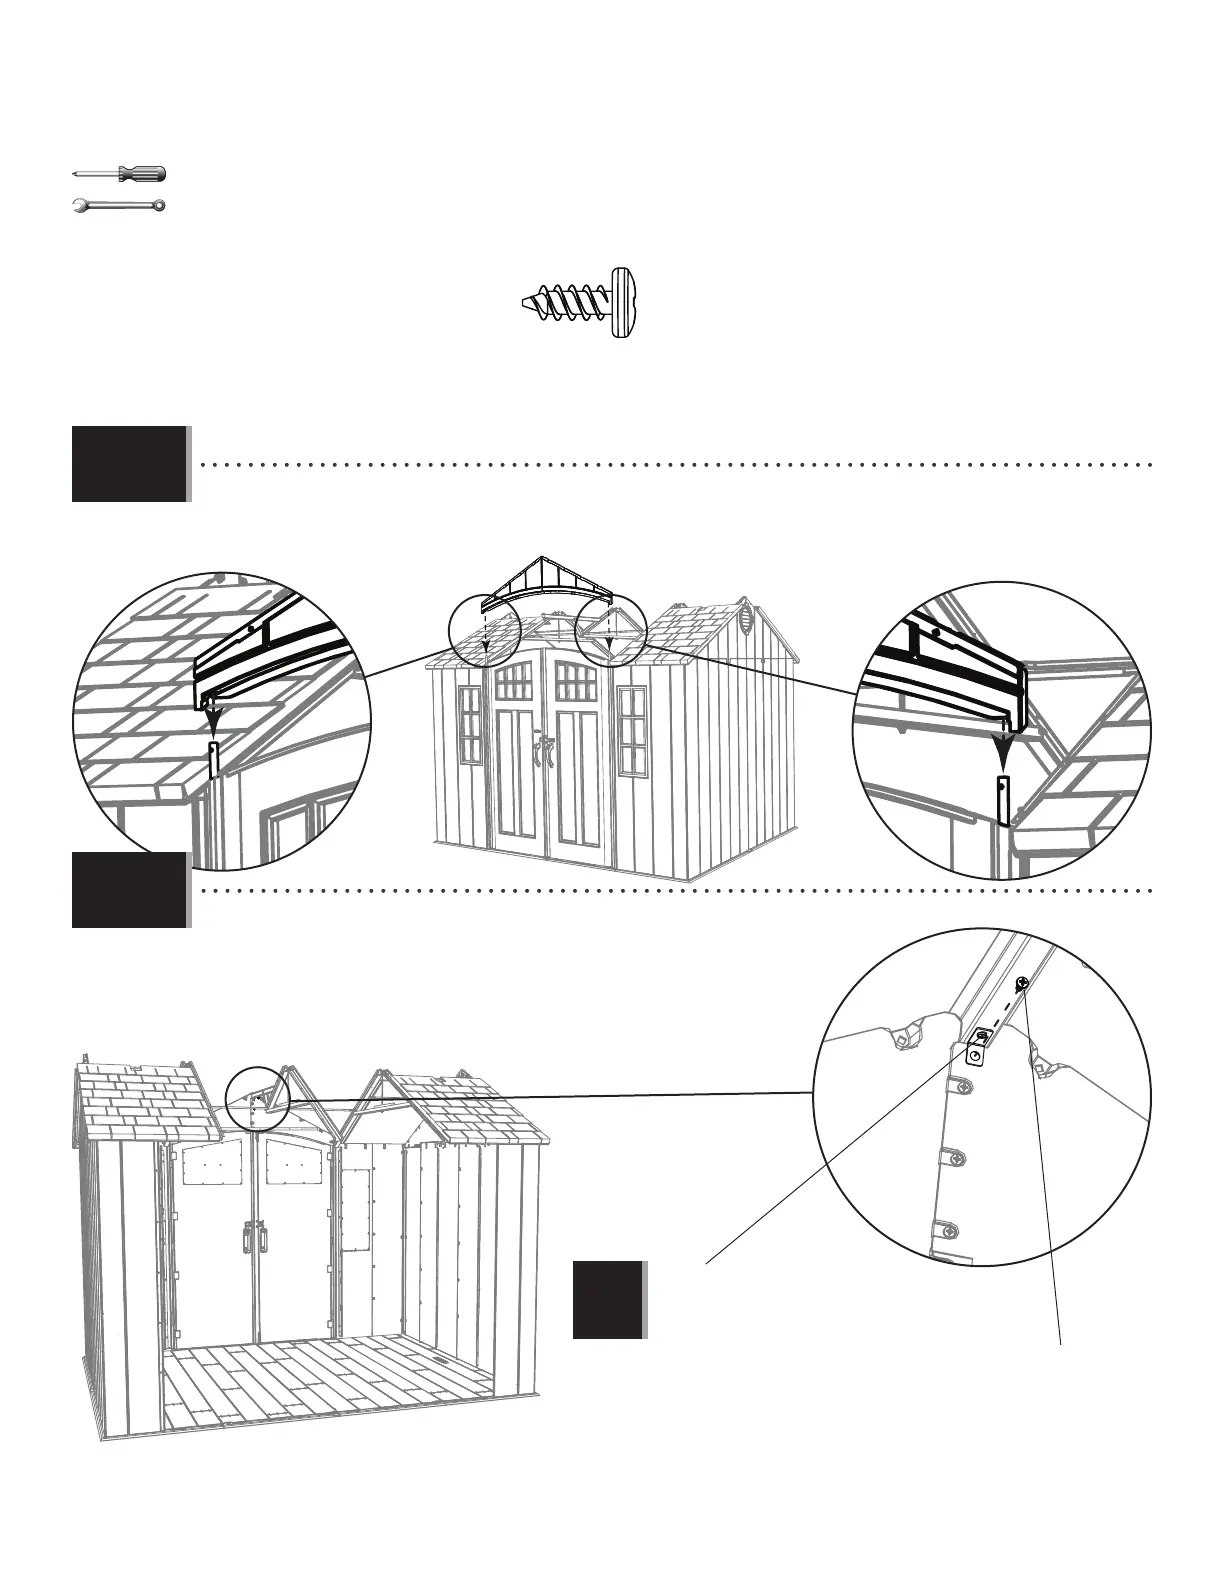
• Set the end of the Center Truss onto the notch in the Front Gable Panel as shown, and secure with one (1)
Screw (ADZ).
• Mettre l’extrémité de la ferme centrale dans l’encoche dans la pignon
avant comme illustré, et fi xer-la à l’aide d’une vis (ADZ).
• Meter el extremo de la cercha central en la muesca en la fachada
delantera como se muestra, y fi jarla avec un tornillo (ADZ).
ADZ (x1)
3/8 in/po
(≈10 mm)
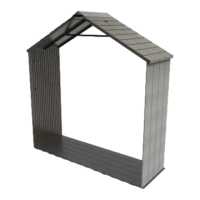
• Slide the holes in the Entry Gable down over the two Hinge Tubes. The ends of the Gable go in the Trusses.
• Faire glisser les trous dans le pignon d’entrée sur les deux tubes. Les extrémités du pignon vont dans les fermes.
• Deslizar los agujeros en la fachada de entrada sobre los dos tubos. Los extremos de la fachada van dentro de las cerchas.
9.12
9.13
Note: Tighten this Nut and Bolt now.
Remarque : Serrer ce boulon et l’écrou maintenant.
Nota: Apretar este perno y la tuerca ahora.
!
ADZ