45
TOOLS AND PARTS REQUIRED / OUTILS ET PIÈCES REQUIS / INSTRUMENTAL Y HERRAJE REQUERIDOS
X SECTION 7 (CONTINUED) / SECTION 7 (SUITE) / SECCIÓN 7 (CONTINUACIÓN)
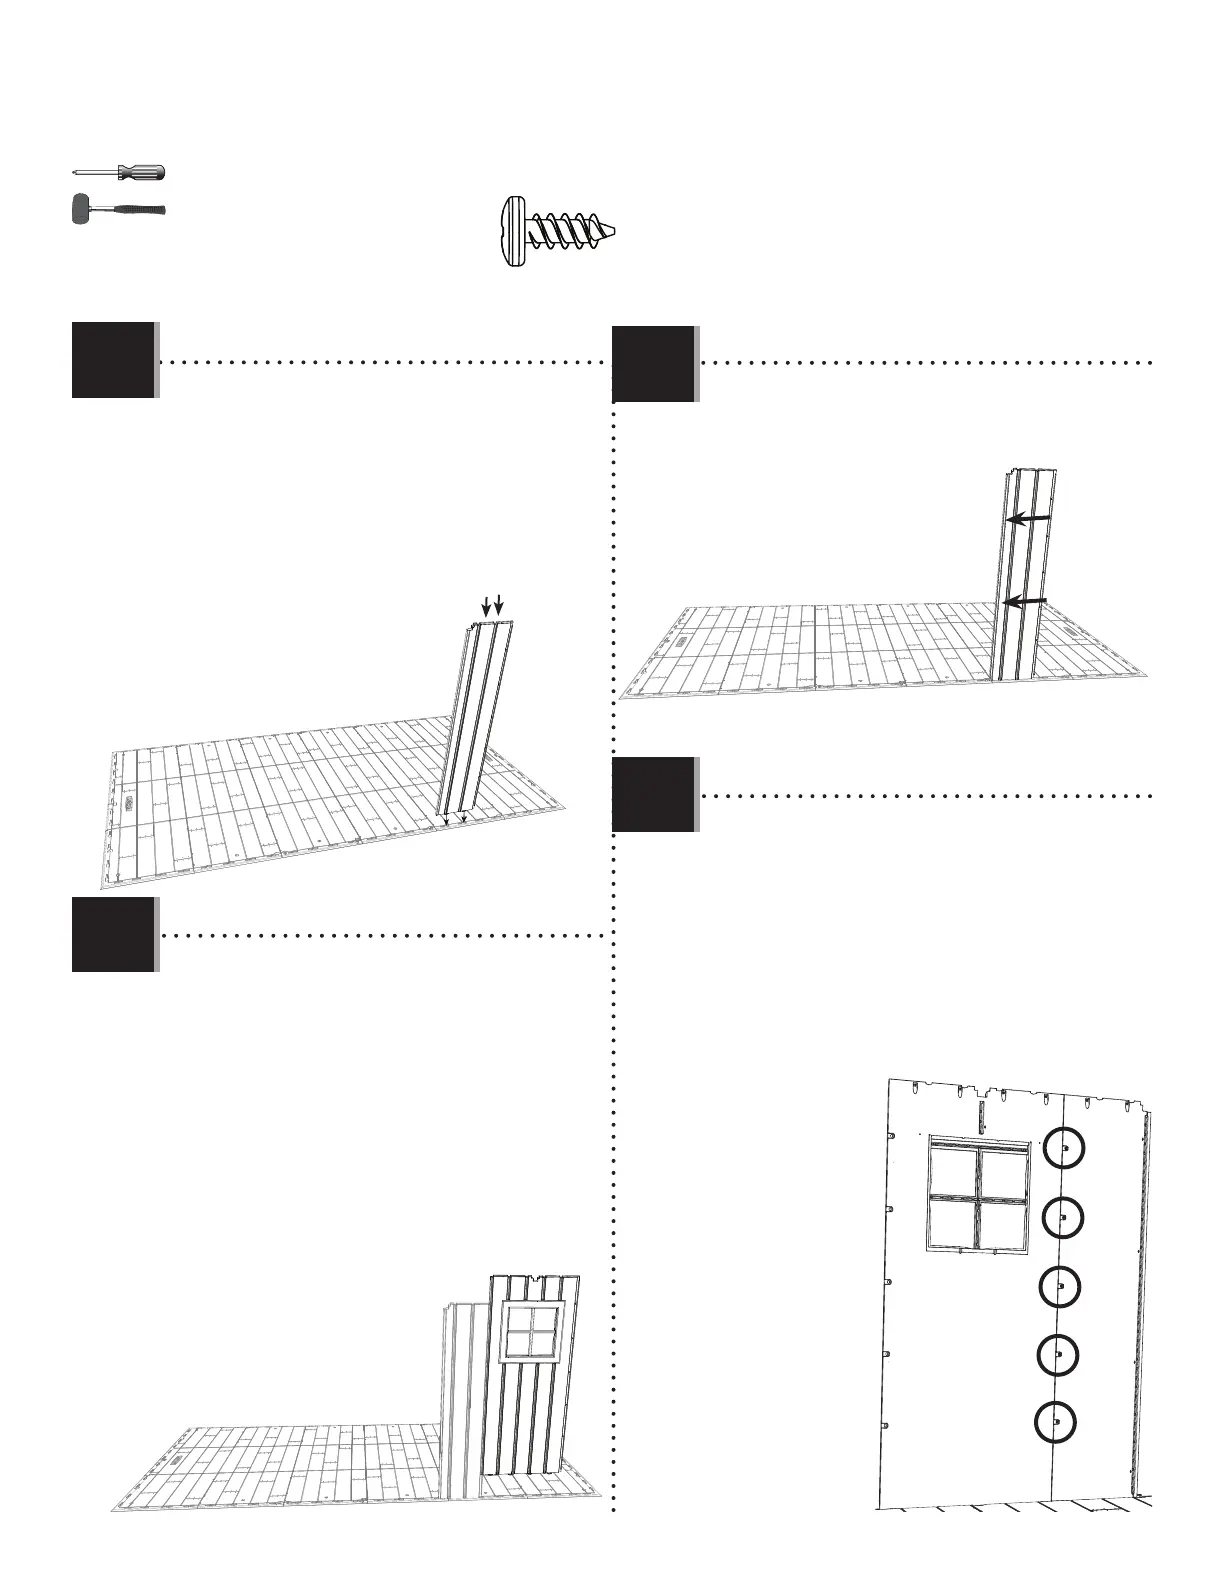
AHH
• Insert the four tabs at the bottom of the window
wall panel (AHH) into the 3rd–6th slots from the right
along the front edge of the fl oor. Slide the panel up
against the narrow wall panel.
• Insérez les quatre languettes au bord inférieur
du panneau mural étroit (CKK) dans les 3e – 6e rainures
du coin droit le long du bord avant du plancher.
Glissez le panneau contre le panneau mural étroit.
• Introduzca las cuatro lengüetas al borde inferior
del panel mural para la venanta (CKK) en las 3ª–
6ª ranuras de la esquina derecha a
lo largo del borde delantero del piso.
Deslice el Panel contra el panel mural angosto.
• Slide the panel to the left.
• Glissez le panneau à gauche.
• Deslice el panel a la izquierda.
7.8
7.7
7.9
7.6
CKN
• Insert the two tabs at the bottom of the narrow
wall panel (CKN) into the 7th and 8th slots from the
right along the front edge of the Floor.
• Insérez les deux languettes au bord inférieur du
panneau mural étroit (CKN) dans les 7e et 8e rainures
du coin droit le long du bord avant du plancher.
• Introduzca las dos lengüetas al borde inferior
del panel mural angosto (CKN) en las 7ª y 8ª ranuras
de la esquina derecha a lo largo del borde
delantero del piso.
• Secure the two panels together using fi ve (5) screws
(ADZ). Do not overtighten the screws. The attachment points may have
a thin membrane that the screws will puncture.
• Attachez bien les deux panneaux l’un à l’autre à
l’aide de cinq (5) vis (ADZ). Ne serrez pas excessivement les
vis. Les points de fi xation peuvent avoir une fi ne membrane que les vis
perceront.
• Sujete los dos paneles el uno al otro usando cinco
(5) tornillos (ADZ). No apriete demasiado los tornillos. Los puntos
de fi jación pueden tener una membrana delgada que los tornillos
perforarán.
ADZ (x5)