48
TOOLS AND PARTS REQUIRED / OUTILS ET PIÈCES REQUIS / INSTRUMENTAL Y HERRAJE REQUERIDOS
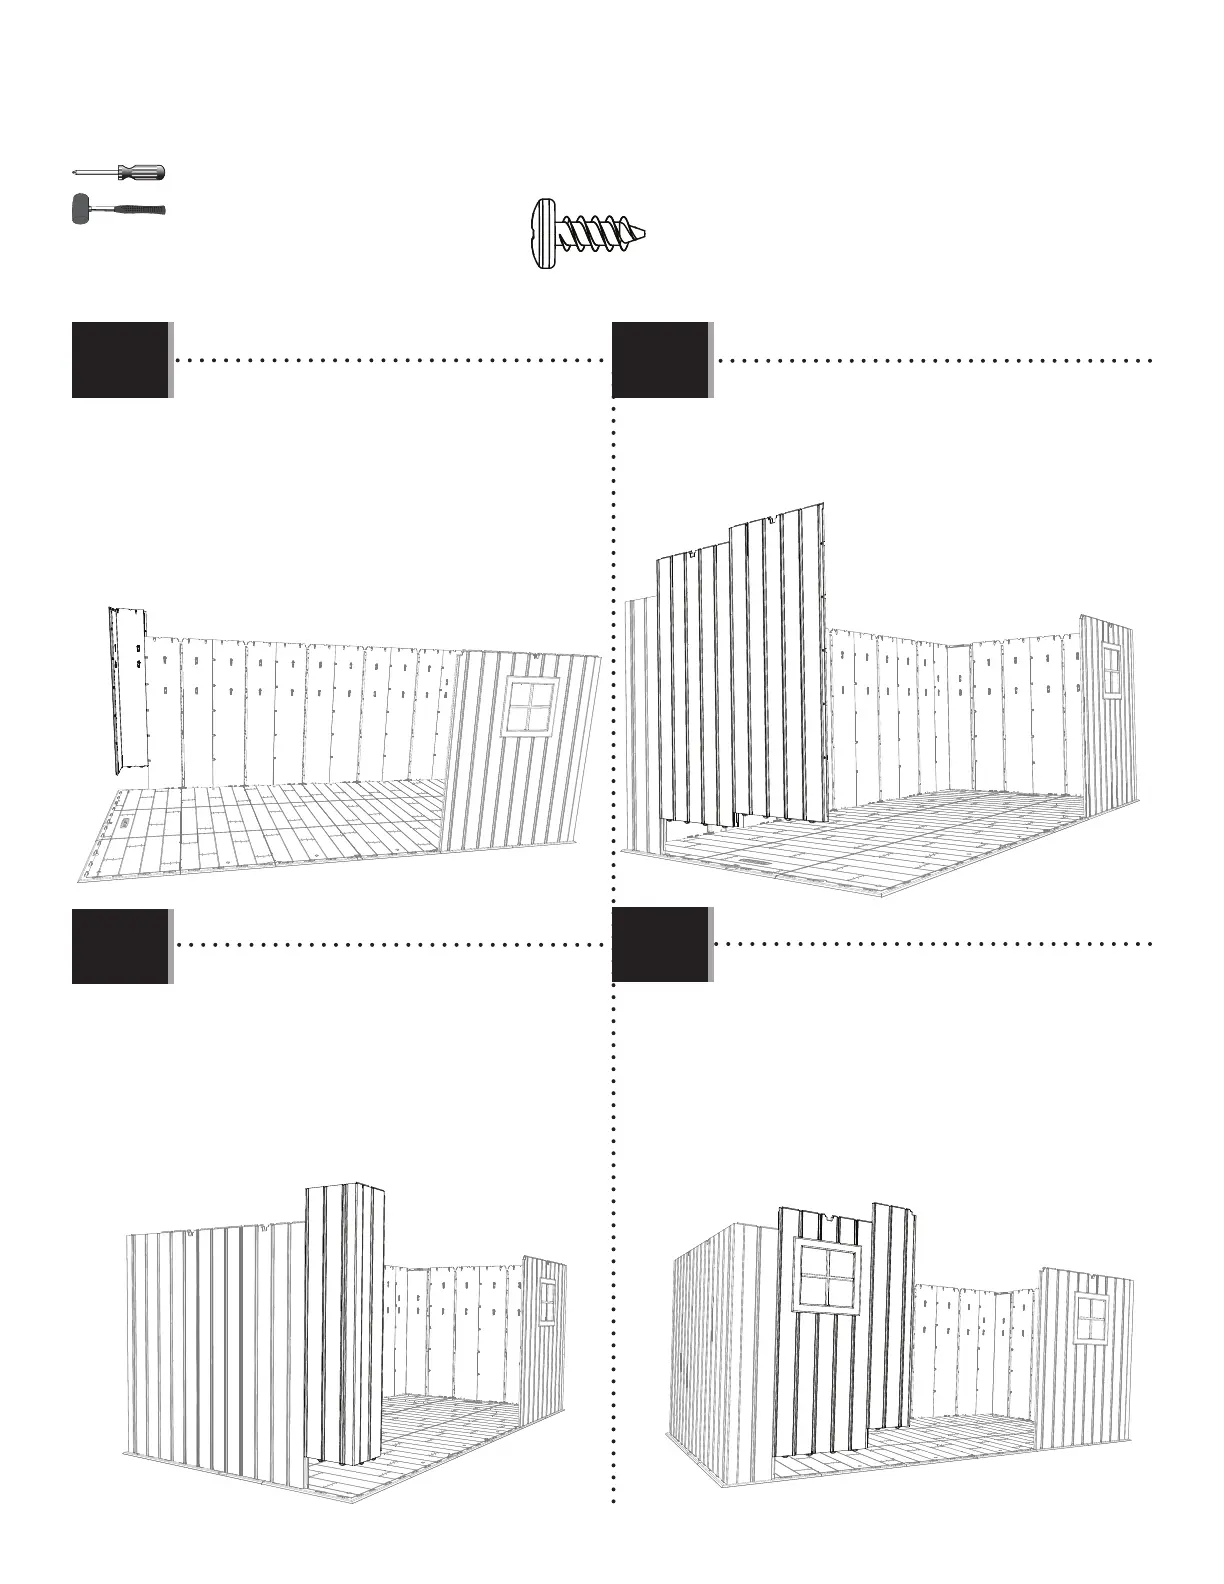
X SECTION 7 (CONTINUED) / SECTION 7 (SUITE) / SECCIÓN 7 (CONTINUACIÓN)
• Insert this corner wall panel (AGL) in the same way as
the fi rst one. Secure with fi ve (5) screws (ADZ).
• Insérez le panneau angulaire (AGL) de la même
manière que le premier panneau angulaire.
Attachez-le à l’aide de cinq (5) vis (ADZ).
• Inserte este Panel angular (AGL) de la misma manera
que el primer Panel angular. Sujételo con cinco
(5) tornillos (ADZ).
• Insert this corner wall panel (AGW) in the same way as
the fi rst one. Secure with fi ve (5) screws (ADZ).
• Insérez le panneau angulaire (AGW) de la même manière
que le premier panneau angulaire. Attachez-le à
l’aide de cinq (5) vis (ADZ).
• Inserte este panel angular (AGW) de la misma manera
que el primer panel angular. Sujételo con cinco
(5) tornillos (ADZ).
ADZ (x30)
AGW
AGL
7.16
7.18
7.17
7.19
AHD
AHD
AHH
CKK
• Insert the next two panels (AHH, and CKK) in the order
shown. Secure with fi ve (5) screws (ADZ) each.
• Insérez les deux panneaux (AHH, et CKK) dans l’ordre
illustré. Attachez-les à de cinq (5) vis (ADZ) chaque
un.
• Inserte los dos paneles (AHH, y CKK) en el orden
ilustrado. Sujetelos con cinco (5) tornillos (ADZ)
cada uno.
• Attach the left wall panels as you did the right.
• Attachez les panneaux muraux gauches comme
vous avez faites les droits.
• Sujete los paneles murales izquierdos como hizo
los derechos.