68
TOOLS AND PARTS REQUIRED / OUTILS ET PIÈCES REQUIS / INSTRUMENTAL Y HERRAJE REQUERIDOS
X SECTION 9 (CONTINUED) / SECTION 9 (SUITE) / SECCIÓN 9 (CONTINUACIÓN)
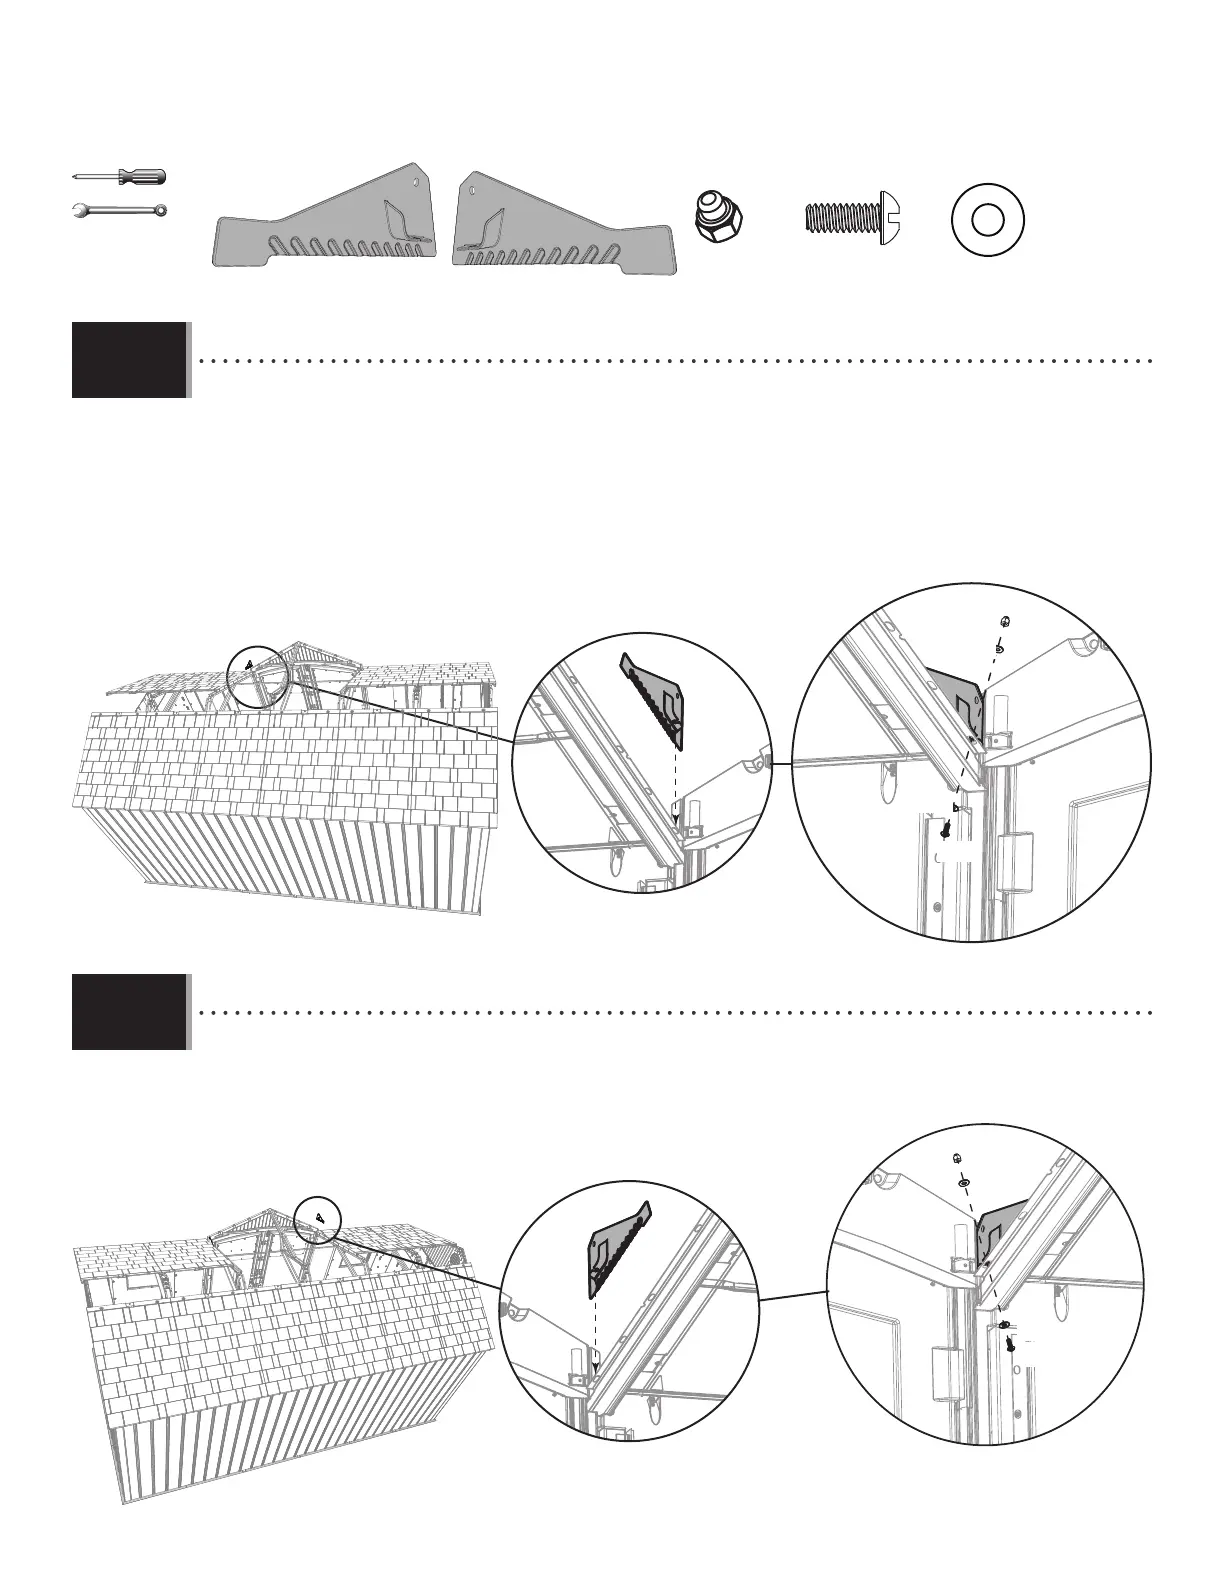
• Insert the right drainage plate (ECS) into the right lateral truss, and align the notch in the plate with the fi rst hole in the
truss as shown. Secure with the hardware provided. Only tighten by hand for now.
• Insérez la plaque de drainage droite (ECS) dans la ferme latérale droite, et alignez l’encoche dans la plaque avec la
premier trous dans la ferme comme illustré. Attachez-la bien à la ferme à l’aide de la quincaillerie incluse. Ne
serrez qu’à la main en ce moment.
• Inserte la placa derecha para el drenaje (ECS) dentro de la cercha lateral derecho, y alinee la muesca en la placa con el
primer agujero en la cercha. Sujétela a la cercha usando los elementos incluidos. Apriete sólo a mano en este momento.
9.19
9.20
ECS (x1)
ECS
AEE
AEE
ADK (x2)
BZA (x2)
AEE (x4)
BZA
3/8 in/po
(≈10 mm)
ECR (x1)
• Repeat the last step for the left drainage plate (ECR).
• Répétez l’étape précédente pour la plaque de drainage gauche (ECR).
• Repita el paso anterior para la placa izquierda para el drenaje (ECR).
ECR
ADK
AEE
AEE
BZA
ADK
 Loading...