EasyManua.ls Logo

Lifetime CRANK ADJUST User Manual

Lifetime CRANK ADJUST
40 pages
To Next Page IconTo Next Page
Page #1 background imageLoading...
Page #1 background image
Lifetime’s assembly experts offer quick responses and great customer service.
CRANK ADJUST
®
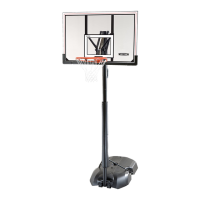
BASKETBALL SYSTEM
Icon Legend................................2
Notices....................................3
Initial Setup...............................4
Pole Assembly.............................7
Extension Arm Assembly............10
Handle Assembly......................14
Backboard to Rim Assembly........17
Parts Identifi er..........................i-iv
Backboard to Pole Assembly.......24
Final Assembly..........................27
Maintenance Instructions..........32
Registration........................33
Warning Sticker........................34
Warranty................................35
Call: 1-800-225-3865
7:00 am–5:00 pm (Monday–Friday) MST
and 9:00 am–1:00 pm Saturday MST
Web: www.lifetime.com/instructions
Live Chat: www.lifetime.com/instructions
NEED HELP? TALK TO US!
MODEL# AND PRODUCT ID (you will need both when contacting us)
Model Number: Product ID:
Lifetime
®
basketball systems are designed to be
strong and durable. We strive to make assembly as
easy as possible without compromising quality. If
you get stuck, we have tools to help:
t Watch Our Instructional Videos
Scan the code below to see how it all comes
together.
http://go.lifetime.com/90568playlist
t Prepare the Area
Before you start, you will need at least eight 80-lb.
bags of concrete mix. Before digging, call to locate
any buried utility lines.
t Recruit Friends and Family
Assembly should take 3 people about 2–3
hours to complete.
TABLE OF CONTENTS
90568
TOOLS REQUIRED
3/4" (x2)
5/16"
(x1, included)
Rubber Mallet
Electric Drill
Carpenter’s Level Shovel
(80 lb bag x 8)
Cement
Tape Measure
1/2" (x2)
3/8"
(x1, included)
9/16" (x2)
COPY
Question and Answer IconNeed help?

Do you have a question about the Lifetime CRANK ADJUST and is the answer not in the manual?

Lifetime CRANK ADJUST Specifications

General IconGeneral
BrandLifetime
ModelCRANK ADJUST
CategorySports & Outdoors
LanguageEnglish

Summary

Warnings and Notices

Initial Setup

Digging the Foundation Hole

Dig a 30-inch deep, 21-inch square hole for the pole base, ensuring proper depth and shape.

Template and J-Bolt Assembly

Assemble the template with J-Bolts, ensuring curved ends point outward for proper installation.

Pouring Concrete and Rebar

Mix and pour concrete into the hole, placing rebar and finishing the surface for water runoff.

Centering Template and Finishing Concrete

Center the template, push J-Bolts into cement, and ensure the concrete slopes for drainage.

Pole Assembly

Extension Arm Assembly

Handle Assembly

Backboard to Rim Assembly

Backboard and Rim Housing Setup

Lay the backboard flat, add the Rim Impact Spacer and Rim Housings, finger-tightening hardware.

Securing Rim Adapter Plate

Secure the Rim Adapter Plate to the backboard using the specified hardware, finger-tightening only.

Attaching Rim to Housing

Slide the Rim Pin into the Rim and attach the Rim to the Rim Housing with hardware, finger-tightening.

Backboard to Pole Assembly

Final Assembly

Positioning and Lifting the Pole

Position the pole, align slots with J-bolts, and lift with at least three adults, following strict safety warnings.

Leveling Pole Plate with Hex Nuts

Adjust Hex Nuts with three adults to ensure the pole plate is level and the backboard hangs plumb.
Warning Sticker and Safety

Related product manuals