7
TOOLS AND HARDWARE REQUIRED / OUTILS ET QUINCAILLERIE REQUIS / INSTRUMENTAL Y HERRAJE REQUERIDOS
SECTION 1 (CONTINUED) / SECTION 1 (SUITE) / SECCIÓN 1 (CONTINUACIÓN) SECTION 1 (CONTINUED) / SECTION 1 (SUITE) / SECCIÓN 1 (CONTINUACIÓN)
ADS (x1)
CIH
(x1)
ALH
ALH
CIH
ADS
ALF
ALF
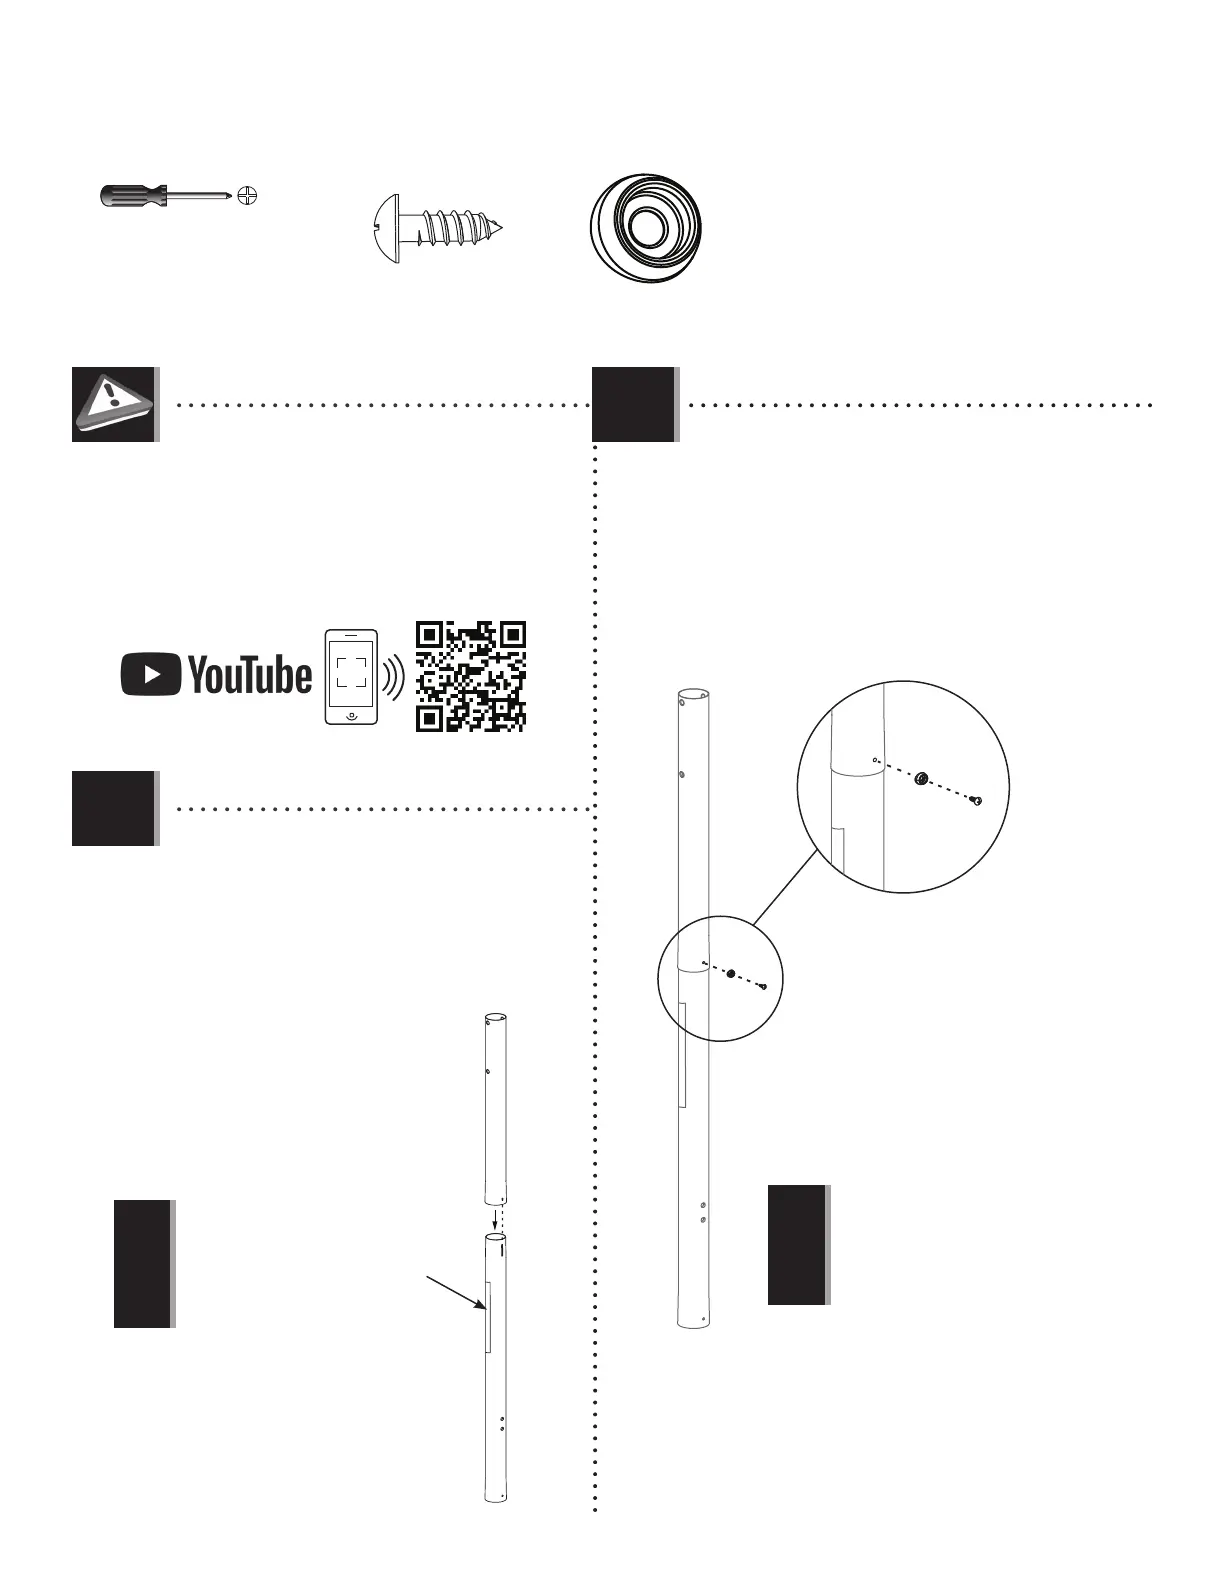
• In case of any trouble with this section, scan the
QR code below to view a video on its assembly.
• En cas de problème avec cette section, scannez
le QR code en dessous pour voir une vidéo de
l’assemblage.
• En caso de problemas con esta sección,
escanee el código QR debajo para ver un video
del ensamblaje.
• Align the hole in the bottom of the top pole (ALH)
with the slot in the top of the middle pole (ALF).
• Alignez le trou dans la partie inférieure du
poteau supérieur (ALH) avec la fente dans la partie
supérieure du poteau du milieu (ALF).
• Alinee el agujero en la parte inferior del poste
superior (ALH) con la ranura en la parte superior
del poste intermedio (ALF).
1.1
• Secure the top pole to the middle pole with the
hardware shown.
• Attachez bien le poteau supérieur au poteau du
milieu à l’aide de quincaillerie indiquée.
• Sujete el post superior al poste intermedio usando
el herraje indicado.
1.2
!
!
• The middle pole is the pole with
the warning sticker.
• Le poteau du milieu est le poteau
avec l’autocollant d’avertissement.
• El poste intermedio es el poste con
el auto-adhesivo de advertencia.
• The screw should be fl ush with the pole, but
will spin freely once inserted.
• La vis sera au ras du poteau, mais elle
tournera librement une fois insérée.
• El tornillo estará a ras del poste, mas girará
libremente un vez insertado.
http://go.Lifetime.com/quickadjust-section1