21
X SECTION 4 (CONTINUED) / SECTION 4 (SUITE) / SECCIÓN 4 (CONTINUACIÓN)
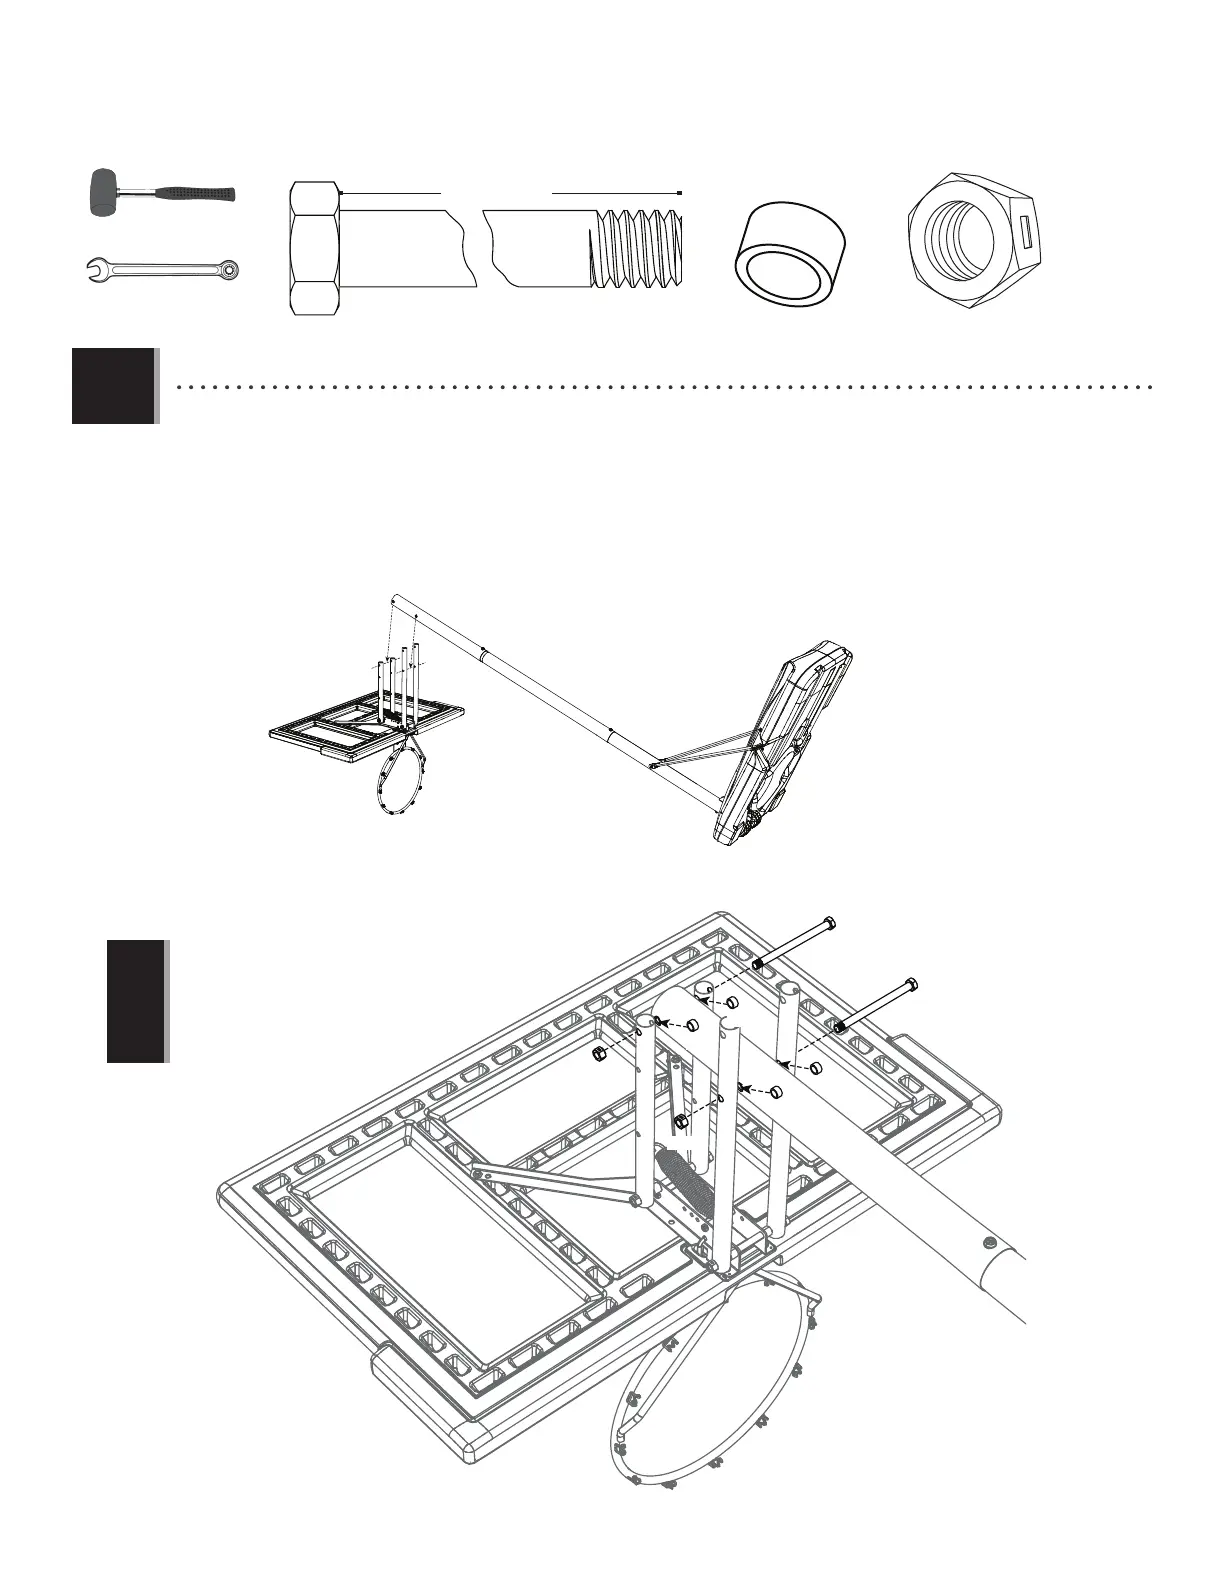
TOOLS AND HARDWARE REQUIRED / OUTILS ET QUINCAILLERIE REQUIS / HERRAMIENTAS Y HERRAJE REQUERIDOS
6 5/8” (16.8 cm)
4.3
AAX (x2)
ADG (x2)
ABP (x4)
AAX
AAX
ABP
ABP
ABP
ABP
ADG
ADG
• Lay the backboard and rim assembly on the ground next to the pole assembly. Rest the rim on cardboard
to prevent scratching. Then, secure the short and long extension arms (AKC & AKB) to the pole assembly with the
hardware shown.
• Mettez l’assemblage du panneau y de l’anneau sur la terre près de l’assemblage du poteau. Posez l’anneau sur
un bout de carton pour éviter griffer la surface. Ensuite, attachez bien les bras de rallonge courts et longs (AKC & AKB)
à l’assemblage du poteau à l’aide de la quincaillerie indiquée.
• Meta el ensamble del tablero y aro en el suelo. Meta el aro en un pedazo de cartón para evitar raspar la superfi cie.
Entonces, sujete los brazos de extensión cortos y largos (AKC y AKB) al ensamble del poste usando el herraje indicado.
3/4” (≈19 mm) (x2)
(x1)
• Tighten the centerlock nut (AAX) until it is fl ush
with the end of the bolt.
• Serrez l’écrou de blocage central (AAX) jusqu’à
ce qu’il soit au ras de l’extrémité du boulon.
• Apriete la tuerca de bloqueo central (AAX)
hasta que esté a ras del extremo del perno.
!