SOLA
™
OWNER’S MANUAL
Light & Motion
711 Neeson Road,
Marina, CA 93933 USA
lightandmotion.com
1. Visually locate the locking detent on
LED Head Module. (Detail A)
2. Angle the Dome Port to slide the
Dome Port Arm underneath the lock-
ing detent. (Detail A)
3. Turn the Dome Port clock-wise into
the locked location before using your
light. (Detail B)
SLIDE SWITCH
The Slide Switch activates the light, and controls brightness. It can
also be locked into place to by centering the slider and rotating the
switch 90 degrees in either direction.
POWER KNOB
The Power Knob electrically disconnects the Li-Ion battery. To
connect the battery, turn the knob ON. The light will be ready
for use but the LED will remain off.
OPERATION
sos
4.
5.
6.
1. Power ON/ 0FF Knob
2. Toggle Slide Switch
3. Switch Forward Increase output
4. Switch Back Decrease output
5. Off: Hold either direction 2 seconds.
6. SOS Mode:
With light off, hold switch in “back (4)” position for 4
seconds to engage SOS mode.To exit SOS mode, hold
switch in either direction for 2 seconds to turn off, or press
the switch forward and release it to turn light on in
normal mode.
OFF
ON
2.
3.
1.
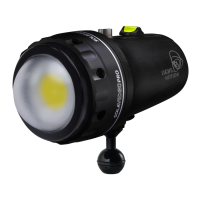
SOLA EXPLODED VIEW
1. Bezel
2. LED Head Module
3. Power Knob
4. Slide Switch
5. Charge Pins
6. Display
7. Mount Plate
8. D-Ring
9. 1”Photoball
1.
2.
3.
4.
5.
6.
9.
7.
8.
To charge: Turn the Power Knob to “ON”. Connect the charger to the
charge pins on the back and plug the AC adaptor into an outlet. The
display will come on to confirm the light is charging.
CHARGING THE SOLA
• Align guide pin to connect charger.
• Make sure to fully charge it before use.
CONNECTING THE LED HEAD MODULE
Disconnecting the LED Head Module from the Body Module:
Unscrew the bezel from the body module and remove the LED head module. Install
connector cap on the LED head module to protect the o-ring from debris. Install
connector cap to body connector to prevent damage to electrical contacts. Thread
bezel back onto the body assembly. The LED head module and Body assemblies
can be packed separately for travel. To re-install the LED head module, do the
above procedure in reverse order.
The Dome Port sealing edge must be kept clean and protected from any dam-
age. Make sure O-ring is lubricated – re-grease with standard silicone lubricant if
necessary.
Thermal Sensor is
not Detect
Return unit to Light and
Motion for servicing.
Overheating
Icon
Wait to charge until
symbol disappears
LED is not detected
Overheating icon
External Power Detected
Battery Status
Light Operating With
External Power
Lumen/Percentage Output
12000/15000
POWER
LUMENS
MIN
90
LED
15000
* Contact Light and Motion for additional O-ring replacement or information.
* If Dome Port is removed, do not compromise the sealing surface. Do not place Dome
Port on rough surface.
A.
UNLOCK
LOCKED
B.
[
OLED DISPLAY
OFF
ON
DOME PORT ASSEMBLY DIRECTIONS: