Step 6. Remove the assembled diving board.
Step 7.
Position the mount plates in the traced footprint ensuring the threaded
mount plate hole is centered in the traced hole.
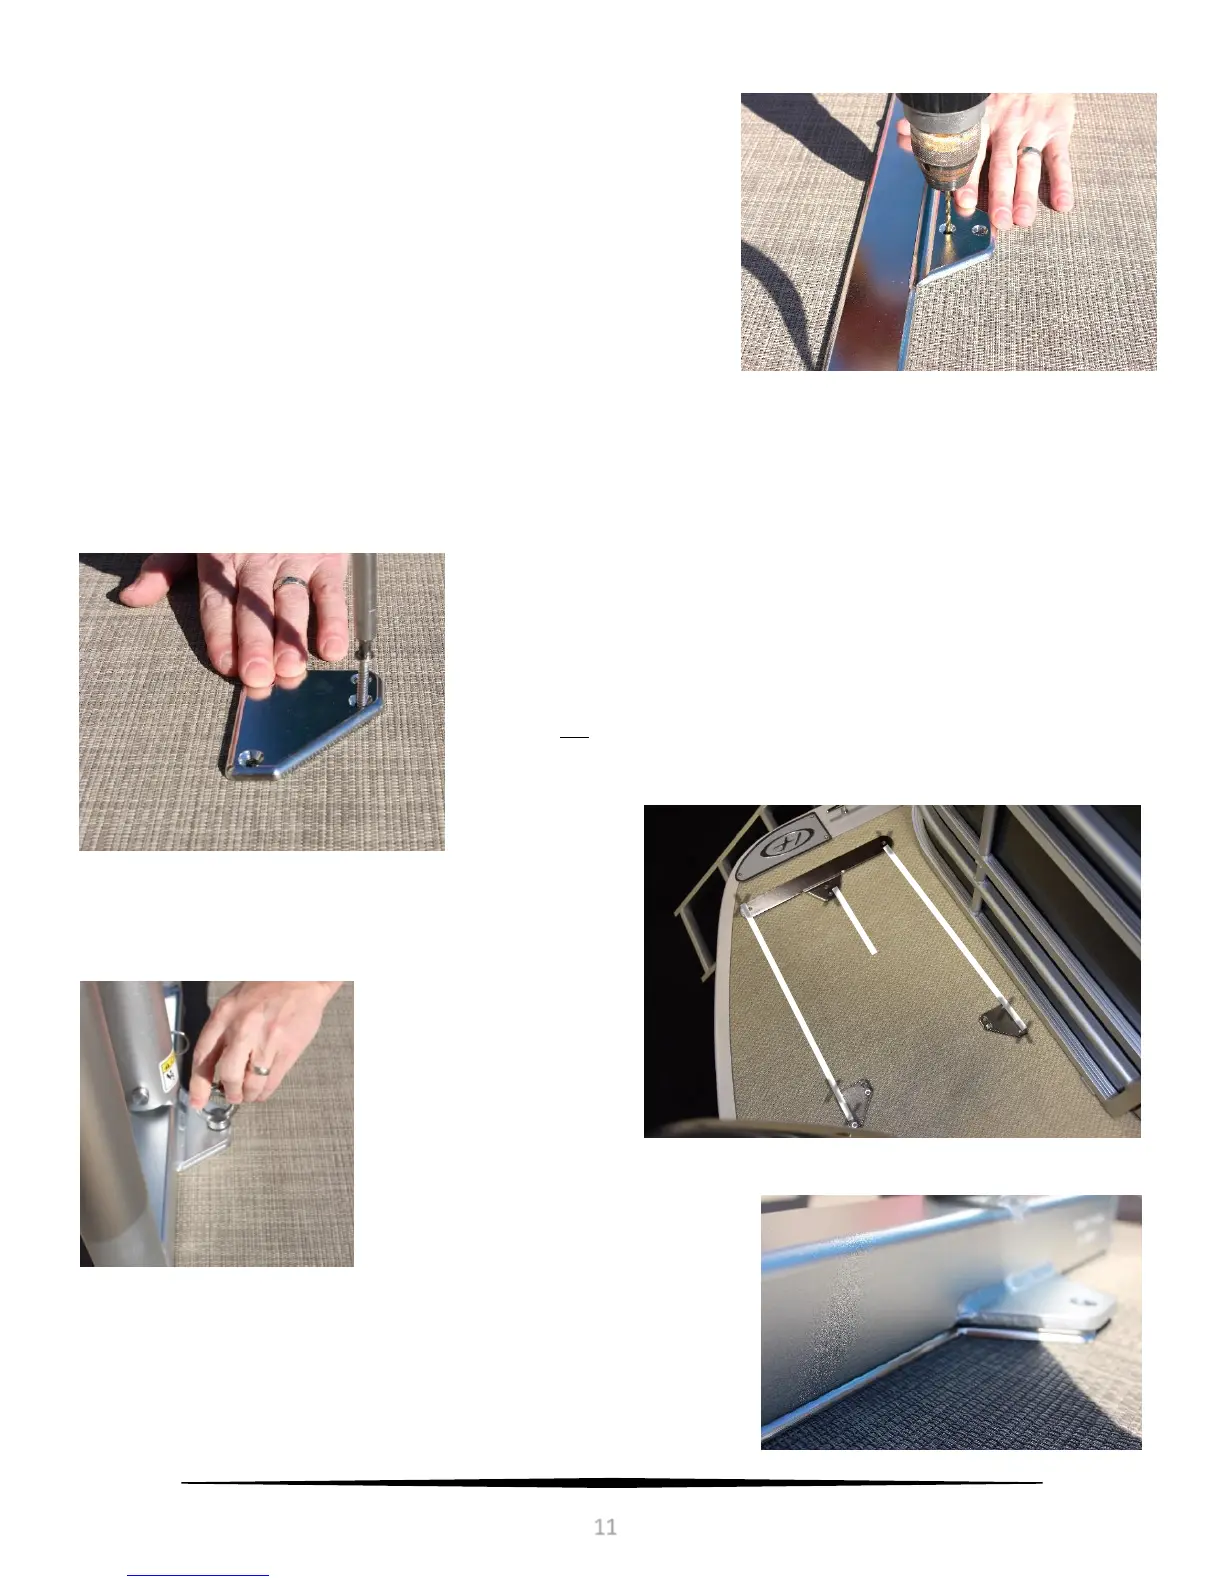
Step 8.
Drill a 5/32” hole for fiberglass, 9/64” hole for plywood flooring, closest to
the threaded mount hole on each of the three plates. Be sure to drill the full
depth of the screws. When drilling through an aluminum deck or
aluminum cross member under plywood flooring, use 11/64” drill bit.
Step 9.
(Fiberglass Only) As an added barrier and to adhere the plates to the deck,
apply a quality marine grade adhesive to adhere the mount plates to the deck prior to securing with mounting screws.
Step 10.
Once the plates are positioned, secure the mount plates beginning with the
drilled hole using the #12 stainless steel mounting screws. Use a #3 screw driver
and take care to not over torque the screw. When screwing #12 screws into
aluminum, place a small dab of grease to the screw tip to aid in cutting threads
into aluminum. (Plywood Only) If the center mount screw of the main frame
plate does not contact an aluminum deck or frame member, install the
supplied 6 mm machine screw, washer, and nylock nut.
Step 11.
Pilot drill and install the remaining 2 screws in each plate using
the same drill specifications as Step 7.
Step 12.
Install your assembled diving
board using the eye bolts to
secure the frame and
ladder to the mount plates.
Step 13.
Remove any gaps between the mount plates and assembly by torqueing on
the eyebolts with a screw driver to fully seat them. (After initial assembly,
eyebolts can be installed hand tight as instructed in the daily assembly
procedure.)
Complete installation using Daily Assembly Procedures. Note step 6.