DAILY ASSEMBLY PROCEDURES
STEP 1.
Position the frame over the frame mounting hole
and secure it to the plate below using an eye bolt.
STEP 2.
Slide the ladder into the slots in
the frame and secure with
the 3/8” quick release pins
STEP 3.
Align the mounting holes of the ladder over the ladder mounting holes and
secure the ladder to the plates using eye bolts.
STEP 4.
Tighten each eyebolt to secure the frame and ladder. Begin by hand-tightening and secure by using a button-lock pin as
leverage – do not over torque.
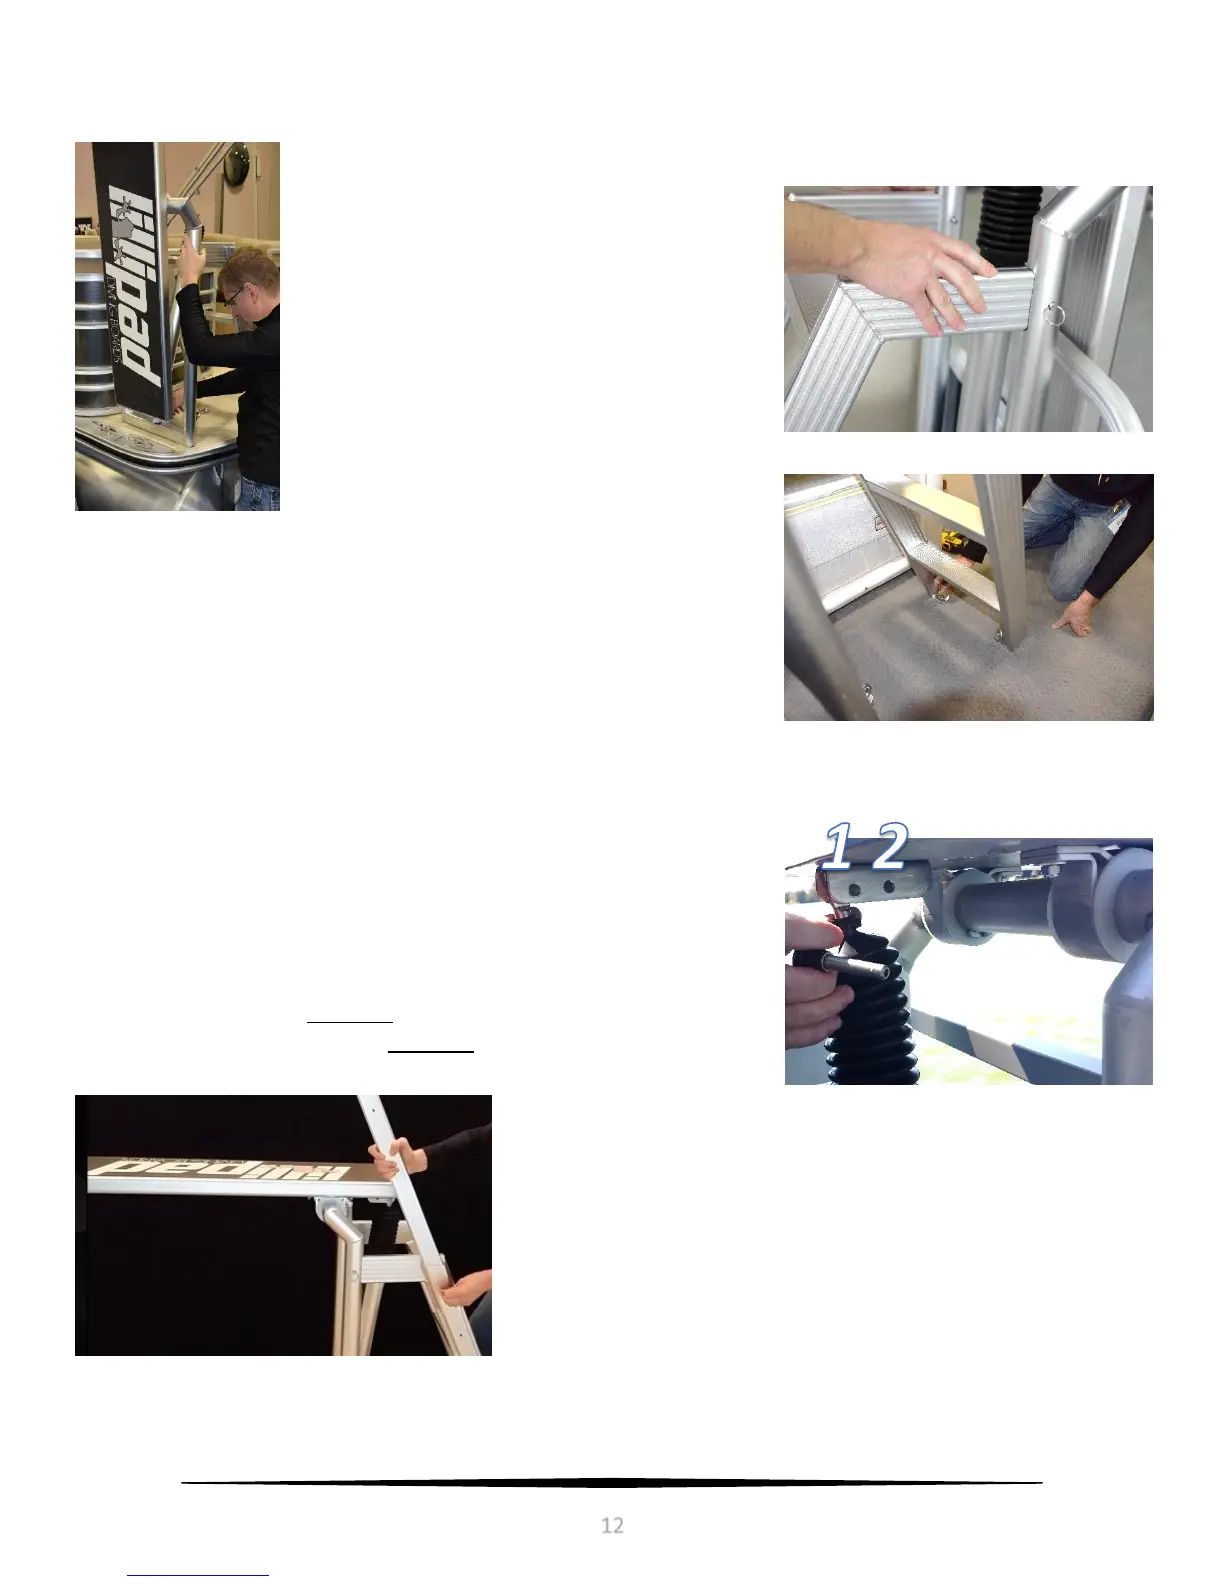
STEP 5.
Raise the diving platform into position and install the button head
locking pin in the upper mount and shock eye.
Position 1 is designed for user weighing 100 – 250 lbs.
Position 2 is designed for user under 100 lbs.
STEP 6.
Insert the stabilizer bar and position it to the height desired. Lock it in
place by inserting the locking pin.
NOTE: UHMW inserts are positioned on the inside of the stabilizer
housing. During initial installation insert the stabilizer rail and apply
pressure in each direction to seat the profile into the UHMW. The rail is
designed to fit tight but with proper seating will easily slide in and out.
STEP 7.
Double check all fasteners to make sure they are properly tightened and/or inserted.