Welcome:
I
NSTALLING
Y
OUR
N
EW
2.0 C
HIP
UP• 6
I
NSTALLING
Y
OUR
N
EW
2.0 C
HIP
Installing the upgrade chip is simple. You’ll need a longish Phillips screwdriver with a
smallish head.
Remember, installing the upgrade will clear your POD’s memory, so be
sure you’ve backed up any custom sounds you created as described in the
previous pages.
G
ETTING
U
NDER
T
HE
H
OOD
Step 1 -
Spread a towel on a table or work bench, and turn your POD upside down on
top of the towel. Point the pedal connector away from you; the guitar input and
headphone output jacks will be nearest you.
Step 2 -
You’ll see 4 round shafts in the bottom of the POD. Insert the screwdriver
into these and remove the four screws.
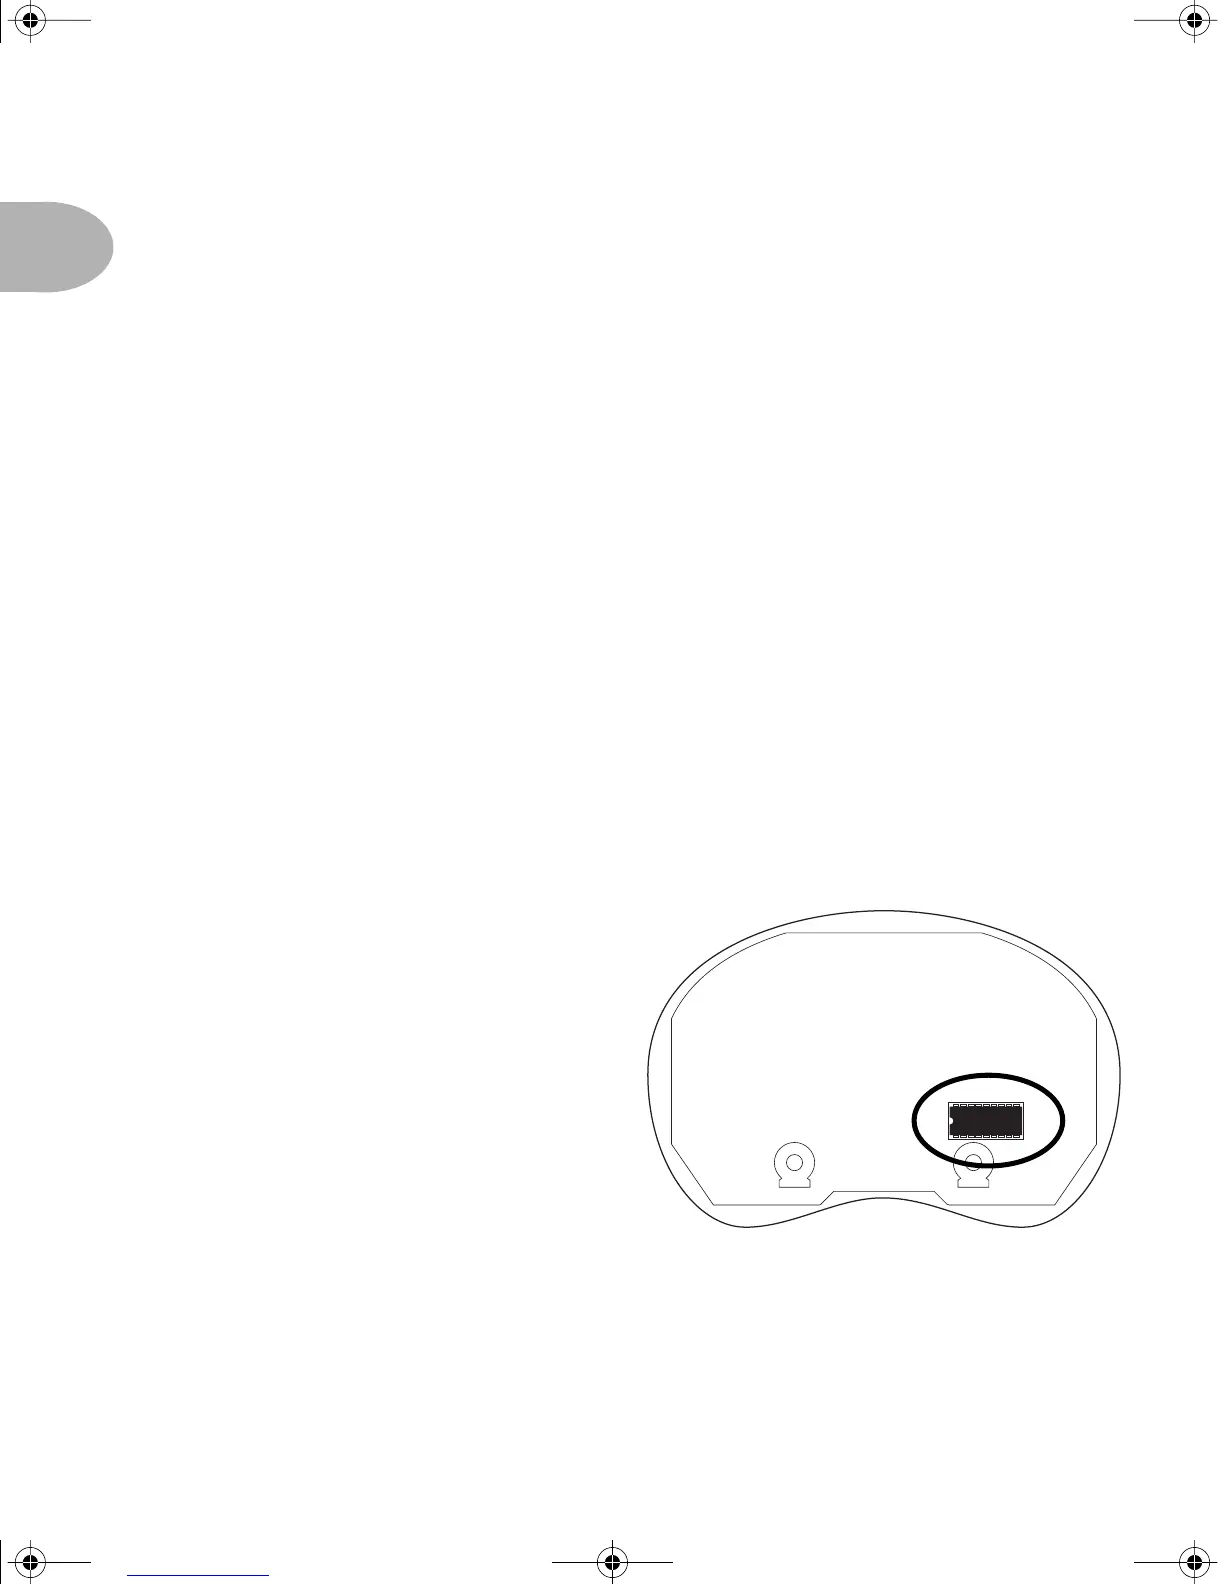
Step 3 -
With the screws removed, pull
the bottom off of your POD. You’re now
looking at its circuit board, and you’ll
see a socketed chip at the lower right
(circled in the illustration to the right).
Step 4 -
Use the included chip puller
to remove the socketed chip. Pull
straight up on the chip; you can rock it
slightly from side to side as you do to
loosen it.
Step 5 -
Now grab the upgrade chip.
Note that the chip has a little notch on one side. You want this notch to be pointing
to the left. The socket also has a little notch, and the idea is to have the socket’s notch
POD 2.0 Upgrade Guide Page 6 Wednesday, June 21, 2000 9:20 PM
 Loading...
